Creating a Review Plan
Veeva EDC enables you to create Review Plans that specify how data from certain Sites and Subjects should be verified. You can create and assign different variations of review plans to different sites based on factors such as site experience and acceptable data accuracy risk. With a Review Plan, you can configure your Study to only require SDV or DMR on the Items that need it. The flexibility and granularity offered by Veeva EDC’s Review Plans reduce time spent on monitoring and data management, and efficiently support data integrity.
Review Plans in Veeva EDC support flexible Targeted SDV and DMR, allowing for varying review requirements across Items at the Form level. You can also configure Targeted SDV or DMR for some Forms to be very granular, drilling down to a specific Item Group and Item combination. For example, in a Review Plan with a broader scope, you would only need to set the requirement mode at the Form level to apply the SDV or DMR requirement to all Items inside that Form. In a more granular Review Plan, you could select individual Item Groups and Items so that your SDV or DMR requirement only applies to certain components within a Form. You can also configure an Item for a certain requirement mode, regardless of the Item Group or Form to which the Item belongs.
Non-reviewable Items: Note that Derived and Label items can’t be reviewed and therefore can’t be selected in the Review Plan creator.
Prerequisites
Before you can determine SDV and DMR requiredness for Items and Event Dates, you must create all of your design definitions and build your study schedule.
Users with the standard CDMS Study Designer study role can perform the actions described below by default. If your organization uses user-defined Study Roles, your role must grant the following permissions:
| Type | Permission Label | Controls |
|---|---|---|
| Standard Tab | Studio Tab | Ability to access the Studio tab |
If your Study contains restricted data, you must have the Restricted Data Access permission to view it.
Learn more about Study Roles.
Item Requirement Modes
For each Item in a Review Plan, there are three (3) Requirement Modes available: Required, meaning that users must complete SDV or DMR for the item, No Review, and Optional. When SDV or DMR for an Item is No Review, Veeva EDC does not display a checkbox for that Item.
By default, when you create a Review Plan, Vault marks all Items that are not read only as Required. You can then edit your plan to mark certain Forms, Item Groups, or Items as No Review. Read only Items are automatically marked as No Review but can also be updated to a different requirement mode.
When enabled in your Study, review users can perform additive SDV or DMR on an ad hoc basis for Event Dates and Items that are set as No Review required. When SDV and DMR are applied using Additive Review, the Additive Review information is available in reports and system-provided extracts.
Additive Review & Requirement Modes: Veeva recommends that you don’t use the Optional requirement mode if you plan to use Additive Review. Clinical team members can use Additive Review to review data where SDV or DMR isn’t required.
Additive Review
The Additive Review feature allows CRAs and data managers to perform SDV or DMR on Event Dates and Items that don’t require review on an as needed basis.
To enable the Additive Review feature for your Study:
- Navigate to Studio > Settings for your Study.
- Click Edit.
- Select Yes for Enable Additive Review.
- Click Save.
Note that Additive Review is user-specific, meaning that it will only apply to the user who enables it.
Navigating the Review Plan Editor
Veeva EDC Studio includes a Review Plan Editor in Studio > Review Plans. With the Review Plan Editor, you can quickly and easily assign Requirement Modes to all of your data collection Items.
To access the Review Plan Editor, navigate to Studio and click to open Review Plans.
The Review Plan Editor has a header, where you can configure the Review Plan, two tabs, for Forms and Schedule Overrides, respectively, and two main content areas in each tab for adding to the Review Plan, the Driving panel and the Form panel.

Forms Tab
The Forms tab contains an overview of all forms and their associated review plan assignment settings. From here, you can assign requirement modes to form Items.
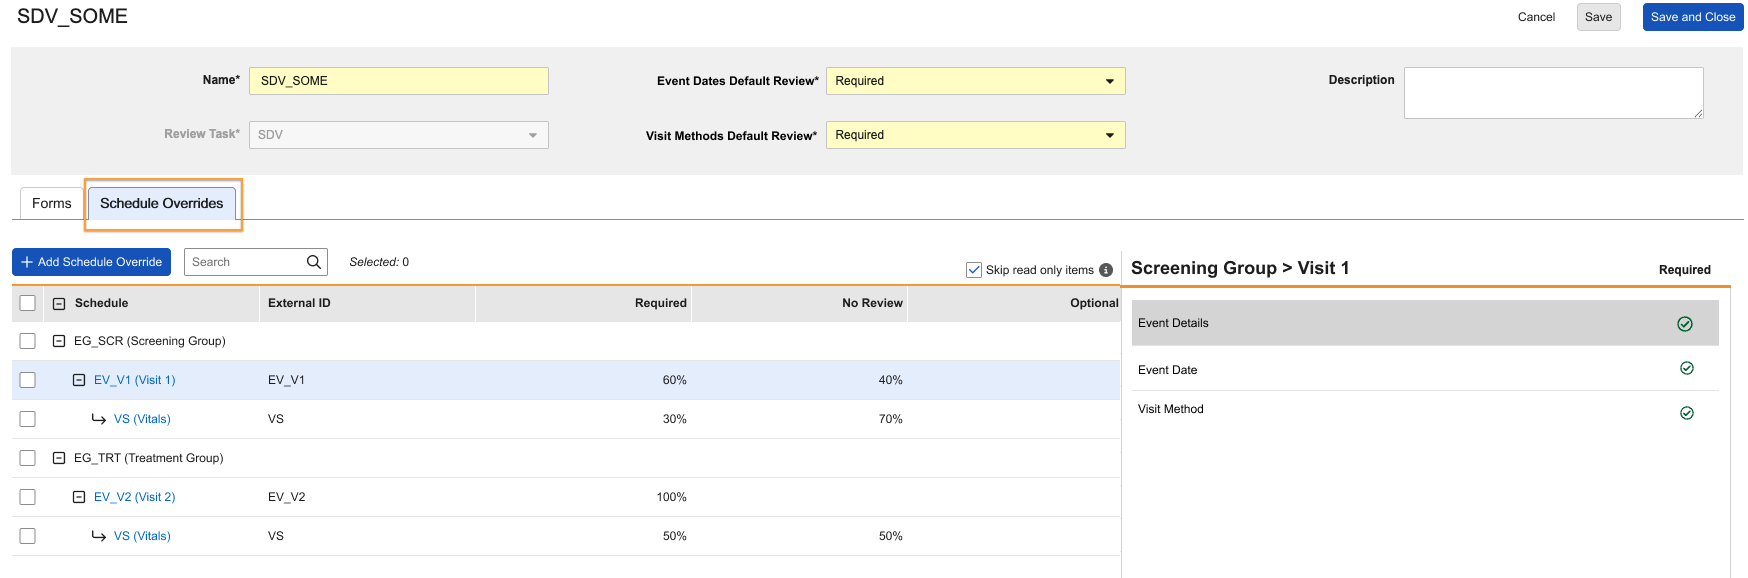
Schedule Overrides Tab
The Schedule Overrides tab allows you to set specific review requirements for specified events or forms within those events.
Driving Panel
The Driving panel is where you can navigate to various Forms in your study design to assign requirement modes to form Items. In the current release, the Driving panel only displays forms from the latest casebook version that are used in the study schedule (Vault does not display orphaned Forms).
You can search for Forms in the Driving panel. To search for a Form:
- Begin typing the form’s Name or External ID in the Search box. Vault searches your study’s forms as you type.
- Locate your Form in the search results.
- Optional: Click Clear (X) to clear your search query.
- Click the Form to open it in the Form panel.
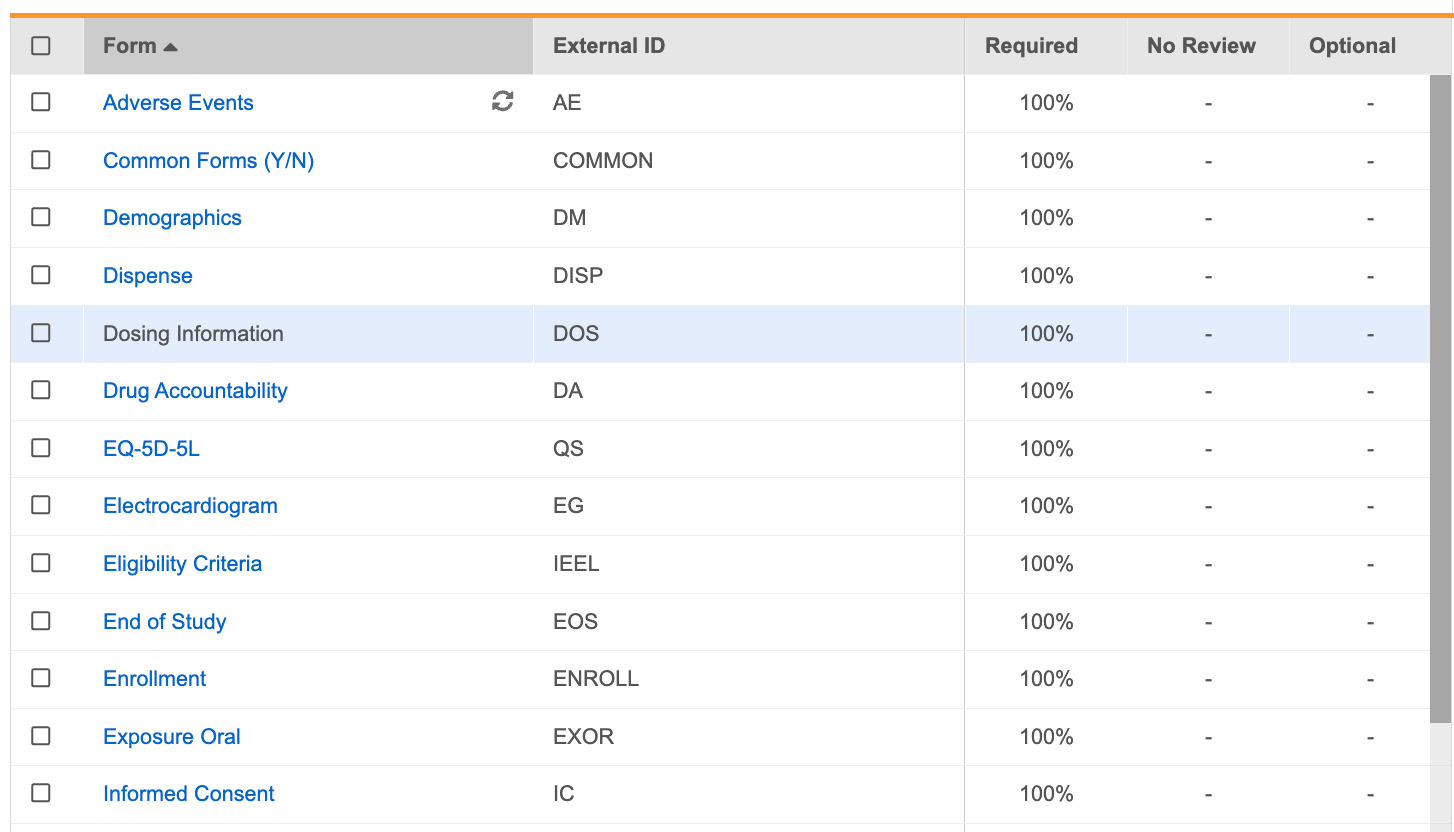
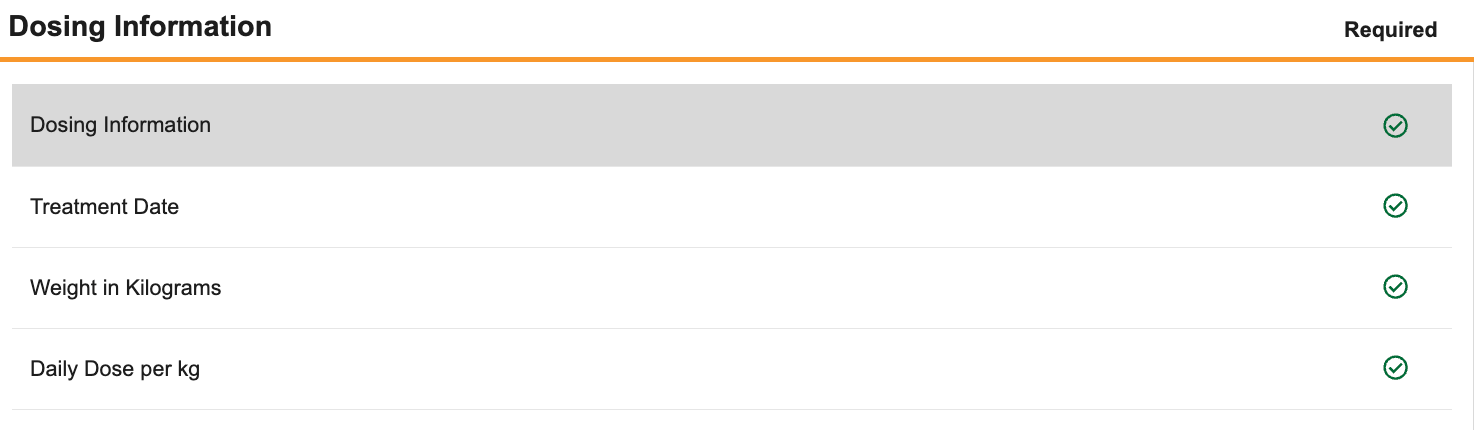
Form Panel
In the Form panel, you’ll identify required Items for review. The Form panel displays all Items in a form, grouped by Item Group. By default, all Items on the Form are marked as Required in the Required column. In the Required column, you can click to change that item or item group’s Requirement Mode to No Review or Optional.
Creating a Review Plan
Your Review Plan record represents your Targeted SDV or DMR plan for a Study Site. Review Plan Object Definition records represent individual SDV or DMR requirements. The Review Plan Object Definition record is a child of the Review Plan object. Note that you must have separate Review Plans for your SDV requirements and your DMR requirements.
To create a new Review Plan:
- Navigate to Studio > Review Plans.
- Click + New Review Plan.
- Enter a Name for your review plan.
- Select a Review Task:
- SDV: Select to create a targeted SDV plan
- DMR: Select to create a targeted DMR plan
- Choose Not Required for Event Date Review to exclude Event Dates from your plan. Vault sets this field to Required by default, indicating that your plan should enforce SDV or DMR as Required for Event Dates in your study. If Visit Method is configured, choose whether your plan should enforce SDV or DMR as Required for Visit Method in your study. This field is set to Required by default.
- Optional: Enter a Description with details about your review plan.
- Set the requirement mode for Items on all Forms requiring review. See details below.
- Click Save.
How to Add & Remove Items
To update an item’s Requirement Mode:
- In the Review Plan Editor, locate the Form in the Driving panel.
- Click the Form to open it in the Form panel.
-
To set the requirement mode for the entire Form, you can click Required, No Review, or Optional in the Set As dropdown menu.

-
In the Form panel, click Required for each Item you want to require review for. To mark Required items as No Review, click again. You can click Required on an Item Group header to indicate that all Items in that group should be Required, No Review, or Optional. Clicking the Required icon more than once cycles through the available statuses: Required > No Review > Optional > Required.

- Repeat steps 1-4 until you have finished adding and removing Items from your Review Plan.
- Click Save.
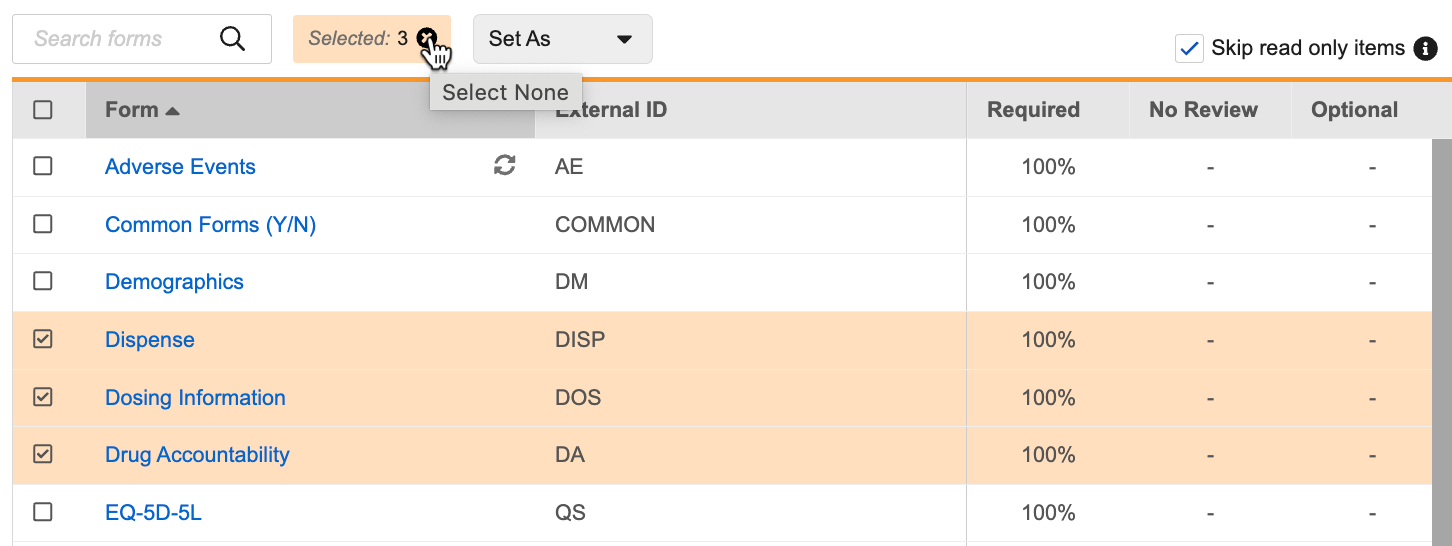
How to Bulk Add & Remove Forms
You can set Forms as Required, No Review, or Optional in bulk from the Driving panel:
- In the Driving panel, select the checkbox for each Form you want to set requirements for. Vault indicates the number of Forms selected in the Driving panel header.
-
In the Set As dropdown menu, click Required, No Review, or Optional to set the requirement mode for the selected Forms.

- Click Remove (x) in the Selected counter to deselect all Forms.
Schedule Overrides
The Schedule Override tab allows you to set specific review requirements for forms based on the Event in which they occur.
To create a schedule override:
- Navigate to the Schedule Override tab when viewing your review plan.
- Click + Add Schedule Override.
-
Select the event(s) or form(s) you’d like to specify review requirements for.
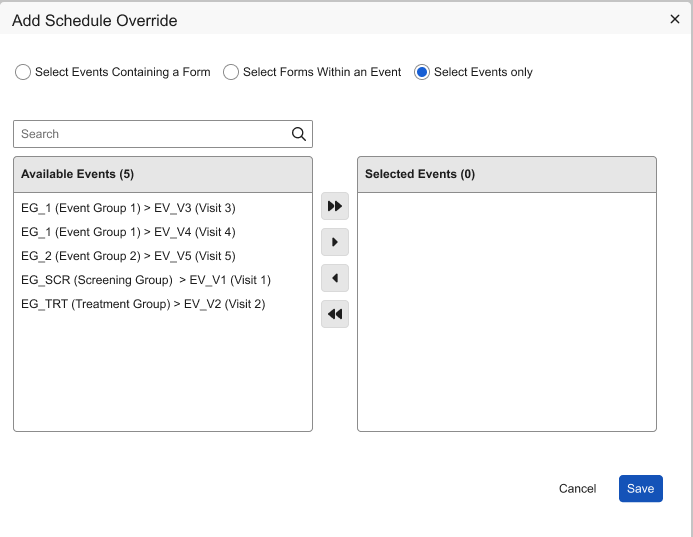
- Click Save.
- Select an Event or Form from the Schedule column. From here, you can set event-level and form-level review requirements as well as bulk manage multiple overrides and copy configurations to apply to another event or form instance.
- When you’re done configuring, click Save and Close. In the Forms tab of your review plan, an icon will display next to any form that has a schedule override.
Restricted Data
Certain forms may be restricted (blinded). Vault marks any restricted forms with the Restricted () icon.
You can still mark restricted Forms or their Items as required or optional, but only users with the Restricted Data Access permission will be able to perform SDV or DMR on those forms. By default, the CDMS Lead Data Manager role has permission to access restricted data.
How to Edit a Review Plan
You can edit your existing Review Plans using the Review Plan Editor.
To edit an existing Review Plan:
- Navigate to Studio > Review Plans.
- Click your Review Plan Name to open it in the Review Plan Editor.
- Make your changes.
- Click Save.
Review Plan Editable Properties
The following are editable properties in the Properties panel for Review Plans. You can also edit these properties from within the Review Plan Editor. See About the Properties Panel for more details.
| Property | Description |
|---|---|
| Name | The Name of the Review Plan object record |
| Review Task | The review task, either SDV or DMR, associated with the Review Plan |
| Event Dates Review | Indicates whether or not the Review Plan has review required for Event Dates, either Required or No Review |
| Description | A description of the Review Plan |
How to Delete a Review Plan
You can delete Review Plans from the Properties panel. Note that you can only delete a Review Plan that is not assigned to a Site.
To delete a Review Plan:
- Navigate to Studio > Review Plans.
- Click in the row for your Review Plan.
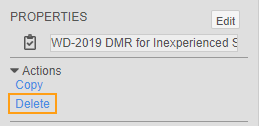
-
In the Properties panel, click Delete.
- In the Delete Review Plan confirmation dialog, click Continue.
How to Copy a Review Plan
You can copy Review Plans from the Properties panel.
To copy a Review Plan:
- Navigate to Studio > Review Plans.
- Click in the row for your Review Plan.
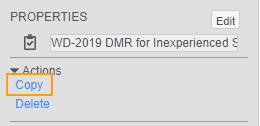
-
In the Properties panel, click Copy.
- Make any required changes.
- Click Save.
Site-Specific Review Plans
Instead of having a single Review Plan for DMR or SDV in your entire Study, you can choose to assign Review Plans on a site-by-site basis. When creating Review Plans for your Study, a study designer can select a Default Plan, an Override Plan, and Override Subjects to use as a “template” for assigning Review Plans to your sites. Vault applies those selections to each Site when they are created. If the EDC Tools Site Review Plan Assignment is enabled in your vault, lead data managers can change plans through EDC Tools that might have been assigned through a study template.
Example: Site Experience Level
For example, a Study may use one experienced site and then another site that is conducting its first ever clinical trial. For the experienced site, you can configure an SDV-type Review Plan with fewer Required items. Then you can configure a second Review Plan that requires SDV for all Items in the Study for the inexperienced site.
How to Assign Review Plans to Sites
Create multiple Review Plans for your Study in EDC Tools.
To assign a Review Plan to a Site:
- Navigate to Tools > EDC Tools > Review Plan Assignment Criteria.
- Click + New Assignment Criteria.
- Fill out any relevant and required fields. You can specify the review plan’s relationship to sites in the Assignment Criteria section of the Assignment Rule dialog.
- Click Save.
Read more about assigning Review Plans to sites.
How Vault Assesses SDV & DMR Modes
Vault applies your Review Plan at object record creation. Once you’ve created a Review Plan, Vault handles it automatically. When a data entry user creates a new Casebook, Vault applies your Review Plan and sets requirement modes for each Item as it is created. As your Study progresses, and Vault adds and removes Forms and Items (based on Rules), Vault continues to evaluate SDV and DMR requirements for each new data collection object.
If a Review Plan does not exist for a Study, SDV and DMR are unavailable for all Forms and Items in that Study.
Vault only includes Items where SDV is Required in the SDV percentage complete on a Form. When Vault displays 100%, it means that 100% of Required SDV is complete, rather than 100% of any available SDV on a Form.
Overriding Plan Assignment with Rules
You can configure a rule in your study that overrides the original Review Plan assigned to a Form with a different plan when certain conditions are met. For example, an Adverse Event form may have an SDV review plan assigned using the optional requirement mode. Then, with an Override Review Plan _rule, Vault can reassign a 100% required SDV plan when _Yes is chosen for the Is this adverse event serious? item.
Learn how to create Override Review Plan rules.