Configuring Repeating Forms & Repeating Item Groups
Veeva EDC supports repeating Forms and Item Groups, which you can use to collect the same set of data multiple times within a single Event. Each new repeating Form or Item Group is a sequence. Data entry users can create new sequences of repeating Forms and Item Groups (up to a configured Repeat Maximum) and enter data within.
Create a Repeating Form
To create a repeating Form:
- Navigate to Studio > Forms.
- Click + New Form. The New Form dialog opens.
- Optional: You can also use the Drag and Drop schedule editor to create and edit Forms.
- Enter a Label.
- Optional: Update the Name. Vault automatically generates the Name from your entered Label by converting it to lowercase and replacing whitespaces with underscores.
- Select the Repeating checkbox.
- Enter the Short Label.
- Optional: Enter an External ID.
- Click Create.
- Optional: If you did not select the Repeating checkbox during Form creation, from the Properties Panel, select the Repeating checkbox.
- Optional: Enter a Repeat Minimum. This number indicates the minimum allowed number of form sequences in a single Casebook.
- Optional: Enter a Repeat Maximum. This number indicates the maximum allowed number of form sequences in a single Casebook.
- Optional: Configure any additional properties.
- Click Save.
- Your Form is now a repeating Form. You can now add it to your schedule and add its Item Groups and Items.
Creating Common Log Forms
For a Form to appear as a common form in the casebook schedule, you must add it to an Event with the Log event type.
The form-level configuration for common log forms is the same as repeating Forms (see above).
Create a Repeating Item Group
To create a repeating Item Group:
- Navigate to Studio > Item Groups.
- Click + New Item Group. The New Item Group dialog opens.
- Optional: You can also use the Drag and Drop schedule editor to create and edit Item Groups.
- Enter a Label.
- Optional: Update the Name. Vault automatically generates the Name from your entered Label by converting it to lowercase and replacing whitespaces with underscores.
- Click Create.
- From the Properties Panel, select the Repeating checkbox.
- Optional: Enter a Repeat Maximum. This number indicates the allowed number of item group sequences in a single Casebook.
- Optional: For Item Groups with default data, choose whether to Disable New Row Button and display only default data. When the + New Row Button is disabled, the button is greyed out. The Disable New Row Button feature is availabe for studies created after 25R2.
- Optional: Configure any additional properties.
- Click Save.
- Your Item Group is now a repeating Item Group. You can now add it to a Form and add its Items from Studio’s Design view.
Using the Disable New Row Configuration: You can use the Disable New Row Button if you have default data configured for this Item Group and you want to keep the site from entering additional rows beyond the defaulted values. We recommend you consider this option when the default Items are also marked as read-only.
Item Group Properties
The following configurations are available in the Properties panel for repeating Item Groups:
Display Formats for Repeating Item Groups
You can configure your repeating Item Group to use a Form or Grid layout. With form display format, Vault displays your repeating Item Group inline in the form. With grid display format, Vault displays your repeating Item Group in a tabular layout, similar to the layout for repeating Forms.
To configure the Display Format property:
- Navigate to Studio > Schedule and click Use drag and drop editor.
- Click Edit Form () to open the Form containing the Item Group.
- Click Edit.
-
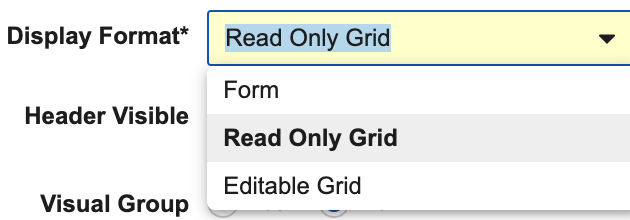
In the Default Display section, select the desired display format from the Display Format dropdown.
- Click Save.
To use grid display format, your repeating Item Group may only contain sixteen (16) or fewer Items.
Setting Up Default Data on Item Groups
You can select default data to display for repeating Item Groups in Data Entry. Only Codelist Items can be selected as default data.
Progressive Display with Default Data: When progressive display is configured for Item Groups that have default data, the repeating item group still appears on the Form even when the controlling item for progressive display evaluates as false.
Derived Item Codelists Not Supported with Default Data: You cannot use derived items in default data configurations. Starting from the 26R1 release, you cannot configure default data using a derived item, and a warning will display on existing invalid default data configurations that use derived items.
To configure default data for a repeating Item Group Definition:
- Navigate to the repeating Item Group Definition you want to configure default data for in Studio.
- Click into the record.
- From the Properties panel, in the Default Data section, click Edit. The Default Data page opens.
- In the Default Data page, you can select Items and values to display as defaults. These must be Codelist-type Items that you have already added to this Item Group in Design view. The Codelist Items appear as columns, and the Codelist Item Values can be selected from the dropdown menu in each row.
-
Optional: Click + New Row to add a row, and select the Item value that you want to set as default from the dropdown for each Item column.

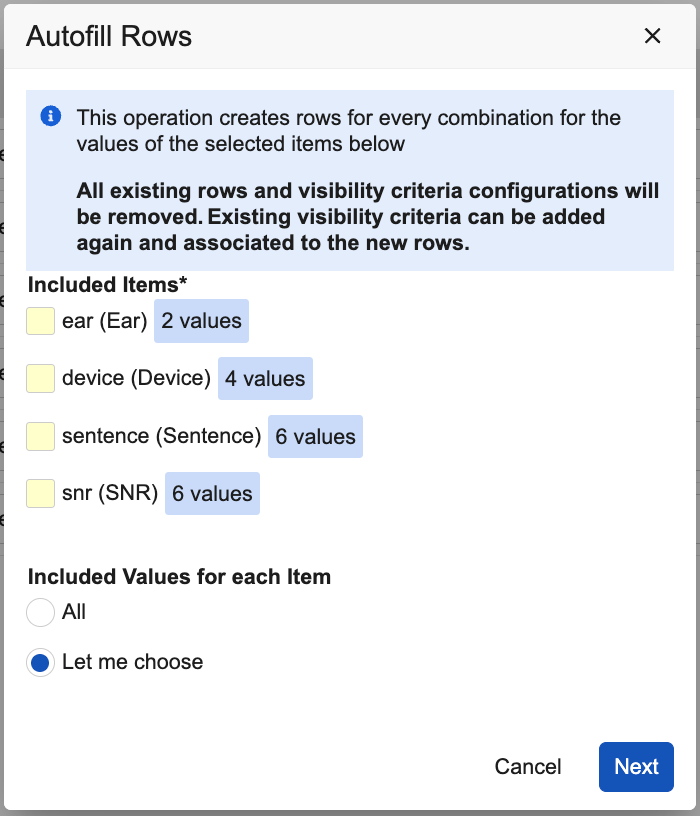
- Optional: Click Autofill Rows to open the Autofill Rows dialog.
- Select the Included Items.
- Optional: for Intended Values for Each Item, select All to include all the values for each item that is selected.
- Optional: for Intended Values for Each Item, select Let me choose to select the values that you want to include for each item that is selected.
- Click Generate Rows.
- Rows of default data are generated for the Item Group.
- Optional: Reorder the Codelist Items by dragging and dropping.
- Optional: Click Remove (x) to remove a Codelist Item from the default list.
- Click Save.
If you choose more than one Value, Vault creates one Item Group sequence per combination of the codelist values from the Codelist Items. If you choose only one Value, Vault creates an Item Group sequence for each Codelist Item.
Post go-live Changes to Default Data Values: When you add default data to an Item Group as part of a post go-live change in a new version, the default values aren’t directly applied to existing Forms during retrospective amendments. To apply the changes, a user must reset the Form via the Data Entry tab after the amendment is completed.
Resetting Default Data Configuration
To reset your default data configuration:
- Navigate to the Item Group Definition whose default data you want to reset.
- From the Properties panel, click Edit
- For Repeating select No.
- Click into another field or away from the Properties panel to prompt Vault to save your change.
- In the Properties panel of the Item Group Definition, click Edit.
- For Repeating select Yes again. This resets the default data configuration for that item group. You can now follow the steps to set up default data.
Optional Considerations
The following configurations are not required for default data to function, but they may be useful for maintaining consistency across Forms with defaulted Item Groups.
- Set the Repeat Maximum property for your Item Group Definition to equal that of the number of Codelist Items you selected for default data. If you set the Repeat Maximum property lower than the number of rows generated during default data configuration, the system updates the property when saved to be equal to the number of generated rows.
- Set the Repeat Maximum property for your Item Group Definition to greater than the number of default combinations. If the Repeat Maximum is greater than the number of default combinations, users will be able to create new Item Group sequences, in addition to those Vault creates. This allows your users to collect a standard set of data Items, while still allowing users to collect and augment additional information.
- You can set the Codelist-type Item you based your default data on to Read-Only, if you don’t want to allow the site to change it.
Configuring Visibility Criteria for Schedule-driven Default Data
You can configure the default data that is displayed in an Item Group to be different depending on what Form, Event, or Event Group the Item Group is part of. Before you can configure visibility criteria for an Item Group with default data, you must have already added it to the object you select to control what data it displays in the schedule. For example, if you want to select an Event Group as the Identifier controlling what default data displays, the Item Group must already be present in a Form in that Event Group. To configure the visibility criteria for default data you must first create and then add at least one visibility criterion.
To create a visibility criterion for default data:
- Navigate to the repeating Item Group Definition you want to configure default data for in Studio.
- Click into the record.
- From the Properties panel, in the Default Data section, click Edit. The Default Data page opens.
- Click the Configure Visibility Criteria tab.
- Click + New Visibility Criterion.
-
In the New Visibility Criterion dialog, enter the Label, and select the Identifier, Event Group, and Event for the criterion.
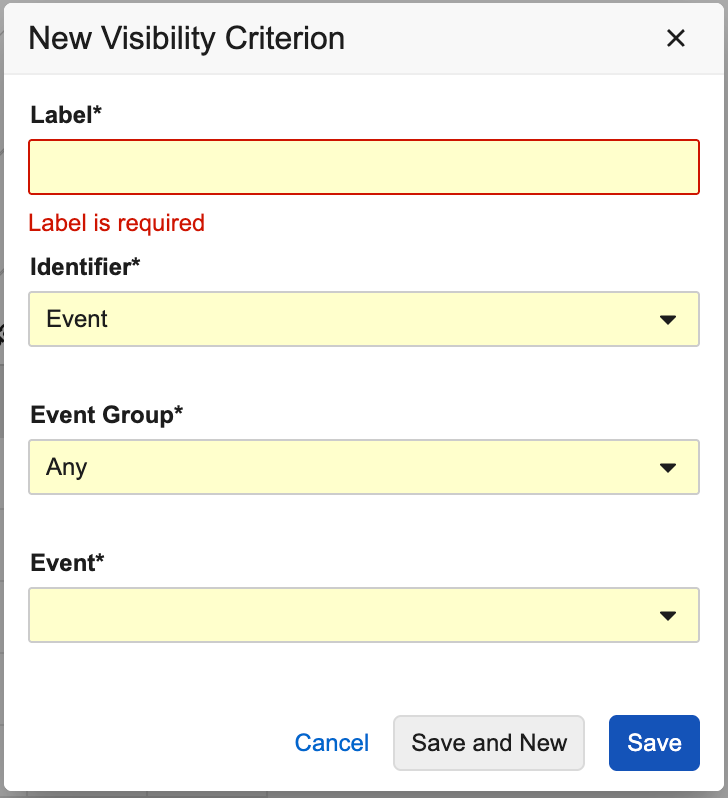
- Click Save. The visibility criterion is created.
To add visibility criteria to the default data configured for the Item Group:
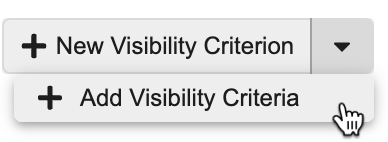
- On the Configure Visibility Criteria tab, click the Arrow next to + New Visibility Criterion.
-
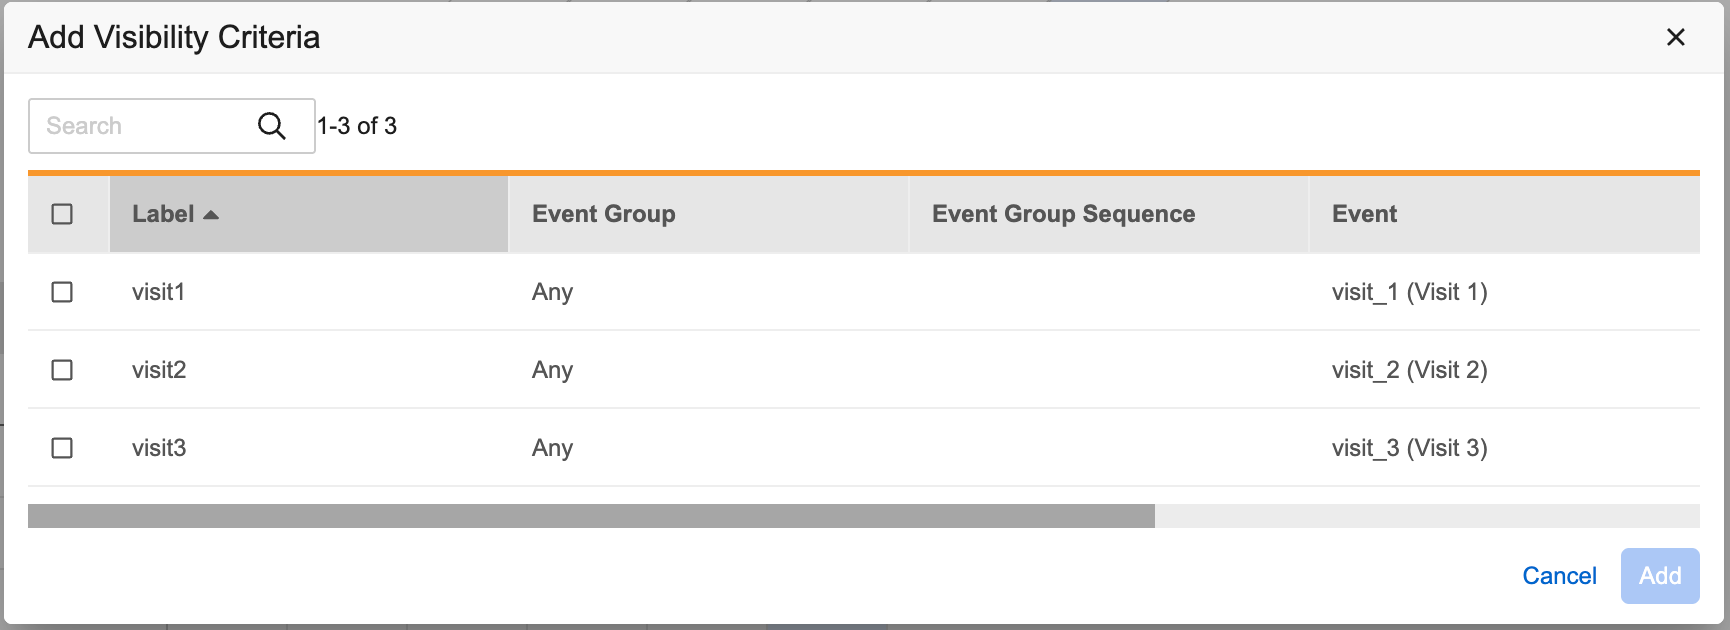
Click + Add Visibility Criteria.
-
In the Add Visibility Criteria dialog, select the Visibility Criteria you want to add, and click Add. Only criteria that have been created but not yet added are displayed.
-
Select the default data to display for each visibility criterion.
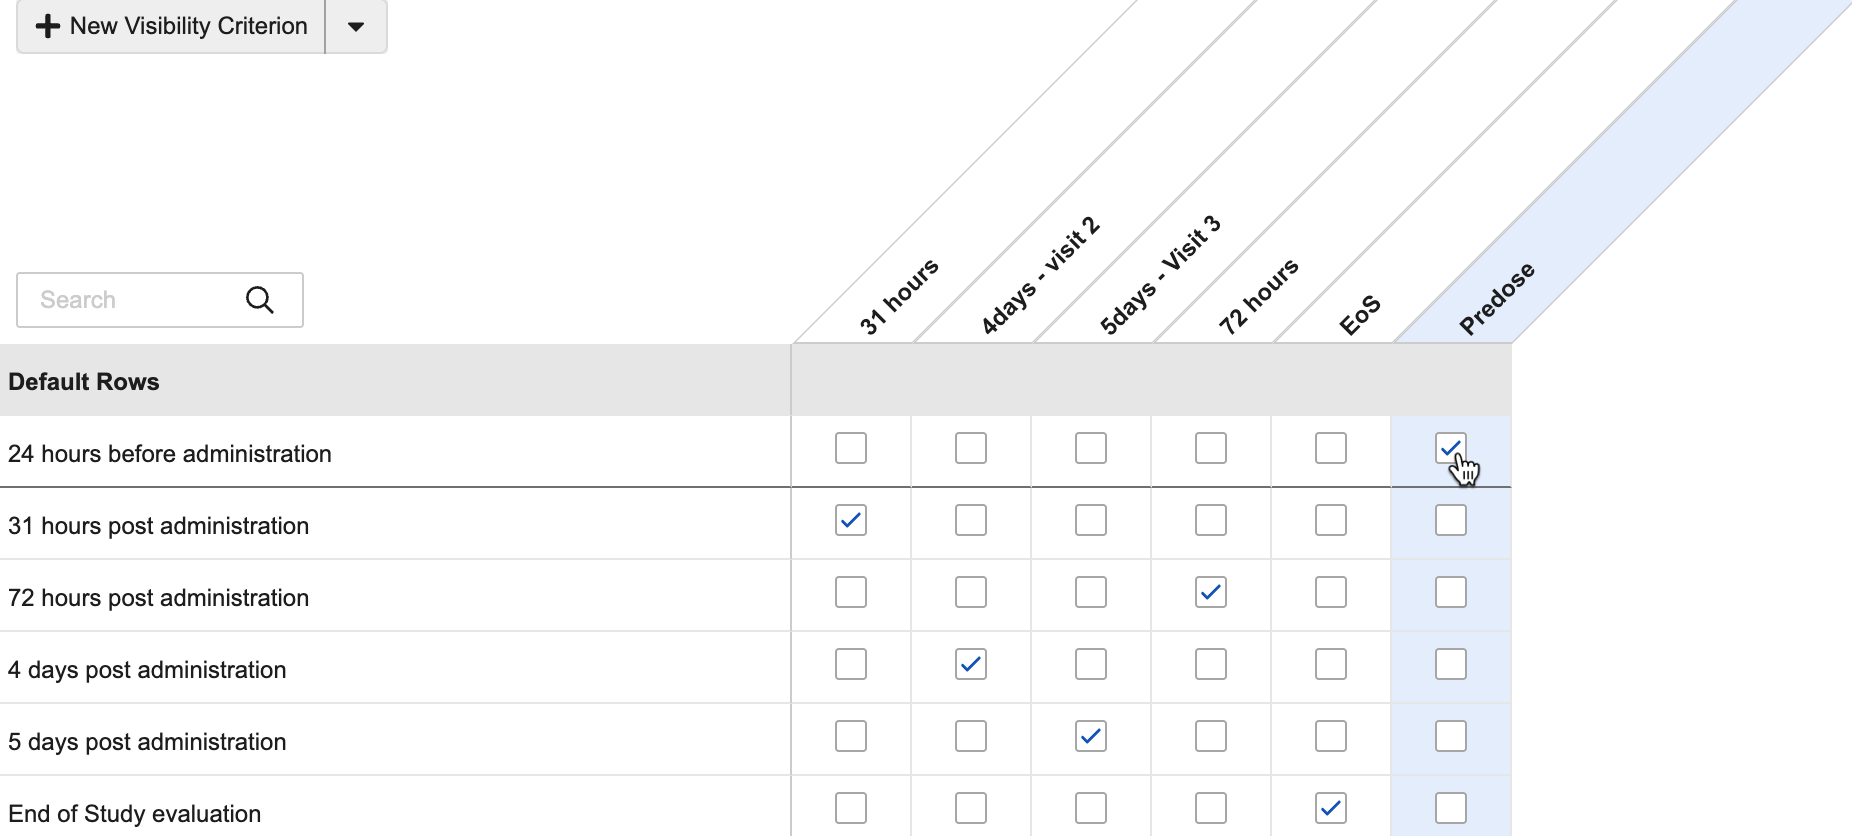
-
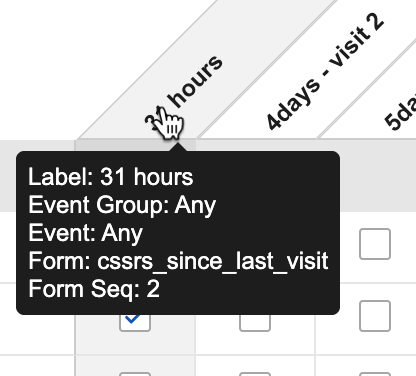
Optional: Hover over the visibility criteria to display information about it.
- When you are done configuring the visibility criteria for the default data, click Save.
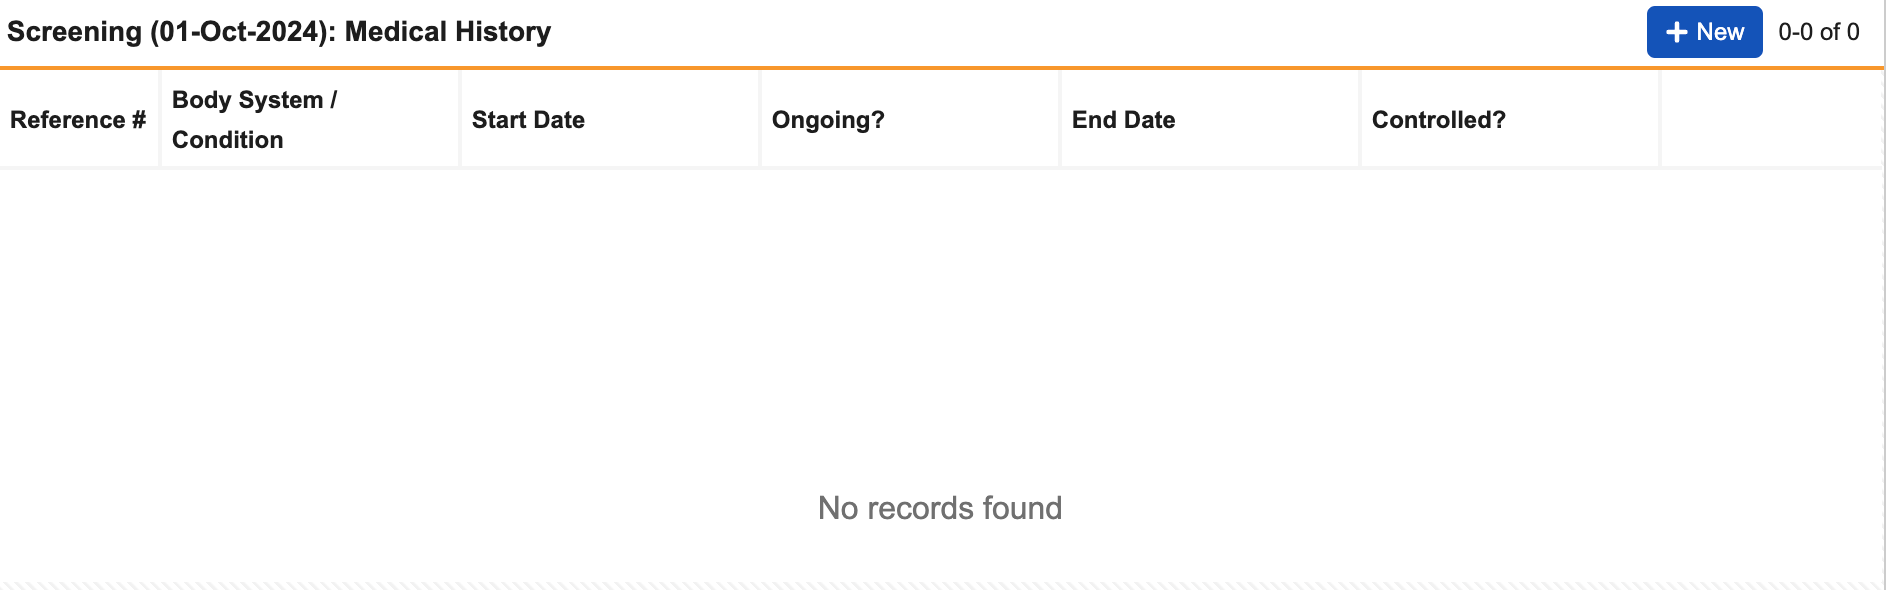
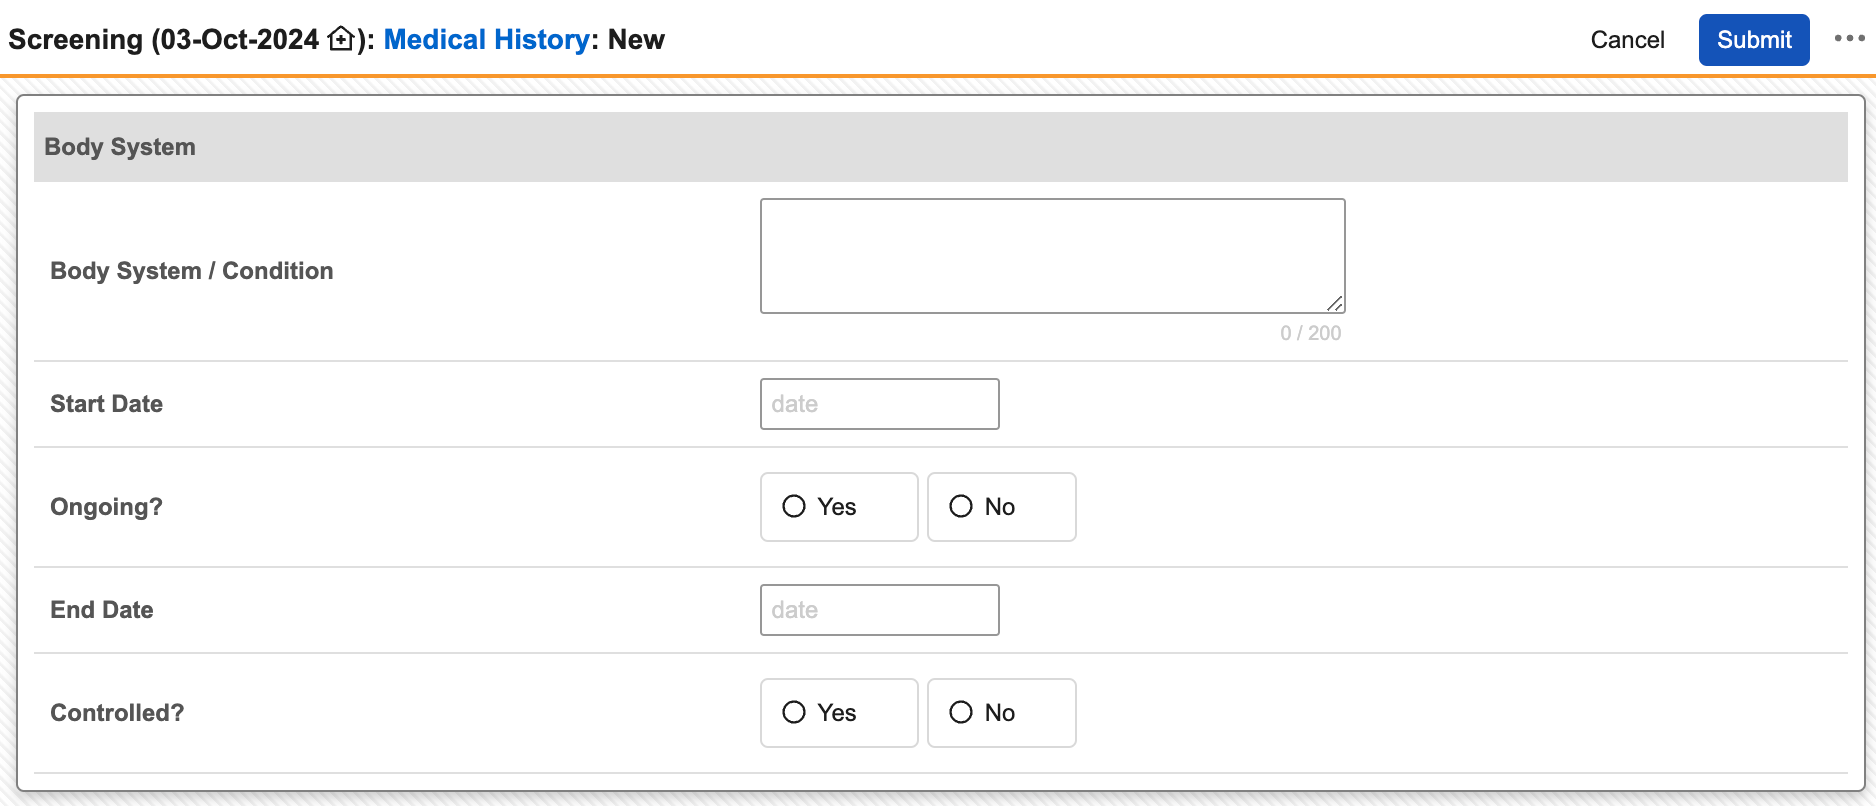
Example Design: Medical History (Repeating Form)
For the Deetoza study, sites will collect information about a subject’s medical history during the Baseline Visit event. The sponsor wants each medical history event to be tracked as an individual Form. Lateef, a study designer for the Deetoza study, can easily accomplish this using a repeating Form for medical history.
This example design includes the following design definitions:
- Form: The Medical History form is a repeating Form for collecting data related to individual medical history events. This form has the Repeating checkbox selected and the default Repeat Maximum of 9999.
- Item Group: The Medical History item group contains all data collection Items for the Medical History form.
- Items: There are data collection Items for each data point required for medical history events.
For each subject, a data entry user can create as many sequences of the Medical History form as needed to capture all relevant medical history events for each Subject.


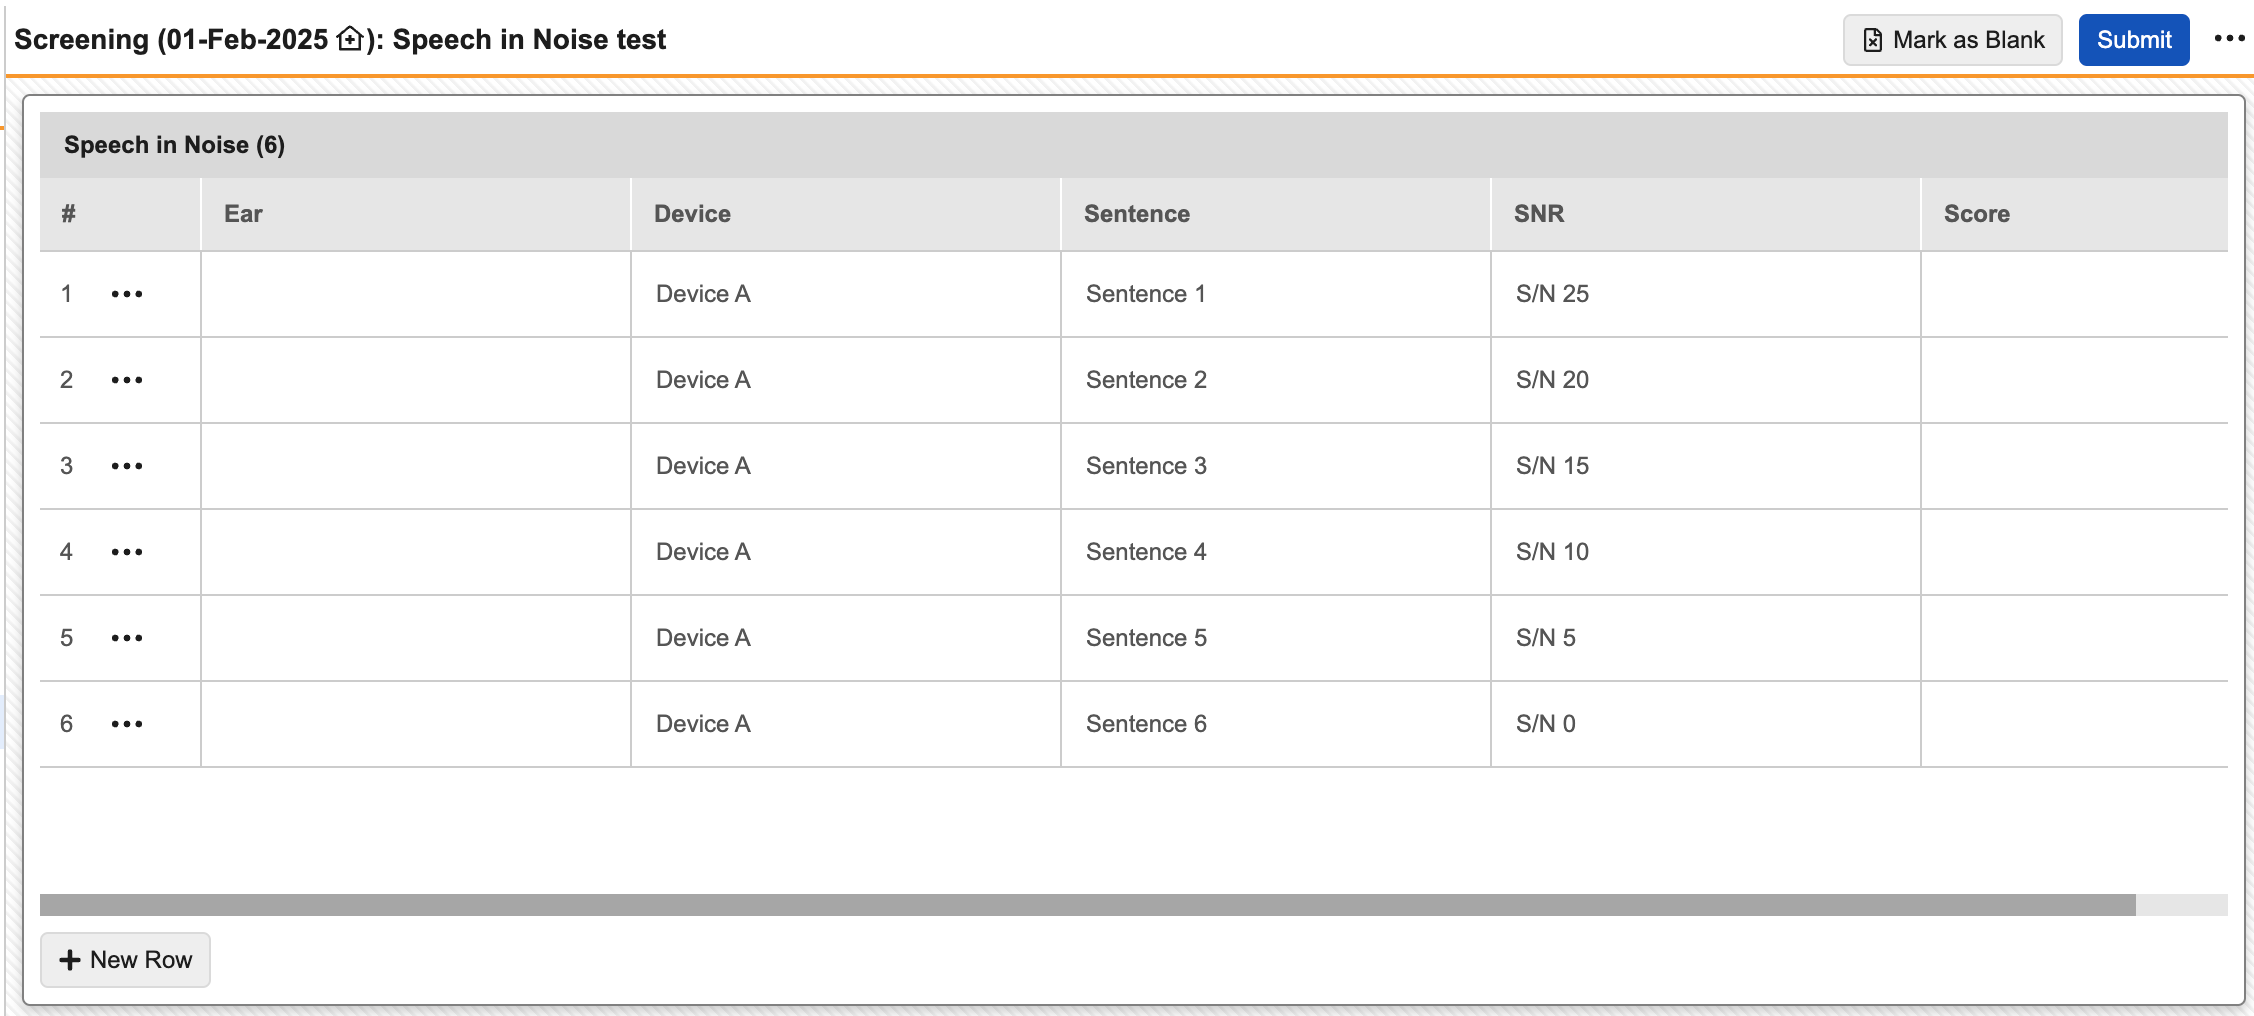
Example Design: Hearing Test (Repeating Item Group)
Linda is a study designer on the Hearing Device study. She needs to create a way for data entry users to easily record data about a hearing test during the study’s Baseline Visit. The exam will cover a QuickSIN test which involves saying sentences at different surrounding noise levels, and scoring the accuracy of repetition by the subject.
Instead of creating an Item Group for each sentence, Linda can create a single repeating item group, Speech in Noise, and configure default data to automatically create sequences for each sentence.
This example design includes the following design definitions:
- Form: The Hearing Test form definition contains the Speech in Noise item group.
- Item Group: The Speech in Noise item group is repeating, with one item group on the Exam form for each sentence in the test.
- Item: The read-only Sentence and SNR items control the default data for the Speech in Noise item group. Vault automatically adds a repeating Item Group sequence for each code within the codelists.
- Codelist: The Sentence codelist contains a code for each sentence included in the QuickSIN test.
For each subject Casebook, in the Hearing Test form, Vault creates a repeating Speech in Noise item group sequence for each sentence in the test.

What Data Entry Users See
The screenshots below show what repeating Form and Item Group configurations look like to data entry users (investigators, CRCs, etc.).
Repeating Form
Repeating forms display as regular forms in the casebook schedule. Each repeating form as a count of all existing form instances appended to the form Name.
Once a user clicks + New and adds a new Form, the data entry experience is the same as a non-repeating Form.
Common Form
Vault displays forms that are part of an Event with the Log event type on the casebook schedule in their own Common Forms panel.
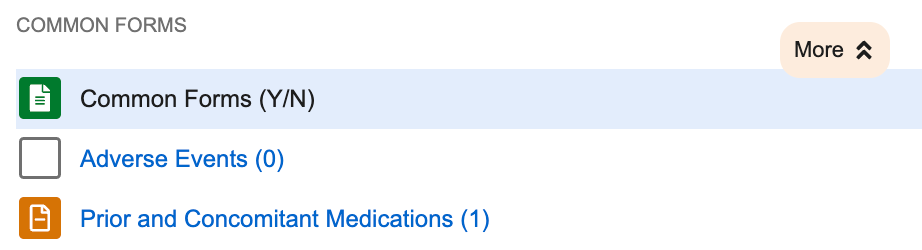
Once a user clicks into a common form, they can see a tabular view of all existing forms. They can click + New to add a new form.

Repeating Item Groups
How repeating Item Groups display in View mode depends on their Display Format property. All repeating Item Groups display the same in Edit mode.
Grid Format (Tabular View)
This Speech in Noise repeating Item Group is in grid format.
Form Format (Form View)
This Speech in Noise repeating Item Group is in form format. It also uses default data.
With form format, users see a + New Section button to add instances of the repeating Item Group.
Study Update Restrictions
After you publish the initial version of your Casebook Definition, Vault prevents you from making certain changes in any later versions you may create. If you were to make these changes, it could cause errors during the casebook amendment process.
See Study Update Restrictions for a list of disallowed changes and available workarounds.
Related Permissions
Users with the standard Vault Owner or Design security profiles can perform the actions described above by default. If your vault uses custom security profiles, you must have the permissions described in the Profile Permissions table.