Creating Forms, Item Groups & Items
Once you’ve planned your study schedule, you can create Forms to collect data. On each form, there are a number of Items which represent a question or field. Items are grouped into Item Groups. Each Form, Item Group, and Item that you create is a study object. The system copies study objects into an “execution” object record during casebook creation. In this way, each Form in the study design is copied as a Form record for each casebook.
EDC Studio does not display “Definition” for each object name in the Studio user interface. Even though the objects are not labeled with “Definition”, you are creating definition object records whenever you are working in Studio.
You can access the listing page for each type of study object from Studio’s Navigation panel. Create records in each of the objects listed in the Study Objects section. See the instructions below.
Prerequisites
Users with the CDMS Study Designer study role can perform the actions described below by default. If your organization uses user-defined Study Roles, your role must grant the following permissions:
| Type | Permission Label | Controls |
|---|---|---|
| Standard Tab | Studio Tab | Ability to access the Studio tab |
| Functional Permission | Design Study | Ability to create study design definitions and a study schedule from Studio |
If your Study contains restricted data, you must have the Restricted Data Access permission to view it.
Learn more about Study Roles.
How to Create a Form
To create a Form Definition:
-
Navigate to Studio > Forms.
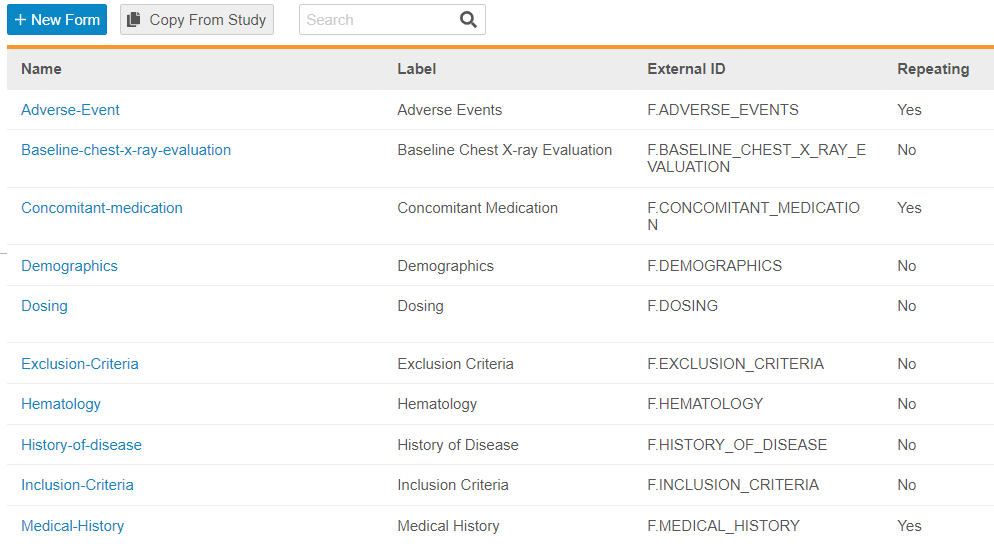
-
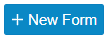
Click + New Form.
-
Enter a Label.
- Optional: Update the Name. Vault automatically generates the Name from your entered Label by converting it to lowercase and replacing whitespace with underscores.
- Select the Repeating checkbox to make your Form a repeating one. Then you can set a Repeat Maximum. Learn more about those properties here.
- Enter a Short Label. This label displays in areas where the Label is too long to display, such as in Design view.
- Optional: Enter an External ID. If you don’t enter an External ID, Vault automatically generates one.
- Optional: Click Advanced to show additional properties. From here, you can enter Description and Help Content. Learn more about those properties here.
- Optional: Click Save and New to save this Form and immediately create another one.
- Click Save.
- In the Properties panel, click Edit.
- Edit properties for your new Form as needed.
- Click Save.
How to Create an Item Group
To create a Item Group Definition:
-
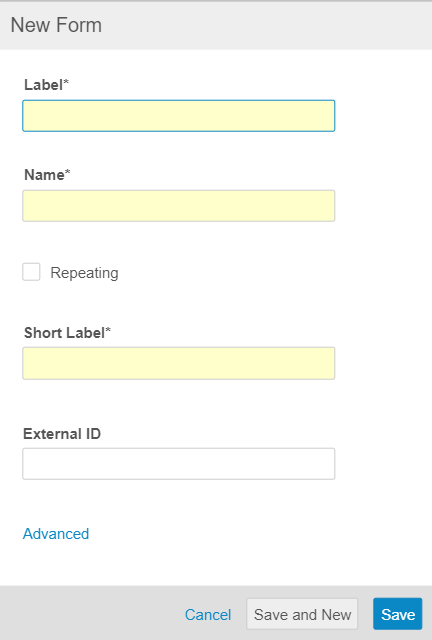
Navigate to Studio > Item Groups.
-
Click + New Item Group.

-
Enter a Label.
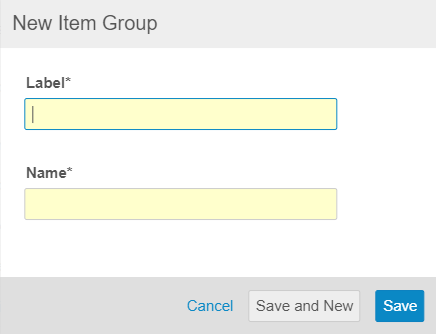
- Optional: Update the Name. Vault automatically generates the Name from your entered Label by converting it to lowercase and replacing whitespace with underscores.
- Optional: Click Save and New to save this Item Group and immediately create another one.
- Click Save.
- In the Properties panel, click Edit.
- Edit properties for your new Item Group as needed. To configure Editable Grids, select Editable Grid from the Display Format dropdown.
- Click Save.
Editable Grids: Note that the Editable Grid display format does not support Label items and is only available for Repeating Item Groups.
Display Formats
In Studio, you can select from the following Display Formats for Repeating Item Groups:
- Form: If selected, your repeating item group will never display in grid format and always display in form format.
- Read Only Grid: If selected, your repeating item group will only display in a grid when a form is submitted. While editing, the repeating item group will display in form format.
- Editable Grid: If selected, your repeating item group will display in grid format when the form is in both the Edit and Submitted states.
How to Create an Item
To create an Item using the Unit or Codelist data types, you must first create the Unit or Codelist. Note that the default data type length for Codelist data types is 100. You can change that length in order to allow the SDE and DQS to have the preferred SAS definition field length by clicking on the Item in Studio > Items and clicking Edit.
To create a Item Definition:
-
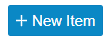
Navigate to Studio > Items.
-
Click + New Item.
-
Enter a Label.
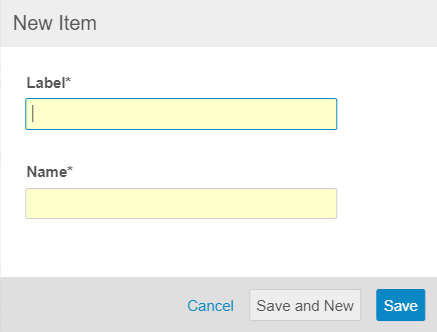
- Optional: Update the Name. Vault automatically generates the Name from your entered Label by converting it to lowercase and replacing whitespace with underscores.
- Optional: Click Save and New to save this Item and immediately create another one.
- Click Save.
- In the Properties panel, click Edit.
- Edit properties for your new Item as needed. See the table below for information about the Item Type field.
- Click Save.
Item Types
Refer to the table below for information about Item Types.
| Item Type | Description |
|---|---|
| EDC | This type is used to define data that is collected in EDC. |
| Status | This type changes the status of a subject or sets the ID (in the case of the screening Manual ID schema or the Enrollment ID) |
| Header | This type will display this field in the casebook header. Vault allows you to set an unlimited amount of items to values in the header but will only display a fixed amount (four as of the 24R3 release). |
| Read-only | This type will only be viewable via the EDC UI. The value is set via API integration. |
| Derived | The value of this field is set by a rule and will be Read-only in the EDC UI. |
| Reference | This type is used to describe a special field that references other data. It is currently only used for the Lab Location item in the Labs tab. |
| Lab | This type is used for fields that come from Local Labs. It is currently only used for the Lab Test (Analyte Name) field. |
Reserved Words
We recommend that you don’t use any of the values below for an item definition’s Name or External ID (formerly known as OID). These values are used by standard Veeva EDC objects and fields, and naming Items with these names can cause errors on SAS conversion.
- Study ID
- Country
- Site
- Subject ID
- Event
- Event Date
- Event Sequence
- Form
- Form Sequence
- Item Group
- Item Group Sequence
- LBLOC*
- LBAGE*
- LBSEX*
- LBFEMALECYCLE*
- LBDTC*
- LBORRES*
*Only applicable to studies using Labs.
Veeva EDC captures these data points in those standard object fields already. For example, when a data entry user enters a date for an Event, Vault records that entry in the Event Date field on the Event object.
How to Create a Codelist
To create a Codelist Definition:
-
Open Studio > Codelists.
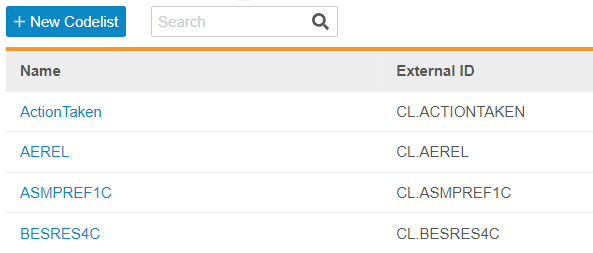
-
Click + New Codelist.

- Enter a Name.
- Optional: Enter a Description.
- Fill the required fields to create Codelist Definition Items.
- Optional: Select the Hide checkbox for any codelist items you don’t want to display to data entry users.
- Click Save.
- In the Properties panel, click Edit.
- Edit properties for your new Codelist as needed.
- Click Save.
For information regarding the character limits for required fields, read Importing Codelists - Required Columns.
How to Create a Unit
To create a Unit Definition:
-
Navigate to Studio > Units.
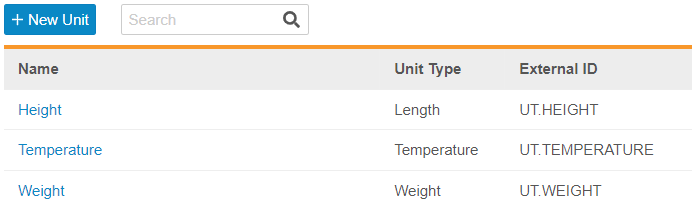
-
Click + New Unit.
- The New Unit dialog opens.
- Enter a Name.
- Optional: Edit the External ID.
- Optional: Select a Unit Type.
- Enter a Label.
- Optional: Enter a Description.
- Fill the required fields to create Unit Definition Items.
-
Click + Add Unit Definition Item to add another Unit Item to your Unit.

-
Select a unit as the default by clicking the Standard radio button.

-
Optional: Select the Hide checkbox for any unit items you don’t want to display to data entry users.

- Click Save.
- In the Properties panel, click Edit.
- Edit properties for your new Unit as needed.
- Click Save.
Deleting Design Definitions
Remove Objects from the Study Schedule before Deletion: You must remove objects from the study schedule before deleting them. Otherwise you may encounter subsequent versioning issues.
You can delete object records from Studio directly if the record is not in a relationship with the Casebook Definition, that is, if it has not been added into any higher-level component from Studio > Schedule. When deleting an object that has been added to the schedule, you must first remove the object from the schedule before deleting it. This helps prevent subsequent versioning issues.
How to Delete a Form
When deleting a Form, you can delete the form only or delete the Form and any Item Groups, Items, Codelists, Units, and Rules, as well as the layout relationships.
Forms with Coding Configuration: If a Form has coding configuration, you must delete the coding configuration before deleting the Form.
To delete a Form:
- Remove the Form from the Study Schedule.
- Navigate to Studio > Forms.
- Hover over the form’s Name to show the Actions menu.
-
From the Actions menu, select Delete.
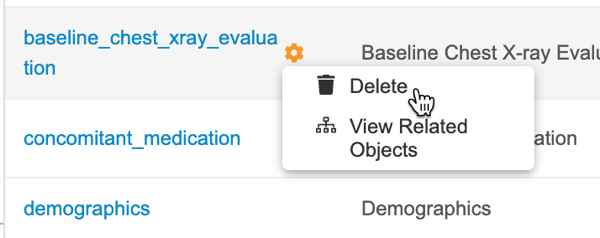
- Optional: By default, Vault deletes all related objects (Item Groups, Items, Codelists, and Units). To only delete the Form, clear the Include all related objects checkbox. You can click See Related Objects to see a list of related object records.
- Click Delete.
How to Delete Item Groups, Items, Units & Codelists
To delete an Item Group, Item, Unit, or Codelist:
- Remove the Item Group, Item, Unit, or Codelist from the Study Schedule.
- Navigate to the appropriate Study Object tab in Studio.
- Hover over the record’s Name to show the Actions menu.
- From the Actions menu, select Delete.
Note that if you delete a Codelist Definition or Unit Definition object record, Vault also deletes all Codelist Item Definition or Unit Item Definition records related to that record.
Study Update Restrictions
After you publish the initial version of your Casebook Definition, Vault prevents you from making certain changes in any later versions you may create. If you were to make these changes, it could cause errors during the casebook amendment process.
See Study Update Restrictions for a list of disallowed changes and available workarounds.