Tips & Best Practices for Forms
This page lists various tips and best practices to help you create and design Forms, and the related components, for your Study.
- For detailed instructions about how to create a Form, see Creating Forms, Item Groups & Items
- For detailed instructions about how to design a Form, see Designing Forms
General Tips
Here are some general tips to help you as you build your study’s Forms:
- Design Forms with safety and endpoints in mind. Don’t over collect Items that aren’t needed for analysis.
- Design the form to follow the flow of entry at the site.
- Reuse Forms across Events when possible.
- Try not to use “Check if present” style boolean Items, as a value could be interpreted as “No” or “False”, when the site didn’t complete the item. Instead, instruct sites to mark Items as Intentionally Left Blank when leaving an Item blank.
- Avoid comments and text fields as much as possible. These values are difficult to use in analysis. Exceptions include Adverse Event Terms, Concomitant Medications, and Medical Histories, as these are coded using medical dictionaries.
- Ensure that you’re not using multiple Items to collect the same question on different Forms. Instead, create one Item and use it on each Form.
- Reuse entire Item Groups and individual Items as much as possible across Forms.
Questions to Ask during Form Review
It can be helpful to have a standard list of questions to ask during any kick-off or form review meetings with sponsors. Consider the following questions:
- Does the Form need form linking? (AE to ConMed, Medical History, Infusion Interruptions, etc.)
- Is it better to use a repeating Form or a repeating Item Group?
- What is the maximum number of repetitions needed for a repeating Form?
- For dates and datetimes, which format should be used? Should the item allow for unknowns? How do you handle unknown days in any calculations or rules (minimum or maximum date)?
- Are there any Items on this Form that you want to be displayed in the casebook header?
Include Form Descriptions
Descriptions for Forms help communicate the Form’s purpose during SOA quality checks and rule creation, and can be especially helpful when a study needs multiple versions of a Form. You can add a Description in the Properties panel of the Form.
For example, on an ECG form, you can add a description to indicate whether is is triplicate or single, or for VS forms, you can add a description to indicate whether it is the baseline or treatment form.
Example descriptions:
- ECG - Triplicate, no Timepoints
- ECG - Triplicate with Timepoints
- VS - Baseline with height
- VS - Treatment
Item Groups
Item Group Display
Item Groups group data according to a clinical concept and help to align data in extracts. You can use the Header Visible, Visual Group, and Display Format properties to change how Vault displays your Item Group on the Form.
Header Visible
The Header Visible property displays the Label of the Item Group above the Items in the group. We recommend that you always set Header Visible to Yes in the Properties panel of your_Item Group_ to make the grouping of Items on your Form easier to see.
Note that if you have multiple Item Groups on a single Form, they appear as separate rows in any extracts regardless of your Header Visible selection.
Visual Group
The Visual Group property demarcates Items in the Item Group with a border. We recommend you set Visual Group to Yes in the Properties panel of your Item Group to visually break your Items into logical groupings.
Display Format
For repeating Item Groups, we recommend that you always set the Display Format in the Properties panel to a grid view (Editable Grid or Read Only Grid) to allow site users to view the data in a summary format.
Repeating Item Groups
- Use repeating Item Groups as needed to group sets of related questions (Items) that are collected more than once in a single Form. However, don’t overuse this feature just to have separate boxes.
- Keep in mind that each Item Group appears as a separate row in extracts. Biostatistics programmers may need to carry down things like Yes/No or date values from the first Item Group into subsequent Item Groups on the same Form.
- If a repeating Item Group is added to a repeating Form, you won’t be able to see the table view of repeating form instances.
- Reuse Item Groups across Forms. Example: Utilize the same Item Group for various PK (or ECG or Vital Signs) Forms that need to capture different time points at different events. You can create one item, “PCTPT”, that is used across the PK Forms in the different repeating Item Groups. Simply select the values needed from the Codelist for the repeating Item Group.
- To collect different Items at different timepoints within a repeating Item Group, such as collecting a “Temperature” item only at the last time point or items related to a specific substance use, use progressive display.
Items
- Be consistent with the capitalization you use in your item Labels. Choose a capitalization scheme (title case, sentence case, capitalize only the first word, etc.) and use it across all of your Items.
- Don’t use colons (:) at the end of your item’s Label. These are transmitted downstream into DQS, Core Listings, and Study Data Extracts, and may cause issues that result in the need for relabeling outside of EDC.
- Avoid including more than fifty (50) Items per Form where possible. This includes Items as a total combined from the maximum number of repeats for a repeating Item Group. In the case of repeating Item Groups, consider whether a repeating Form might be more appropriate and allow you to stay below the limit.
- You can provide brief instructions for difficult items, or hints for the expected ranges per any rules, using the Help Content property. The text you enter there displays to site users when they hover over the item’s Label.
Names
- Use all caps for item Names. These names are used as the field names in extracts.
- To avoid getting an error when using an item in a rule, do not use an underscore (_) as the initial character in the item name.
- See Naming Conventions for best practices for naming Items.
External IDs
The External ID is primarily used for use when integrating with third party systems, such as IRT, as naming conventions may be different between EDC and other applications. The External ID may also be used for custom solutions created by Veeva for use within CDMS, Vault APIs and the SDK, and DQwhen importing third party data.
- Use unique External IDs. Casebook validation will show a warning when an External ID isn’t unique within the study.
- Always provide an External ID when the item will be used in an integration with a third party system. The External ID is not required to match the Name. Non-matching of Names and External IDs is actually expected when an external system requires a different ID.
- Don’t use External ID to reference a repeating object, like “CYCLE_2”. See Tips & Best Practices for the Study Schedule for details about cycles.
Required Checks
In most cases, you should set Required to Yes in the Properties panel of your Item. When set to Yes, Vault opens a query on the Item when a site user leaves it blank, without marking it as intentionally left blank. Exceptions may include read-only Items, such as derived Items populated by a Set Item Value rule, or Items that are populated by an IRT system.
No Future Date Checks
In most cases, you should set No Future Date to Yes in the Properties panel for date and datetime Items. When set to Yes, the system opens a query any time a site user enters a date in the future for the Item. Exceptions may be read-only Items, such as dates populated by an IRT system, or dates that deal with the expiration of a product, for which you would expect a future date.
Progressive Display Tips (Post-20R1, Rules Version 2)
Note that progressive display is only available to Studies created after the 20R1 release that are using version 2 of rules.
- Use progressive display as much as possible. This will significantly reduce the number of rules in your study.
- Be consistent in using either Show or Enable. Composite items that use progressive display (where one of the composite Items controls the other) can use either option.
- If a Form is made up entirely of composite Items (a side-by-side layout), any progressively displayed Items must use Enable, and not Show, to keep the Items properly aligned.
- If you’re using default data on a repeating Item Group, consider using values from this item to control progressive display, such as showing a Temperature item at the first or last time point, per the protocol.
You can also use one Item to show or enable an entire Item Group. Intentionally Left Blank (ILB) is also an option. Users can mark individual Items as ILB, as well as entire Item Groups.
Codelists
- Maintain consistency in your values, order, and the display style of “No/Yes, Not Done, Unknown, or Other” codelists. Sites will become accustomed to the order you use. Design consistency facilitates faster and cleaner data entry and analysis.
- If your study has gone live and sites have begun entering data, only add new Codelist Items or hide any that you no longer need. You can’t remove any Codelist Items at this point. See Study Update Restrictions for a complete list of disallowed changes.
- Always ensure that values used across multiple codelists are stored in the same format. For example, if you have two codelists: “NY” and “NYUNK”, store “Yes” as “Y” in both codelists.
- Always ensure that you don’t have duplicate Codelists resulting from copying a Form. Search the Codelists listing for “_1”, “_2”, and remove any unnecessary duplicates. For example, if you have “NY” and “NY_1”, the “NY_1” codelist is a duplicate. Update the associated Item to reference the correct Codelist and remove the duplicate.
- The Value should be the full, uppercase text for the Label, unless otherwise specified by the study’s design requirements. For example, if the label is “Oral”, the value should be “ORAL”. You can quickly quality check this in the SDS.
- Discuss requests for using an “Other” value within a codelist. When possible, remove “Other” and instead include choices that have clinical meaning.
Date & DateTime Items
For Date and DateTime items, be sure to confirm the configuration for allowing unknowns, for example, Start Dates on Medical History, Concomitant Medication, and Adverse Event Forms.
We recommend that you use datetime-type Items when collecting the date and time. Separating the date and time items complicates study configuration, data entry, SDV, and data management.
Veeva EDC supports full date/time collection (DTC) and allows for unknown months, days, and times. Using the datetime data type ensures consistent and accurate data collection, this way the time is always associated with its applicable date and is already formatted to ISO standards.
Benefits of adhering to these datetime best practices:
- Better data quality at data entry
- Natural downstream efficiency for DateTime items in ISO8601 for SDTM datasets
- Cleaner data and reduced Rule configurations
- All portions of the date are recorded collectively
- Easily compare -DTC with other Date and DateTime Items
- Future Date checks handled inherently by system functionality
- Less effort in specifying and programming rules, in testing, and in user acceptance testing
- Reduction in data cleaning efforts
Event Dates vs. Assessment Dates
If the Assessment Date item on a Form is a date-type Item, and the collected date will always occur on the same day as the Event Date, then remove the Assessment Date item altogether. The Event Date is included in all data extracts and can be utilized as the Assessment Date.
Benefits of this approach include:
- Reduce the number of Items configured
- Reduce the number of Rules configured
- Reduce specification, testing, and user acceptance testing requirements
- Reduce the need for monitoring and cleaning of duplicate data
- Reduce unnecessary data entry
You should only use an Assessment Date item on your Form when you need to collect an Assessment Date and Time, or when the Assessment Date can occur on a different day than the Event Date.
Changing an Item’s Data Type
Scenario: Your study is in development. You haven’t deployed to TST yet, but you have started creating your rules. During testing, there is a requirement to change an item’s data type, such as a change from a date to a datetime or a change to allow or disallow an unknown day or time.
To change the item’s data type:
- Clear the Future Date and Required checkboxes in the item’s properties.
- Remove the Item from the Item Group. Be careful if the same Item Group is used across Forms. You can easily check by filtering the SDS by Item Name.
- Create a new Item using the new data type, selecting the Future Date and Required checkboxes, and add that new Item to the Item Group.
- Identify any rules that reference the Item you removed. You can easily do so in the SDS by searching the Rule Syntax column of the Rules worksheet for the item’s Name. Revise these rules to reference your new Item. If you changed the allowing of unknowns, make sure to add
MinDate(),MaxDate(), orDateValue()functions where needed. See Tips & Best Practices for Rules for details. - Validate your casebook version to check for any missed rules that you still need to revise.
- Delete the original Item that you no longer need.
If you have already deployed, consider that certain changes are not allowed from version to version. See Study Update Restrictions for a complete list of disallowed changes. Once a casebook version has been deployed to production changing the data type of an Item is a destructive change and is not permitted.
Before deploying to the same TST instance or to production, consider taking a set of PDFs or extracts to preserve a snapshot of the data prior to the casebook amendment. Once an Item is removed from the Item Group and Form, and the amendment is deployed, the Item is no longer included in any extracts. Only the new Item will be present.
Removing or Deleting Items
When deleting an object from the schedule, we recommend that you first remove the object from the schedule and then delete it. This helps prevent subsequent versioning issues, especially when the object is deleted as part of a post go-live study update.
Once a study design has been deployed to TST or production, study objects are versioned and can’t be deleted. If you need to remove an Item, you can remove the Item from the Item Group by clicking Remove () in Studio’s Drag and Drop Editor or by clicking the related Remove action in the Time and Events Schedule Editor. This removes the relationship between the Item and the Item Group (so it won’t be included in the Form), but it doesn’t delete the Item.
![]()
If you’ve deployed to TST, but have not yet deployed to production, Vault will allow you to delete the Item (from the Properties panel). If data was entered for the Item during testing, either in development or TST, the next TST deployment will fail with the following error:
Cannot delete resource [object key]: resource is used in [object type]
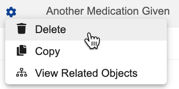
You can delete an Item from the Item’s Properties panel in Studio’s Drag and Drop Editor, or via the actions menu in the Item listing.
To resolve this error, consider these options:
- Create a new TST Environment.
- When initiating the deployment to TST, select the Delete study data and Create detail PDF checkboxes in the Deploy Study Design dialog.
- Reset the Forms or Events in the Casebooks where data was submitted for the Item. You could also delete the Subject. If there are multiple Subjects or the Item is reused across multiple Forms, you may find it easier to consider the other two options, as you may require multiple deployment attempts before the error is resolved.
This is also important for Lab Panels. Don’t remove an Analyte from the Analyte Library after the study has been deployed to TST.