Resetting Data
You can reset Events and Forms to remove all entered data. When you reset Item Groups, Forms, and Events, all system-generated queries and any closed manual queries on Items and Events (when resetting an Event) are deleted. Manual queries that are in Open or Answered status remain Open or Answered. You could reset an Item Group if you entered incorrect data, a Form if you entered data in the wrong subject, and an Event if you entered data in the wrong visit. Note that if you reset a Form that contains an Item Group with default data, the reset will revert the Item Group to the configured default data that is present when the Form is initially added.
How to Reset an Event
Resetting an Event removes all entered data, removes the Forms associated with the Event, clears the Event Date, and closes any open system-generated queries. Manual queries that are in Closed status are deleted, but manual queries that are in Open or Answered status remain Open or Answered.
To reset an Event:
- Navigate to the Casebook containing the Event.
- Locate the Event in the casebook schedule.
-
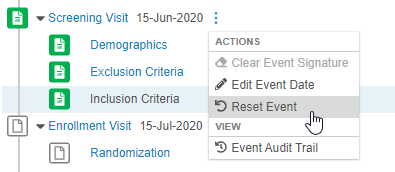
From the event’s More Actions menu, select Reset Event.
-
In the Reset Event dialog, select a Reason.
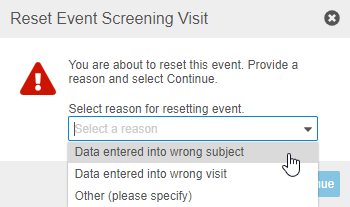
- Click Continue.
-
In the confirmation dialog, type “RESET”.
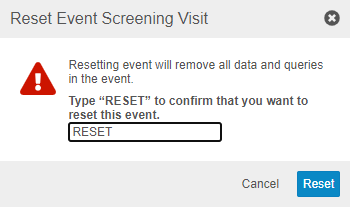
- Click Reset.
How to Reset a Form
Resetting a Form removes all entered data, closes any open system queries, and returns the Form to the Blank status. Manual queries that are in Closed status are deleted, but manual queries that are in Open or Answered status remain Open or Answered.
Note that you can only reset In Progress forms. To reset a submitted form, you must first open the Form in Edit mode.
Form and Item Linking: Resetting a Form with existing form links will remove all form links from that Form. If a Form is linked to an Item, that Form can’t be reset.
To reset a Form:
- Navigate to the Form within the Casebook.
-
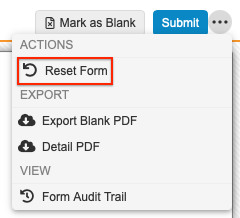
From the Actions menu, select Reset Form.
-
In the Reset Form confirmation dialog, type RESET.
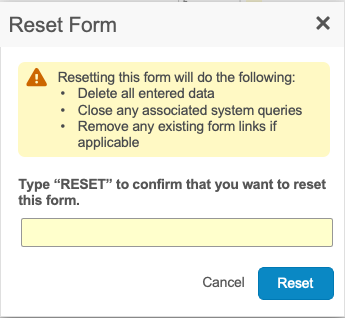
- Click Reset.
If a blinded user resets an Event or Casebook containing a restricted Form, and you are an unblinded user, you must reset the Form for it to be fully removed. When you open the Form, Vault shows a banner noting that the form is no longer required.
To reset such a Form, click Reset Form.
If a Form contains externally owned data, reset the non-externally owned data first, and then reset again. See instructions below for resetting externally owned data.
How to Reset an Item Group
You can reset repeating Item Groups to clear all data from that row or section. Resetting an Item Group removes all entered data and closes any open system-generated queries. Manual queries that are in Closed status are deleted, but manual queries that are in Open or Answered status remain Open or Answered.
Resetting Item Groups with Default & External Data: You can only reset an Item Group containing default data if the data was changed from the default. Upon reset, the Item Group reverts to the configured default data. When an Item Group contains external data, resetting the group only clears the non-external data. To clear all data, you must perform a second reset</a>.
To reset an Item Group in form view:
- In the Data Entry tab, open the Form containing the Item Group you want to reset.
- Locate the repeating Item Group section on the form.
- Hover over the Item Group Header to show the More Actions menu ().
-
- From the More Actions menu, select Reset Section.
-
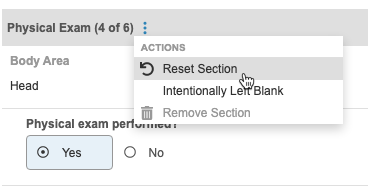
- In the Reset Section confirmation dialog, click Reset.
To reset an Item Group that uses an editable grid (tabular view):
- In the Data Entry tab, open the Form containing the Item Group you want to reset.
- Locate the repeating Item Group section on the form.
- Hover over the Item Group Reference Number to show the More Actions menu ().
-
- From the More Actions menu, select Reset Row.
-
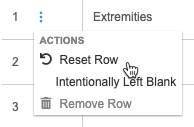
- In the Reset Section confirmation dialog, click Reset.
External Data
We recommend that you consult a representative from your external system to determine the best course of action before resetting external data.
When resetting a Form or an Item Group in form view, all data is removed except external data, which is read-only in EDC. To remove external data, you must conduct a two-step resetting process.
When external data is present, clicking Reset Form the first time performs a partial reset. This action clears all manually entered data while leaving external data that was loaded via API.
After the first reset, the form reflects the original default data configuration, adding or removing rows as needed.
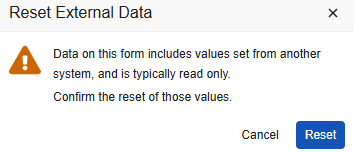
To clear the form and return it to its original, empty state, perform a second reset by selecting the Reset External Data Values option. This clears all data, both external and non-external.
How to Reset External Data
To reset external data after resetting a form:
- Navigate to your recently reset form and click on the Actions menu.
-
Select Reset External Data Values.
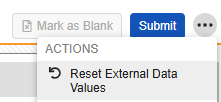
- Click Reset.
External Data & ILB: External data cannot be marked as ILB (Intentionally Left Blank). When external data is present on a form, the Mark as Blank button is disabled.
Marked for Removal
Forms and Events can be Marked for Removal. This status is indicated with this icon:
When a Form or Event is dynamic (added via rules), has entered data, and then a user edits the controlling Item in such a way that the Form or Event is removed from the schedule, the Form or Event is Marked for Removal. Vault can’t just remove the Form or Event, because they contain data. You must reset the Form or Event before it can be removed from the schedule.