Managing Lab Locations, Normal Ranges, & Reports Mass Updates
In the Lab Settings section of the Labs tab, you can view approved and pending Lab Locations, add new Lab Locations, import Lab Locations, add Normal Ranges, and Import Normal Ranges. You can also run lab-specific jobs.
Viewing Lab Locations & Normal Ranges
In the Lab Locations & Normal Ranges tab, Vault displays tables of all approved and pending Lab Locations (statuses split into two subtabs) with Lab IDs, Status, and whether the location is In Use. The Pending Locations subtab label includes the number of Lab Locations that are in the Pending status and lists Lab Locations that aren’t approved yet.
To view the Normal Ranges associated with a Lab Location, click the Lab ID in the location table. From the Normal Ranges page, you can add new Normal Ranges, edit existing Normal Ranges, export the ranges for that locations, or view the audit history for the location.

To add or remove columns in your Lab Locations and Normal Ranges tables:
- Navigate to Labs > Lab Locations & Normal Ranges.
- If you want to edit columns in the Normal Ranges table, click the Lab ID of a Location to open the Normal Ranges table for that location. To edit columns for the Lab Locations table, remain on this page.
- From the Actions menu, select Edit Columns.
- Use the shuttle menu to move columns from Available Columns to Selected Columns. The columns under Selected Columns display in the table.
- Click Save.
Lab Locations
You can add Lab Locations one-by-one, or you can import Lab Locations in bulk using a CSV file.
Add Individual Lab Locations
To add a new Lab location:
- Navigate to Labs > Lab Locations & Normal Ranges.
- Click + New Lab.
- Fill all required and relevant fields.
- Initiated By Study: This field shows which Study the Lab Location was initiated for. The dropdown list will only show studies that you have permission to access and that have Labs enabled.
- Initiated By Site: This field shows which Site initiated the Lab Location. The dropdown list will only show sites that you have permission to access.
- Click Save.
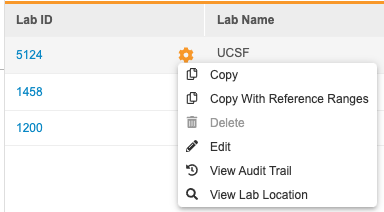
Select the gear icon next to the Lab ID for more options.
Import Lab Locations
You can import Lab Locations using this template:
Download the Lab Location Template
Excel Localization for .CSV Files: Veeva CDMS uses commas as the default separator for .CSV files. If your system is configured in a non-English language, you may encounter errors when attempting to upload .CSV files created or modified in Excel. We recommend that you change the localization of your system to English while working on the .CSV to avoid this issue.
To import Lab Locations:
- Navigate to Lab Tools > Lab Locations & Normal Ranges.
- Click Import Lab Locations.
- Drag and drop your completed template to upload, or click in the upload area to browse for the file.
- Click Import.
Required Columns
The following columns are required in your import file:
| Column | Details |
|---|---|
| Lab ID | Enter the Lab ID(s) associated with your lab location(s). |
| Lab Name | Enter the name of the lab location. |
| Lab Address | Enter the address of the lab location. |
| Country | Enter the country where the lab location is located. |
| Timezone | Enter the timezone of the lab location. |
See Timezone, Language & Locale Entry Formats for more information about timezone format.
Any columns not mentioned above are not required for import.
File Size Limit: Your import CSV file can’t exceed 100MB in size.
Validation Errors
The table below lists possible validation errors and their resolutions:
| Error | Explanation | Steps to Resolve |
|---|---|---|
| Field is required or field must not be empty | This field is required. | Provide a value for this field. |
Pending Lab Locations
If a Site enters a Lab Location in the Data Entry tab, that location will be given a Pending status, meaning that it must be approved by a data manager or lab managers. Lab Locations that are entered in the Labs module are automatically approved.
Pending Lab Locations
Last Updated: 23R3
This video reviews how to interact with pending lab locations in the Local Labs module.
Normal Ranges
You can manually add, upload, or edit local lab Normal Ranges for analytes collected in EDC in Lab Settings > Lab Locations & Normal Ranges. Normal Ranges only need to be entered once and can be leveraged elsewhere in your study once entered. When testing methods are being changed, you can update effective Begin dates in this section. You can configure queries to automatically generate for abnormal ranges in the Study General Settings tab of the Labs module.
You can import Normal Ranges using this template:
Download the Lab Normal Ranges Template
To import Normal Ranges:
- Navigate to Lab Tools > Lab Locations & Normal Ranges.
- Click Import Normal Ranges.
- Drag and drop your completed template to upload, or click in the upload area to browse for the file.
- Click Import.
Required Columns
The following columns are required to have data in your import file:
| Column | Details |
|---|---|
| Lab ID | Enter the Lab ID(s) associated with your normals. |
| Analyte | Enter the Analyte(s) associated with your normals. |
| Lower Age Modifier | Enter a modifier for the Lower Age number value (≥ or >). This column is only required if a Lower Age number value is provided. |
| Lower Age | Enter the Lower Age number value. This column is only required if a Lower Age Unit is provided. |
| Lower Age Unit | Enter the Lower Age Unit. This column is only required if a Lower Age value is provided. |
| Upper Age Modifier | Enter a modifier for the Upper Age number value (≤ or <). This column is only required if an Upper Age number value is provided. |
| Upper Age | Enter the Upper Age number value. This column is only required if a Upper Age Unit is provided. |
| Upper Age Unit | Enter the Upper Age Unit. This column is only required if a Upper Age value is provided. |
| Lower Normal | Enter the Normal Range low. This column is required when adding measurement units or a number data type. |
| Upper Normal | Enter the Normal Range high. This column is required when adding measurement units or a number data type. |
| Measurement Unit | Enter the measurement unit associated with your normals. This column is required when an analyte is associated with a measurement unit date type. The data in this column must match the Unit Name of the associated measurement unit. |
| Codelist Normal | Enter the Codelist Normal. This column is required when an analyte is associated with a Codelist data type. The data in this column must match the codelist name of the associated codelist. This column is not automatically included in the template above. To add the Codelist Normal column, select the Edit Columns option in the Actions menu. |
| Text Normal | Enter the Text Normal. This column is required when an analyte is associated with a Text data type. |
| Effective Begin Date | Enter the effective start date of your normals (MM/DD/YYYY or MM/DD/YYYY hh:mm). The time will be marked as Unknown if only the date is entered. Note that the Effective End Date must be after the Effective Begin Date. |
Any columns not mentioned above are not required for import.
Codelist Normal Range and Text Normal: Vault will produce an error based on the Codelist Normal Range and Text Normal column data, if entered, when you attempt to save a range for codelists and text normals that is out of range.
Uploading Lab Normal Range Documents
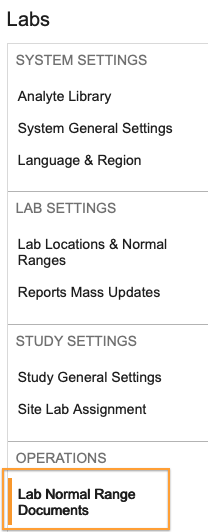
You can upload copies of normal range documentation for verification and reference use in the Operations section of the Labs tab.

To upload normal range documents:
-
Navigate to Labs > Lab Normal Range Documents.
- Click Upload Document.
-
Fill out the required fields.

- Initiated By Study: The study associated with the documented normals.
- Initiated By Site: The site associated with the documented normals.
- Associate to: You can choose to associate the document with an existing lab location or create a new one.
- Associated Lab: The associated lab location if using an existing lab location.
- Drag and drop your normal range document to upload, or click the upload area to browse for a file.
- Click Upload.
You can lock documents to protect the integrity of the data. Locked documents will exist in a read-only state until unlocked.
To lock a normal range document:
-
Hover over the Lab ID column and click on the More Actions menu.
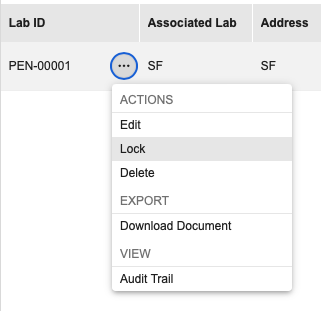
- Click Lock.
- Your document is locked and the Edit and Delete options in the More Actions menu will be disabled until the document is unlocked.
Validation Errors
The table below lists possible validation errors and their solutions:
| Error | Explanation | Steps to Resolve |
|---|---|---|
| Field is required or field must not be empty. | This field is required. | Provide a value for this field. |
| Lower Normal can't be greater than Upper Normal. | The lower normal must have a lower number than the upper normal. | Enter a lower number in the lower range and a higher number in the upper range. |
| Upper Range must be greater than Lower Range. | The lower range must have a lower number than the upper range. | Enter a lower number in the lower range and a higher number in the upper range. |
| Age Unit is required if Age is defined. | An Age Unit is required if a number is entered into the lower or upper age. | Enter an Age Unit. |
| Age Ranges must not overlap for the same Effective Date. | There are conflicting normal ranges for the Age Range and Effective Date fields. | Update the Effective Date or change the Age Range. |
| A record already exists with those parameters. | The analyte normal ranges and related parameters already exist. | Change the normal range parameters. |
| Cannot import Normal Range that references an archived analyte. | The normal range you’re trying to import references an analyte that has been archived. | Import a normal range that doesn’t reference an archived analyte. |
| Upper/Lower Normal cannot be defined for an analyte that is a codelist or text data type. | The associated analyte for the normal range you're trying to import is a codelist or text data type, which can't be imported. | Enter an analyte that is a number or unit data type. |
| Lower Age Modifier is required if Lower Age is defined. | You’ve entered a Lower Age but the Lower Age Modifier field is blank. | Select a Lower Age Modifier. |
| Upper Age Modifier is required if Upper Age is defined. | You’ve entered an Upper Age but the Upper Age Modifier field is blank. | Select an Upper Age Modifier. |
| Lower Age is required if Lower Age Modifier is defined. | You’ve entered a Lower Age Modifier but the Lower Age field is blank. | Enter a Lower Age. |
| Upper Age is required if Upper Age Modifier is defined. | You’ve entered an Upper Age Modifier but the Upper Age field is blank. | Enter an Upper Age. |
View an example template of a completed Lab Normal Import file below:
Download a completed example template
Adding Normal Ranges
You can manually add Normal Ranges in addition to or instead of uploading them via the template above.
To manually add Normal Ranges:
- Navigate to Labs > Lab Locations & Normal Ranges.
- From the Lab Locations table, click the Lab ID for which you’d like to upload or edit ranges.
- To add a new range, click + New Normal Range.
- From this point, you can begin filling in the table with your data. You can edit which columns you’d like to include by clicking the gear icon in the right-hand corner of the table and selecting Edit Columns. When finished entering data, click Done to save your changes.
Note that the Test Code field is an open text field where you can enter related blood work.
Deactivate a Normal Range
Vault doesn’t allow you to delete Normal Ranges for existing Lab Locations. However, you can change the Status of a Normal Range to _Inactive.
To deactivate a Normal Range:
- Navigate to Labs > Lab Locations & Normal Ranges.
- Locate the Lab Location containing the Normal Range that you want to deactivate.
- Click the Lab ID to open Normal Ranges for that _Lab Location.
- Click Edit Normal Ranges.
- Locate the row for the Normal Range you want to deactivate.
- In that row, select Inactive for Status.
- Click Done.
If a Normal Range is missing the Measurement Unit, Vault automatically assigns that range the Incomplete status.
Approving Normal Ranges
If approval is enabled in System General Settings > General Settings, Normal Ranges must have the Active status to be used in a Lab form. Refer to the table below for more information about Normal Range statuses.
| Status | Description |
|---|---|
| Pending Approval | Normal range is waiting for approval. Normals won't load in the eCRF until they've been approved. |
| Incomplete | Normal range is missing units. |
| Active | Normal range is approved. |
Normal Ranges
Last Updated: 23R1
This video provides instructions on how load Normal Ranges in the Labs Module.
Reports Mass Updates
You can perform jobs specific to the Labs module from Labs > Reports Mass Updates. For more information on the types of jobs available in this tab, refer to the table below.
To run a job:
- Navigate to Labs > Reports Mass Updates.
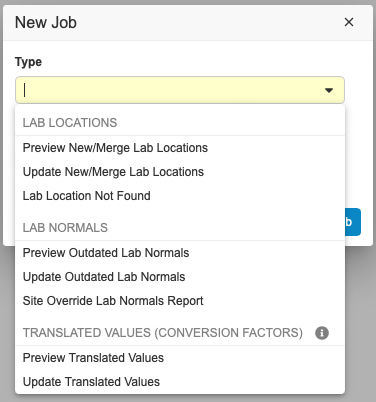
- Click New Job.
-
Select a Type for the job.
- Select the Study that you want to run the job in.
- Click Run Job. Vault begins the job. When finished, Vault sends you an email notification with a link to download the job log and any relevant output files.
Updating Lab Locations & Outdated Normals: You must run the Update New Lab Locations job before running the Update Outdated Lab Normals job in order to update Lab Locations and normal ranges effectively.
| Job | Description |
|---|---|
| Preview New/Merge Lab Locations | This job allows you to preview the updates that will go into effect if the Update New/Merge Lab Locations job is run. |
| Update New/Merge Lab Locations | This job updates any Lab forms that reference a merged Lab Location to reference the approved Lab Location. Lab normals will also be updated to the normals in the approved Lab Location. Note that Locked and Frozen items will not be updated. You should run this job after merging Lab Locations into an approved Lab Location. |
| Lab Location Not Found | This job shows a listing of every time a Site has marked a Lab Location as Lab Location Not Found. |
| Preview Outdated Lab Normals | This job allows you to preview the updates that will go into effect if the Update Outdated Lab Normals job is run. The Update Outdated Lab Normals job may break SDV/DMR/Signatures as it updates item values. You can use this preview job to check whether that may happen. |
| Update Outdated Lab Normals | This job updates a study's outdated normal values. Errors will appear for any unsuccessful updates. The Item Audit trail will show updates of Lab Normals. Note that Frozen and Locked Items will not be updated. You should run this job after editing Lab Normals for a Lab Location that is in use. This job may break SDV/DMR/Signatures as it updates item values. The output job file contains columns that will indicate whether SDV, DMR, or Signatures were broken. Note that the review state will only break if the column returns "Yes" and the job updates are successful. |
| Site Override Lab Normals Report | This report gives Data Managers the opportunity to review Override normals entered by Sites and update the Normal Ranges library if necessary. |
| Preview Translated Values | This job allows you to preview the updates that will go into effect if the Updated Translated Values job is run. The output of this job includes a row if the Value Translated is different from the Expected Value Translated or if the Lab Unit Value Translated is different from the Expected Lab Unit Value Translated. This job only applies to Labs Forms in studies that have Global Labs enabled. |
| Update Translated Values | This job updates the saved Value Translated and Lab Unit Value Translated values on items according to the updated unit conversions and default units that are saved in the Labs module. This job only applies to Labs Forms in studies that have Global Labs enabled. |