Creating Rules (V2)
19R2 & Later
Veeva EDC allows you to create rules that specify conditions that will trigger a system action based on the data that is entered. When data is submitted in a study object that is associated with a rule, the Veeva EDC Rules Engine evaluates the rule and performs the action you specify, such as making a query or adding a form. There are three types of rules in Veeva EDC:
- System-managed Rules: enforce constraints on single Items. System-managed rules are created through the Properties panel of the Item. Learn more about System-managed Rules.
- User Defined Rules: perform the Action specified by the user when the customizable Expression evaluates to true. User defined rules are programmed in Studio using the rule engine and formula expression grammar.
- Comparison Rules: compare dates and datetimes. Comparison rules are created through the Comparison Rules tab in Studio. Learn more about Comparison Rules.
Expression Engine Version: The content below refers to the updated formula grammar and new text-based rule editor (Expression Engine V2), which was released in April 2019 with 19R1. If your Study was created prior to the 19R1 release, see Creating Rules (V1).
Vault evaluates data that is entered based on the rules you define, and performs an action depending on the rule type and specified action.
You can view rules from two locations within Veeva EDC:
- Studio: You can view, create, and edit rules from Studio > User Defined Rules. To open the Properties panel for a rule, click anywhere in the rule’s row.
- EDC Tools: If you have permissions to access EDC Tools, you can view a list of rules in the study from EDC Tools > Rules. Data validation rules are displayed as clickable links that open a popup that displays read-only information about the rule, including the rule’s details, expression, and action.
See Tips & Best Practices for Rules for information on timezones as well as tips for using rules.
System-Managed Data Validation Rules
You can create system-managed data-validation rules by defining properties on Items in the Properties panel. Veeva EDC uses the properties you define as data validation rules that can enforce constraints on single Items. Veeva EDC automatically creates data validation rules for the following properties:
- Required field (Required)
- Minimum range validation (Minimum Value and Minimum Date)
- Maximum range validation (Maximum Value and Maximum Date)
- Future date validation (Future Date)
By default, Vault doesn’t list system-managed rules in the User Defined Rules tab. If your organization wants to display these rules in Studio, you can choose to do so.
To show system-managed rules in the User Defined Rules tab:
- Navigate to Admin > Business Admin > Study Settings.
- Click + Create.
- For Name, enter “show_system_rules”.
- For Study, select your Study.
- For Value, enter “true”.
- Click Save.
When enabled, system-managed rules are viewable in Studio’s Rules tab, but you can only edit them from the related Item Definition’s Properties panel. System-managed rules don’t have the rule name highlighted in blue and aren’t clickable.
Rule Properties
You can perform additional configuration on your rules from the Properties panel. Required properties have a yellow background. For an explanation of available properties, see Rule Design Properties.
How to Create a Rule
You can create new Rule Definitions in Studio from Studio > User Defined Rules. Depending on when your Study was created, you may have Version 1 or Version 2 of the rules editor and formula expression grammar. If your Study uses Version 1 of the Rule Editor and formula expression grammar, see Defining Rules in Studio (V1) for information about creating rules.
To create a new rule:
-
From Studio > Rules, click + New Rule.
- Enter a Name for your rule.
- Optional: If you don’t want your rule to be immediately active in your Study, deselect the Active checkbox. You can later activate the rule by selecting the Active checkbox again.
- Optional: Enter a Description.
- Optional: For Evaluate Rule When, select Event Group Creation. With this selection, Vault evaluates your rule when creating a new Event Group (for repeating Event Groups), instead of upon Form submission. When you select Default for this field, Vault evaluates all rules upon Form submission.
- Select a Form to apply the rule to if the rule expression or action contains
@Formidentifiers or the rule uses the Override Review Plan, Set Item Value, or Send Email rule action type. - Optional: Select the Within Current Event Group checkbox. For Add Event and Add Form rules, this setting prompts Vault to only add the Event or Form within the current Event Group, instead of any instance of that Event Group.
- Optional (Number Fields): Select a Blank Handling option. This controls how Vault handles blank values when evaluating numbers in your rule expression. See details below.
- Add your formula or expression in the Expression field. First, set any variables using
#definestatements, and then enter your formula on a new line. To get help with building formulas, click Formula Language Reference. This opens the Formula Reference in Veeva Clinical Data Help. You can use the Function Selector to add functions to your expression. See details below. Vault can also attempt to autocomplete identifiers, variables, operators, and functions. Press Ctrl + Space to see a drop-down list of autocomplete options. If you are defining a variable to refer to an Item with a Name that starts with an underscore (_), you must rename the variable to remove the underscore in the#definestatement. Otherwise, a syntax error will occur. - Click Validate to validate your expression. If there are any errors, Vault shows an Error icon on the line number. You can hover over the icon to see details about the error. Vault also lists all errors below the Expression field.
- Select a Rule Action. See details about the different actions available below.
- Depending on the Rule Action you chose, Vault prompts you to make various selections about the actions to execute. See details below.
- When you are finished creating your rule, click Save and Close.
Using the Function Selector
You can use the Function Selector to search for and add functions.
To add a function from the selector:
-
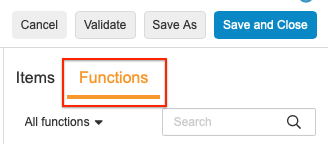
Click Functions to open the Function Selector.
-
Optional: Select a function type from the drop-down to filter the list by type of function.

- Locate your function in the list.
- Click the Function in the list to view details about the function. Double-click on the Function to immediately add it to your expression.
-
Optional: Click Help on this function to view additional documentation about this function.

- Click Insert to add the function into the Expression field.
To search for a specific function:
- Enter the function name in the Search field.
- Press Enter.
- Click the Function in the list to view details about the function. Double-click on the Function to immediately add it to your expression.
- Optional: Click Help on this function to view additional documentation about this function.
- Click Insert to add the function into the Expression field.
Unsupported Functions
In the current release, the Function Selector shows several functions from the Vault Platform that aren’t supported for use in rules. The following functions aren’t supported:
AddMonthsAsciiBeginsBlankValueContainsCurrencyRateDayOfYearFromUnixTimeIdInitCapIsoWeekIsoYearPiPicklistCountRandTimeNowTimeValueTruncUnixTimestampUrlencode
Using the Item Selector
When creating a rule, you can search for Item identifiers in your Study and insert them into your rule expression. By default, Vault lists all Items on the Form you selected in the Rule Details panel.
To search for an Item:
-
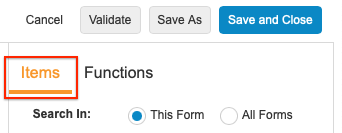
If it isn’t already open, click Items.
-
Optional: Select All Forms to search in all of your study’s forms. Leave this as This Form to only search in the Form you selected in the Rule Details panel.

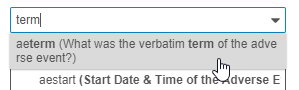
- Click into the Search field.
- Type one or more terms in the search box. You can search for the Name or the Label from your item. To search for an exact string, use double quotes around the terms (“informed consent”).
-
Vault searches for Items as you type. Select an Item from the Results dropdown to view it.
-
Optional: Hover over an Item and click Add () to add the item’s identifier to your rule expression.

- Click Clear () to clear your search.
For each Item in your search results, Vault shows the Name and the Label. Items are grouped by Item Group.
Rule Identifiers
The #define statement of a rule expression assigns a shorter variable name to an identifier, which specifies the Study objects the rule evaluates. This variable can easily be used throughout the rule expression. EDC’s Rule Editor lets you use two types of identifiers:
- Fully qualified identifiers: Identify the specific Study object whose data you want to evaluate, starting from the Event Group level. For example, when you only want to reference a specific instance of a form, or you want to reference an item on a different form, you use a fully qualified identifier.
- Floating identifiers: Identify the Study object referenced based on the context. For example, when you select a Form in the Rule Details panel, and then use the @Form identifier, the expression uses this context to evaluate the rule every time an instance of the specified Form is submitted.
Rule Reciprocity: As of 20R1 (April 2020), for any new rules that use ‘@Form’, Vault automatically evaluates the rule each time the identified form is submitted. When data for any other form or identifier referenced in the rule is submitted, Vault will also re-evaluate the rule.
Parts of a Rule Identifier
The rule identifier contains multiple components:
| Component | Description | Notes |
|---|---|---|
$ |
Specifies that the identifier contains the full path to the object's location in the schedule. |
Learn more about fully qualified identifiers. |
@ |
Specifies that the identifier is a context variable (floating identifier such as @Form, @Event, or @ Event Group) OR is a system variable. |
Learn more about floating identifiers. |
* |
For repeating objects, references all values of the repeating object identifier as an array. |
Learn more about aggregate identifiers. |
[#] |
For repeating objects, references a specific instance of the repeating object using its sequence number. | Learn more about referencing sequence numbers in rules. |
.attributes__v |
System references, which provide access to additional fields on an object. | Learn more about Veeva EDC system references. |
Fully Qualified vs Floating Identifiers
The format you use when entering the identifier into the Rule Expression field indicates to the system whether you are using a fully qualified identifier or a floating identifier.
In most cases, fully qualified identifiers begin with a dollar sign ($), which indicates to the system that you are fully qualifying the reference to the study object.
Fully qualified identifier format example:
$EVENTGROUP.EVENT.FORM.ITEMGROUP.ITEM
Floating identifiers always begin with an at sign (@), which indicates to the system that you want it to look at the study object that is pointed to based on the context.
Floating identifier format example:
@EventGroup.EVENT.FORM.ITEMGROUP.ITEM, @Event.FORM.ITEMGROUP.ITEM, or @Form.ITEMGROUP.ITEM
In the Rule Action, the denotation of the “@” depends on the dynamic action scope.
@Event and @Event Group The study object that the @Event or @Event Group floating identifiers reference depends on whether they are used with the @Form floating identifier:
- Used without @Form: Refer to the Event or Event Group in the context the rule is evaluated in.
- Used with @Form: Refer to the parent Event or Event Group of that form.
Using Floating Identifiers: In most cases, if you use a floating identifier (also known as ‘wildcard identifier’) in your rule expression, you should use the same identifier in your rule action and both the rule expression and rule action should be qualified to the same level. This ensures that the rule action and rule expression are scoped to the same object instances in the Casebook. Otherwise, the rule action may impact unintended forms.
When a rule contains a repeating Event Group, Event, or Form that is fully qualified, Vault looks at every instance that matches that identifier. For this reason, it’s recommended that you not use fully qualified identifiers on repeating objects unless you want the rule to execute against all of them.
If you need to create a new Rule using the non-reciprocal behavior (pre-20R1), work with your Veeva Services representative to do so.
Avoid Errors with @Form in 23R2: As of 23R2, rules using @Form or ‘this form’ identifiers when the associated form in the Rule Details panel doesn’t match the identifier must be fixed or inactivated to avoid validation errors.
Rule Identifiers and Permutations
How the identifiers in a rule are defined, or qualified, determines how the rule engine evaluates the study data those identifiers reference. The way identifiers are written impact the behavior of the rule and, in some cases, the performance of EDC. Rule permutations are the different ways a rule will be evaluated against study object data.
The identifier is the path to the study object that the rule is bound to. The system looks at every object instance that matches the location where the object is identified, and runs against that record. A rule containing a fully qualified identifier will only permute against the study object in the location pointed to. If a rule contains a fully qualified identifier for a repeating object, the rule will evaluate against all instances of the repeating object. This may lead to unintended results and excess permutations when the rule runs against and performs a rule action based on repeating event groups, forms, or item groups.. Learn more about best practices for optimizing rule permutations.
When the rule has too many permutations, this can unintentionally impact the submission time for forms and the performance of your vault. In most cases, we recommend you use a floating identifier such as @Form, @Event, or @Event Group (also known as “wildcard identifiers”) when writing a rule expression that references a repeating object. It is recommended to use fully qualified identifiers only when you want your rule to evaluate the following:
- A single instance of an object in the schedule, for example:
$SCREEN.SCREEN.DM.igDM.AGE - Aggregate logic, for example:
$LOGS.LOGS.AE[*].igAE.AEOUT - Specific instances of event groups or forms, for example:
$TRT[1].WEEK.EX.igEX.EXSTDTC
The following examples demonstrate how the use of fully qualified identifiers and floating identifiers impact the number of rule permutations.
In each incorrect example, the AEITEM is fully qualified, even though the AE form is a repeating form. This tells the rules engine to multiply the rule for each occurrence of the AE form. If a subject has 100 AE form instances in their casebook, then whenever the other form is saved, the rule permutes 100 times to evaluate the data the identifier points to in each of the AE forms.
Example of incorrect identifier usage, one repeating form:
$LOGS.LOGS.AE.igAE.AEITEM
In the following example, only 1 AE form instance in the subject’s casebook is referenced, so the rule only permutes once each time the other form referenced in the rule expression is submitted.
Example of correct identifier usage, using a floating identifier for the main repeating form:
@Form.igAE.AEITEM
If multiple repeating forms are referenced using fully qualified identifiers, then the number of possible permutations grows as a multiple of the number of instances of both forms. For example, if the rule uses fully qualified identifiers to reference both the repeating Screen form and AE form, and if there are 100 AE form instances and 20 MH form instances in the subject’s casebook, the rule has 100 AE x 20 MH form repeats = 2000 permutations.
Example of incorrect identifier usage, two repeating forms:
$SCREEN.SCREEN.MH.igMH.MHITEM
$LOGS.LOGS.AE.igAE.AEITEM
The following example uses a floating identifier, so only 1 AE form instance in the subject’s casebook is referenced. This rule has 1 AE instance x 20 MH form repeats for the casebook = 20 permutations.
Example of correct identifier usage, using a floating identifier for the main repeating form:
@Form.igAE.AEITEM1
$SCREEN.SCREEN.MH.igMH.MHITEM
The permutations continue to multiply as more fully qualified identifiers are used in the rule expression to indicate multiple items on multiple repeating forms.
In the following example, with 100 AE form instances and 20 MH form instances in the subject’s casebook, the rule has 100^2 AE instances x 20^3 MH form instances for the casebook = 80,000,000 permutations.
Example of incorrect identifier usage, two repeating forms with multiple identifiers:
$LOGS.LOGS.AE.igAE.AEITEM1
$LOGS.LOGS.AE.igAE.AEITEM2
$SCR.SCR.MH.igMH.MHITEM1
$SCR.SCR.MH.igMH.MHITEM2
$SCR.SCR.MH.igMH.MHITEM3
In the following example, only 1 AE form instance in the subject’s casebook is referenced. This rule has 1 AE instance x 20^3 MH form instances for the casebook = 8,000 permutations.
Example of correct identifier usage, using floating identifiers for the main repeating form:
@Form.igAE.AEITEM1
@Form.igAE.AEITEM2
$SCR.SCR.MH.igMH.MHITEM1
$SCR.SCR.MH.igMH.MHITEM2
$SCR.SCR.MH.igMH.MHITEM3
You can further optimize the rule permutations when you write rules referencing repeating objects by using item-to-form and form-to-form linking.
Reciprocal Rules
When a rule expression references data from multiple Forms, even when both floating (@) and fully qualified identifiers are used, Vault will evaluate the rule upon the submission of the Form that is selected in the Rule Details panel and will also re-evaluate the rule each time data changes on any Form that is referenced in the rule expression. This process is called Reciprocal Rules. For example, if you use @Form to point to a Vitals form that you use in multiple Events, and also use a fully qualified identifier to point to a PE form, Vault will run the rule and evaluate the data in the Study object that is pointed to each time a Vitals form or the specific PE form is submitted.
Reciprocal form behavior also applies to the Rule Action. For Query rules, for example, in order to ensure that the query fires on the same instance(s) being evaluated in the rule expression, it is important for the Query Rule action identifier to match the expression identifier. When the identifier in the rule expression uses @Form, @Event, or @Event Group, the query action should match with ‘this form’, ‘this event’, or ‘this event group’, respectively.
Using Identifiers with Repeating Objects
Referencing Sequence Number in Rules
When writing a rule that references a repeating object, you can reference the Sequence Number of a repeating Event Group, Form, or Item Group to only evaluate the rule against or perform the rule action upon a specific instance of the repeating object. For example, you could configure a Set Item Value rule to only set the item’s value in the first sequence of the repeating Item Group containing it.
To reference the sequence number in the rule expression, append the number in square brackets after the repeating object’s identifier but before the period of any subsequent identifiers.
TreatmentCycle[2].Visit1.event_date__v or $egSCR.evSCR.MH[1].igMH.MHSTDAT
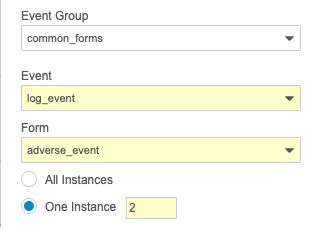
To reference the sequence number in the rule action configuration, select One instance for the repeating object and enter the sequence number.
Referencing Previous/Next Instance in Rules
When using floating (@) identifiers (also known as “wildcard identifiers”), you can also reference either the previous or next instance of a repeating object, instead of a specific sequence number. To do so, include “+1” (for next) or “-1” (for previous) between the brackets, instead of the sequence number. For example, @EventGroup[-1].Visit1.event_date__v.
Previous/next identifiers require an anchor identifier within the expression. An anchor identifier is an identifier that is the same as the identifier using previous/next, upward in the hierarchy from the previous/next identifier. For example, if @Form.PK[-1].Measurement is used in the expression, then you must also reference @Form.PK.Measurement, or another Item in the PK item group.
The following use cases are supported:
@Form.ItemGroup[-1/+1].Item@Form[-1/+1].ItemGroup.Item@Form/LinkedForm.ItemGroup[+1/-1].Item@EventGroup[-1/+1].Event.Form.ItemGroup.Item@EventGroup[-1/+1].Event.event_date__v
Note that you can only use a previous/next modifier once per identifier.
Aggregate Identifiers
For repeating Event Groups, Forms, or Item Groups, as well as linked Forms, you can use an aggregate identifier to point to a value across all instances. For example, you could use an aggregate identifier to look up the Lesion Size item on all instances of the repeating Measurements form. Note that floating identifiers (also known as “ identifiers”) can’t use an aggregate identifier.
Aggregate identifiers use square brackets around an asterisk ([*]) after the Name of the repeating object. See the examples below.
Aggregate identifiers are “bottom up”. If you have an aggregate identifier, all repeating identifiers below it in the hierarchy must also be aggregate. For example, if a repeating Form contains a repeating Item Group, you must use an aggregate identifier for the Item Group if you use one on the Form. Note that this does not apply if the lower components aren’t repeating (a repeating Form with a non-repeating Item Group).
$Visit_1.Visit_1.Measurements[*].Lesions.Lesion_Size
$Treatment_Visits[*].Visit.event_date__v
@Form.Physical_Exam[*].Abnormalities
$eventgroup.event.form.itemgroup[*].item@eventgroup.event.form.itemgroup[*].item@event.form.itemgroup[*].item@form.itemgroup[*].item$eventgroup.event.form[*].itemgroup[*].item@eventgroup.event.form[*].itemgroup[*].item@event.form[*].itemgroup[*].item@form.itemgroup[*].item$eventgroup[*].event.form[*].itemgroup[*].item@event.form[*].itemgroup[*].item$eventgroup.event.form1/form2.itemgroup[*].item@eventgroup.event.form1/form2.itemgroup[*].item@event.form1/form2.itemgroup[*].item@form1/form2.itemgroup[*].item$eventgroup.event.form1/form2[*].itemgroup[*].item@eventgroup.event.form1/form2[*].itemgroup[*].item@event.form1/form2[*].itemgroup[*].item@form1/form2[*].itemgroup[*].item$eventgroup.event.form1[*]/form2[*].itemgroup[*].item@eventgroup.event.form1[*]/form2[*].itemgroup[*].item@event.form1[*]/form2[*].itemgroup[*].item$eventgroup[*].event.form1[*]/form2[*].itemgroup[*].item-
@event.form1[*]/form2[*].itemgroup[*].item - Any combination of the above with a Property
- Any of the above with a sequence number instead of ‘*’, except for the linked form.
There is a special set of functions for use with aggregate identifiers. Other functions cannot be used with aggregate identifiers. Note that some of these functions, for example, Sum, can be used on regular identifiers as well. Learn more about functions used with aggregate identifiers and see some examples for their use here.
Referencing Value from Previous Event
When you re-use an Item across non-repeating objects in your Study, you can reference its value on the previous Event using @PreviousEvent. A rule with an identifier using @PreviousEvent evaluates on every previous matching instance prior to the Event where the rule is triggered.
For example, your Study may use a single Dosing form across multiple Events. You can use @PreviousEvent to compare the value of an Item on the Dosing form in Visit 3 to the value of that Item in the previous event. If Visit 2 did not occur, the rule will find the value in Visit 1.
#define dose_amount @Form.dosing.dose_amount
#define previous_amount @PreviousEvent.dosing.dosing.dose_amount

dose amount != previous_amount

Rule Details Form: Dosing
You can use @PreviousEvent more than once in a single rule expression, but @PreviousEvent can only point to one Form. When using @PreviousEvent, you must also use an @Form identifier to anchor the rule to the previous instance.
Note that when you use a @PreviousEvent identifier followed by a Form, the system will scan the expression to find the next previous event that resolves the rest of the identifier. It will also find all previous events that resolve the rest of the identifier and will execute accordingly on each matching instance. For example, if a schedule contains Day 1, Day 2, Day 3, and Day 4 events in that order, and Days 1 and 3 contain FORM1 while Days 2 and 4 don’t contain FORM1, and if a rule containing the @PreviousEvent.FORM1.ig1.item1 identifier is evaluated at Day 4, the system would scan to find and evaluate all previous events that also contain the FORM1.ig1.item1 identifier. In this case, the identifier would evaluate for both Day 1 and Day 3.
@PreviousEvent supports the same attributes and identifiers as @Event (change_reason__v, did_not_occur__v, event_date__v, name__v, sequence__v, and all valid attributes and identifiers on @Form.)
Using @Previous Event with Repeating Event Groups: When using @PreviousEvent with repeating event groups, if you want the rule to only evaluate on specific instances, you must reference the specific sequence number in the rule identifier. Otherwise, the rule will evaluate on all previous events.
Vault uses the sort order you define in the Sort Events By property to determine the previous event. When a rule with @PreviousEvent is run, the system evaluates all events that precede the triggering event according to the chosen sorting option. Options for Sort Events By include:
- Event Date: Vault sorts Events by their Event Date when determining the previous Event. For example, a Casebook contains Event 1, Event 2, and Event 3. Event 1 is performed first, followed by Event 3 and then Event 2. When sorting by Event Date, if a rule checks for the previous event at Event 3, the system finds Event 1 as the previous event. Repeating and unscheduled Events are included in this sorting method, and can be used as the previous event when teh event date is prior to the date of a scheduled event.
- Schedule: Vault sorts Events as they appear in the Casebook schedule (as designed in Studio), regardless of Event Date. For example, a Casebook contains Event 1, Event 2, and Event 3. The Events appear in the schedule in that order. Even if a subject has Event 2 after Event 3 according to the Event Date, the system still uses Event 2 as the previous event when evaluating a rule in Event 3, as that is the defined schedule order. Repeating and unscheduled events are sorted by Sequence Number.
@PreviousEvent can only be used for Open Query rules and Set Derived Value rules.
Referencing System Variables and Attributes
You can reference system variables and their attributes in the Rule Identifier by using the at symbol (@) followed by the variable name. The following table lists some system variables that are commonly used in rules along with their associated attributes. Some attributes have set values which can be included for further refinement. For example, the system variable @Casebook can be used with the attribute subject_status__v, which can be used with status attributes including enrolled__v. An identifier that references only only Casebooks (@Casebook) whose Subject Status (.subject_status__v) is Enrolled (.enrolled__v) would be written as follows: @Casebook.subject_status__v.enrolled__v. Learn more about system variables you can use when writing rules.
Handling Intentional Blanks
For @PreviousEvent rules, Vault skips any Event marked as Did Not Occur by default.
This is controlled by the Skip Intentionally Left Blank and Did Not Occur Values checkbox in the Rule Details panel.
| Selection | Impact |
|---|---|
| Yes (Selected) | For @PreviousEvent identifiers, Vault skips over Events marked as Did Not Occur. For [-1]/[+1] identifiers, Vault skips over Forms or Items marked as Intentionally Left Blank. |
| No (Cleared) | For @PreviousEvent identifiers, Vault includes Events marked as Did Not Occur when determining the previous Event. For [-1]/[+1] identifiers, Vault includes Forms or Items marked as Intentionally Left Blank (default behavior before 22R3). |
Referencing Data from Linked Forms
During data collection, it’s often necessary to relate the data from two or more repeating forms together to group similar or related data or indicate cause and effect. For example, an Adverse Event can be linked to one or more Concomitant Medications that are related to that Adverse Event.
You can reference data in a rule expression from both the rule’s form and any forms that are linked to it. For example, if you’re writing a rule on a Concomitant Medication form, you can reference data from the linked Adverse Event form.
A rule expression can’t contain identifiers that are outside the context of the linked form. The Form selected in the Rule Details panel is the “main” form that the @Form floating identifier references. You can access data from any Forms that are linked to this main form. All other identifiers in the expression must be in either this main form or on one of the linked forms. For example, if a ConMeds form is linked to an AE form, but not linked to a Medical History form, you could write a rule and check that the AE start date is before the CM start date, but you couldn’t check that the Medical History start date is before the CM start date. This is because in this example, the Medical History form isn’t linked to the Concomitant Medication form.
Note that, when you use the @Form floating identifier, you must select the referenced form in the Rule Details panel. In most cases, if you use a floating identifier in your rule expression, you should use the same identifier in your rule action and both the rule expression and rule action should be qualified to the same level. This ensures that the rule action and rule expression are scoped to the same object instances in the Casebook. Otherwise, the rule action may impact unintended forms.
To reference an Item or form-level attribute of a linked Form, include the linked form’s identifier after the form identifier or @Form, separated by a forward slash (/). You can reference a linked Form in a fully qualified identifier or a floating identifier. Note that you cannot reference a specific sequence number after the linked Form if it is repeating. In the following examples, the identifiers point to the Is the adverse event ongoing item on the Adverse Event form, which is linked to the Concomitant Medication form:
Fully qualified form link identifier example:
$Logs.CommonForms.ConcomitantMedication/AdverseEvent.AdverseEventDetails.Ongoing
Floating identifier form link identifier example:
@Form/AdverseEvent.AdverseEventDetails.Ongoing

Rule Details Form: Concomitant Medication
For example, on the Concomitant Medication form, you could write a rule to check whether the linked Adverse Event record is still ongoing.
#define ongoing @Form/AdverseEvent.AdverseEventDetails.Ongoing

ongoing = true

Rule Details Form: Concomitant Medication
Item to form link identifier example:
#define ongoing @Form.ig_CM.STDAT/AdverseEvent.AdverseEventDetails.Ongoing

ongoing = true

Rule Details Form: Concomitant Medication
Form to form linking example (AE to CM):
Form design: The CM form is the @Form defined for the rule.
Rule description: The CM end date is before the AE start date for any CM-to-AE linked forms.
Rule expression:
#define CMENDAT @Form.ig_CM.CMENDAT
#define AESTDAT @Form/AE[*].igAE.AESTDAT
Not(IsBlank(CMENDAT)) && Not(IsBlank(AESTDAT))
&&
CMENDAT < Max(AESTDAT)
Actions: Open Query > Item > this form > ig_CM > CMENDAT
Form to form linking example (AE and CM):
Form design: the AE form is the @Form defined for the rule.
Rule description: AE Another Medication Given was checked and no form link was added to the CM form.
Rule expression:
#define AECONTRT @Form.igAE.AECONTRT
#define CM @Form/CM.count__v
AECONTRT = true  &&  CM = 0
Actions: Open Query > Item > this form > igAE > AECONTRT
Item to form linking example:
Form design: The EOS form has the item DSREASAE and Date Type: Form Link. This item is progressive display when the reason from Discontinuation = ADVERSE EVENT and the following rules are used to check the data on the linked AE.
Rule description: EOS reason for discontinuation is AE, and Did the Adverse Event Cause the Subject to be Discontinued From the Study? field is not Yes for the linked AE form.
Rule expression:
#define DSREAS @Form.igEOS.DSREAS
#define AELink @Form.igEOS.DSREASAE/igAE.AEDIS
DSREAS = “ADVERSE EVENT” && AELink != "Y"
Actions: Open Query > Item > this form > igEOS > DSREASAE
Inactivating Rules
You can activate and inactivate rules by clicking the Active checkbox in the Rule Details panel when you configure the rule. Inactive rules are not executed upon data entry or form submission. If you misconfigure Add Query rules and these rules add unwanted queries to your environment, you can inactivate the misconfigured rules and then remove the unwanted queries by running a Run Rules job.
Archiving (Deleting) Rules
If you need to remove a rule from your study, you can archive it. Archived rules behave as follows:
- The system does not execute archived rules
- The system excludes archived rules from validations and documentation
- Archived rules are deployed in the Archived status.
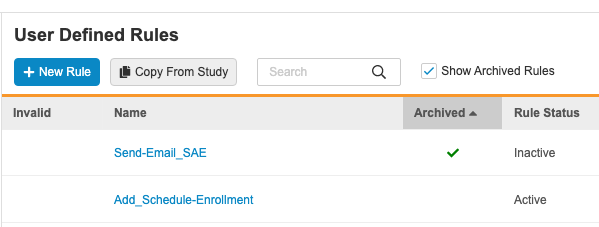
By default, archived rules aren’t included in the User Defined Rules listing. Select the Show Archived Rules checkbox to include them. Archived rules have a green checkmark () in the Archived column.
How to Archive a Rule
To archive a rule:
- Navigate to Studio > User Defined Rules for your Study.
- Locate your rule in the list.
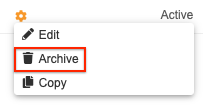
- Hover over the rule’s Name to show the Actions menu.
-
From the Actions menu, select Archive.
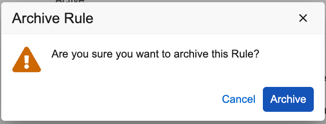
- In the Archive Rule confirmation dialog, click Archive.
Your rule is now Archived. Select the Show Archived Rules checkbox to show it in the list.
How to Restore an Archived Rule
To restore an archived rule:
- Navigate to Studio > User Defined Rules for your Study.
-
Select the Show Archived Rules checkbox.
- Locate your rule in the list.
- Hover over the rule’s Name to show the Actions menu.
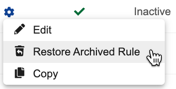
- From the Actions menu, select Restore Archived Rule.
Vault restores the rule. The rule is now active and will execute normally.
Copying Rules
Vault allows you to copy rules from both the current Study and from another Study in your vault.
From the Current Study
Open an existing Rule Definition and click Save a copy to save a copy of your rule.
From Another Study
You can also copy Rule Definitions from another Study. Note that if matching identifiers don’t exist in your (the target) Study, Vault copies the rules as “invalid”, and you’ll need to update the identifiers and reactivate the rules before they are available for use.

See Reusing Design Definitions for details on copying rules from another study.
To resolve an invalid rule:
- Open the invalid rule in the Rule Editor from Studio > Rules.
- Replace any invalid identifiers with valid ones.
- Select the Active checkbox.
- Click Save.
Repeat that process for each invalid rule.
Available Rule Action Types
The following Action Types are available for rules in Veeva EDC:
| Action Type | Fields | Result |
|---|---|---|
| Open Query | Query Level, Item/Event, Query Message |
When the expression evaluates as True, Vault will create a query on the selected Item or Event Date with the entered Query Message (field labeled "Enter message" in the Rule Action panel). Query messages have a 500 character limit. Special characters can be used in query messages, but they may not appear correctly in export files. |
| Add Event Group | Event Group | When the expression evaluates as True, Vault will add the selected Event Group to the casebook schedule. |
| Add Event 1 | Event | When the expression evaluates as True, Vault will add the selected Event to the casebook schedule. |
| Add Form 1 | Form | When the expression evaluates as True, Vault will add the selected Form to the casebook schedule. |
| Disable 4 | Identifier | When the expression evaluates as True, Vault will disable the selected Item. |
| Add Assessment 2 | Assessment | When the expression evaluates as True, Vault will create an Assessment. |
| Set Subject Status | Status | When the expression evaluates as True, Vault updates the subject's status to the selected status, and records the status change date. If the subject's current status and the status for the rule are the same, no change occurs. |
| Create Integration Record1 | N/A | When the expression evaluates as True, Vault creates an Integration Task Record. |
| Set Derived Value | Item | Vault populates the selected Item with the calculated result of the expression. |
| Send Email | N/A | When the expression evaluates as True, Vault sends an email, using the configured Subject and Message, to a pre-configured recipient group. |
| Progressive Display 2, 3, 4 | N/A | In the current release, this action type is only available for system-generated rules. To configure Progressive Display, edit an item's properties from Studio > Schedule. Learn more. |
| Override Review Plan | Review Plan Task, Override default plan with | When the expression evaluates as True, Vault overrides the default Review Plan for the Form (the Form Definition selected in the Rule Details panel) with the chosen Review Plan. |
| Create Protocol Deviation | Summary, Category, Subcategory, Severity, Date of Deviation, Link to, Description | When the expression evaluates as true, Vault creates a programmatic Protocol Deviation with the chosen Category, Subcategory, and Severity, and sends that Protocol Deviation to the appropriate monitoring users. |
| Set as Ready to Randomize 5 | N/A | When the expression evaluates as true, Vault marks the subject as Ready for Randomization, which enables the Randomization option in the Data Entry tab. |
| Assign Subject Latest Arm | Arm | If the rule evaluates to true, Vault assigns the latest version of the selected Arm to the subject. |
| Assign Subject Latest Cohort | Cohort | If the rule evaluates to true, Vault assigns the latest version of the selected Cohort to the subject. |
| Assign Subject Latest Substudy | Substudy | If the rule evaluates to true, Vault assigns the latest version of the selected Substudy to the subject. |
|
1 Contact Veeva Support to enable this action type. 2 This action type is only available in vaults where Role by Study is enabled. Contact Veeva Support to enable Role by Study in your vault. 3 This action type is only available in studies using the automated deployment model. 4 The availability of this action type depends on the Rules Version field on the Study Configuration record. If the Rules Version is "2", the Disable action is not available. 5 This action type is only available in studies with Randomization configured. |
||
Rule Processing Order
After a site user completes a Form, Veeva EDC processes rules in the following Action Type order:
- Set Item Value or Set Derived Value
- Dynamic Rules (Add Event Group, Add Event, Add Form)
- Query
Within each rule type, Veeva EDC processes rules in the following order:
- Derivation Rules
- Cross Form - Same Event Rules (controlling and dependent objects are in different Forms)
- Cross Form - Cross Event Rules (controlling and dependent objects are in different Events)
- All other rules except Send Email
- Send Email rules
Vault processes rules in this order so that any Query-type rules that are affected by derived values or any added Event Groups, Events, and Forms can be processed with all expected data present.
Disable Rules
Disable action rules don’t follow the rule processing order because unlike other rule actions, disabling an Item or Item Group is not potentially impacted by the actions of other rules. Vault evaluates Disable action rules when a user saves a Form containing the controlling Item.
Data Validation Queries with Rules
You can create data validation rules across multiple items, as well as create rules for single items not based on the properties for system-managed rules. When an entered Item value does not match your defined criteria, Vault creates a query. To create a data validation rule, select Query for the Rule Action.
Data validation rules display as clickable links in the Rules tab. Clicking the link reopens the Add Study Rules dialog, where you can edit your rule. To open the Properties panel for a rule you created, click anywhere in the rule’s row.
Queries on Read-only Items: Vault doesn’t allow users to comment on (answer) queries against read-only Items.
Rule Execution
By default, rules execute upon form submission (when the site user clicks the Complete button). For query rules, you can choose to delay execution of the rule by marking it as a post-save rule. This means that once the user submits the form, instead of creating and displaying the query immediately, Vault adds the rule to a processing queue and displays the query when finished. This is helpful for improving rule performance, especially for complex rules that check many data points.
To set a rule as a post-save rule, select the Post-save rule checkbox under Rule Execution in the Rule Details panel.
Study administrators can monitor the execution of post-save rules and view any errors from Tools > EDC Tools > Rules > Error Console. Vault sends a notification to any study users with the Run Rules permission whenever an error occurs.
Example Open Query Rule
#define DIASBP @FORM.Blood_pressure.Diastolic_blood_pressure
#define SYSBP @FORM.Blood_pressure.Systolic_blood_pressure

DIASBP > SYSBP

Rule Details Form: Vital Signs
In this example, the form containing the DIASBP and SYSBP items to be evaluated is selected in the Rule Details panel. In this case, Veeva EDC evaluates whether the Diastolic_blood_pressure item is greater than the Systolic_blood_pressure item. The study designer can configure the rule action to generate a query when the expression evaluates to true. Both DIASBP and SYSBP are numbers, so the study designer must consider blank handling. Since this form uses a floating identifier, in most cases the same identifier should be used in the rule action and both the rule expression and the rule action should be qualified to the same level.
Create a Query Only in Certain Casebook Versions
You can configure a rule to evaluate only subject Casebooks on a certain version. For example, you could have a rule run on all Casebooks with a Version less than 8 and only where the Screening Event Date is earlier than the date of the casebook version amendment from 7 to 8. This type of rule is useful when you’ve updated your Casebook Definition in such a way that a certain rule is no longer valid based on the new design.
To reference a Version number, use the following syntax: @Casebook.version__v.
#define EVDAT $Screening.Screening.event_date__v
#define CBV @Casebook.version__v
#define BRTHDAT $Screening.Screening.Demographics.DM.BirthDate.value__v

(( EVDAT > date(2018, 12, 15)

&&

CBV > 7))

&&

((EVDAT - BRTHDAT) <= 18)
In the example formula above, when the Screening Event Date is after 2018-12-15 and the casebook version is greater than 7, the rule creates a query if the subject is not 18 at the time of the Screening Event. It would also be possible to write this rule using the @Form floating identifier, as long as the demographics form only exists in the Screening Event.
Note that, since this rule expression uses a floating identifier, in most cases the rule action should be qualified to the same level.
Dynamic Study Design with Rules
Veeva CDMS lets you design your Study dynamically by using rules to add Forms, Events, and Event Groups to your Study based on user-entered data. For example, you can configure rules to control which Event Groups appear in a Casebook based on a subject’s cohort or randomization number or you can create a rule that adds the Follow Up Visit event when a user selects the Follow Up Visit Required checkbox on a form. Veeva CDMS refers to rule actions that modify the structure of a study by adding Forms (Add Form), Events (Add Event), and Event Groups (Add Event Group) and that are triggered by data that is entered into study forms as “dynamic actions”.
Post-Go-Live Edits to Dynamic Rules
When you modify the action identifier or Dynamic Action Scope of a dynamic rule (Add Form, Add Event, or Add Event Group), any existing rule results created before the changes become obsolete the next time the rule is evaluated. This process ensures data is only removed when no other valid rule justifies its presence in the schedule.
Examples of changes that will make existing rule results become obsolete:
- An action identifier is removed from the rule.
- An action identifier is changed to point to a different object.
- The specificity of an action identifier is updated (for example, changing the action of an Add Form rule from ‘this event’ to a specific event or event group).
- The Dynamic Action Scope is changed in any way
Managing Existing Rule Results
When you run the updated rule via the Run Rules job, the system cleans up all obsolete rule results and the dynamic objects they created. Before removing an object, the system checks for any other existing, non-obsolete rules that might still target the same object. This ensures that a dynamic object is only removed or marked for removal if there is no other valid rule requiring it to remain in the schedule.
Following the 25R3 release, if the updated rule is run via a form submission before it is run via a Run Rules job, the system will only attempt to clean up obsolete objects that are within the scope of the current evaluation. Prior to 25R3, such form submissions could remove objects across the entire casebook.
For complete cleanup of all obsolete records in a casebook, you must run updated rules in a Run Rules job after deploying changes.
Once a rule result is marked as obsolete, it will never become valid again.
Changes to the rule expression scope or making a rule inactive will not trigger the obsolete process.
Editing Dynamic Rules Without Removing Objects from the Study Schedule: If you want to update a dynamic rule action for a rule that is already in production without removing the dynamic objects in the schedule that the rule already created, you can inactivate the rule. After inactivating a dynamic rule, the system will ignore any existing results in future processing and will not mark them as obsolete.
=========
Post Go-Live Edits to Dynamic Rules: Changing action identifiers of a dynamic rule (Add Form, Add Event, or Add Event Group) will apply the change retroactively to a Casebook and delete all objects created by that rule action identifier by default. If you want to remove a dynamic action from a rule that is already in production without deleting the study objects the rule already created, you must inactivate the rule. Alternatively, if you remove an action identifier from a rule and create a new rule with that action target, we recommend that you run the old rule and then the new rule via the EDC Tools Rule Job to ensure the rule functions as expected.
Scoping the Dynamic Rule Action
When you write a dynamic study building rule, there are two components that drive where in the study schedule the rule action takes effect:
- The Dynamic Action Scope setting in the Rule Details panel
- The Rule Action identifier, specifically the level at which the identifier is qualified
When you add a dynamic Form or Event to your study schedule using a rule, you must set the Dynamic Action Scope in the Rule Details panel to configure the scope in which the rule action will take place. There are three options for configuring the Dynamic Action Scope:
-
Global: When the rule is evaluated, one action is performed across the whole Casebook. Regardless of where the rule is executed from, the Form, Event, or Event Group in the Rule Action is added to the Schedule everywhere the action identifier matches. When the Dynamic Action Scope is set to Global and only the Form is qualified in the rule action identifier, the Form will be added to every Event in the schedule where that Form exists. If both the Form and Event are qualified, the Form will be added to every Event Group in the Schedule where that Form exists in that Event.
-
Event Group: When the rule is evaluated, one action is performed within the Event Group instance where it was executed from.
-
Event: (For Add Form rules only) When the rule is evaluated, one action is performed within the Event where it was executed from. The action is taken on each matching Event individually based on where the rule is fired from, and rule results are specific to that Event.
The Add Event Group rule action takes effect at the global level by default.
The location of the Rule Action is determined by the Dynamic Action Scope and Rule Action identifier qualification level, but it is also important to understand how and when the rule is executed. This is based on the context provided in the Rule Expression. Learn more about writing a Rule Expression
Rule Conflicts
A rule conflict occurs when more than one dynamic rule tries to add the same study object to the schedule. For example, two Add Form rules that are configured with the same dynamic Form in the Rule Action are considered conflicting. In these situations, the system determines which rule “wins” based on the following hierarchy:
- The rule with the more specific Dynamic Action Scope always takes priority over rules with less-specific Dynamic Action Scope. Global scope is considered the least specific, and Event scope is considered most specific.
- If conflicting rules have the same Dynamic Action Scope, the one with the most specific (more qualified) Action Identifier “wins”. For example, an Add Form rule with an action identifier of egCYCLE_A > evDAY1 > VS1 will take priority over a rule with an action of ‘this event’ > VS1.
- If conflicting rules have the same Dynamic Action Scope and the exact same action identifier, then a rule that evaluates to true will add the object to the schedule. In this case, the existence of any true rule results will persist the object in the schedule, and to remove it, all existing results must be false.
Adding Events & Forms
You can conditionally add Events and Forms to a Casebook based on user-entered data by configuring a rule using the Add Event or Add Form action type on the controlling Item. When that rule expression evaluates as True, Veeva EDC automatically adds the dependent Event or Form to the Casebook. If the rule evaluates as False, Vault does not add the Event or Form.
To set an Event or Form in the schedule as dynamic and add them conditionally using a rule, you must set Dynamic to Yes in the Properties panel of the target Event or Form in the study schedule in Studio.
A single rule can be used to add multiple Events or multiple Forms to the schedule. Forms and Events that are added by the same rule share the same Rule Expression, so when one Form or Event gets added or removed, they all do. To add more than one Form or Event to the schedule with a single (Add Form or Add Event) rule, you can add additional objects to the rule action.
Unlike Event Groups, you do not have to create Add Event and Add Form rules for all Events and Forms in your Study. Forms and Events should be set as dynamic only when they are added to the schedule conditionally.
Scoping Add Form Rules
When configuring a dynamic rule, it is important to ensure that both the Dynamic Action Scope and Rule Action Identifier are configured correctly in order for the Rule Action to fire in the appropriate locations in the study schedule.
The following table shows where a Form named LBHEMA will be added into the study schedule based on what Dynamic Action Scope and Rule Action Identifier are selected.
Dynamic Action Scope & Action Identifier Configuration for Add Form Rules
| Rule Action: Add Form | Dynamic Action Scope | |||
|---|---|---|---|---|
| Event | Event Group | Global | ||
| Rule Action Qualification | 'this event' OR 'this event group' > 'this event' OR 'all events'1 > LBHEMA | Add LBHEMA to all events in the current2 event group | Add LBHEMA to all events in the current2 event group | Add LBHEMA to all events in the study schedule |
| 'this event group' OR 'all event groups'1 > evDAY1 > LBHEMA | Add LBHEMA to the current2 event, if current event is evDAY1 | Add LBHEMA to all evDAY1s in the current2 event group | Add LBHEMA to all evDAY1s in the study schedule | |
| egCYCLE > evDAY1 > LBHEMA | Add LBHEMA to the current2 event, if the current event is any evDAY1 event in egCYCLE | Add LBHEMA to evDAY1 in the current2 event group, if the current event group is egCYCLE | Add LBHEMA to all evDAY1s in egCYCLEs in the study schedule |
1 When the Dynamic Action Scope is set to Event or Event Group, the rule action identifier displays ‘this event’ and ‘this event group’. When the Dynamic Action Scope is set to Global, the rule action identifier displays ‘all events’ or ‘all event groups. 2"Current" refers to the specific Event or Event group instance from which the rule is fired. |
Example Add Form Rule
This rule adds the Pregnancy (PREG) Form if the Demographics (DM) form is submitted with the Childbearing Potential (CHILDPOT) item value entered as Yes (“Y”). Because the Dynamic Action Scope is Event, the PREG form will only be added to the same Event where DM was submitted.
#define CHILDPOT @Form.ig_DM2.CHILDPOT


Not(IsBlank(CHILDPOT))
&&
CHILDPOT = "Y"

Form: DM
Dynamic Action Scope: Event
Rule Action Identifier: this event > PREG
Scoping Add Event Rules
The following table shows where an Event named evDAY8 will be added into the Schedule based on what Dynamic Action Scope and Rule Action Identifier are selected.
Dynamic Action Scope & Action Identifier Configuration for Add Event Rules
| Rule Action: Add Event | Dynamic Action Scope | ||
|---|---|---|---|
| Event Group | Global | ||
| Rule Action Qualification | 'this event group' OR 'all event groups'1 > evDAY8 | Add evDAY8 to the current2 event group | Add evDAY8 to all Event Groups in the study schedule |
| egCYCLEA > evDAY8 | Add evDAY8 to the current2 event group, if the current event group is a egCYCLEA | Add evDAY8 to all egCYCLEA event groups in the study schedule |
1When the Dynamic Action Scope is set to Event or Event Group, the rule action identifier displays ‘this event’ and ‘this event group’. When the Dynamic Action Scope is set to Global, the rule action identifier displays ‘all events’ or ‘all event groups. 2"Current" refers to the specific Event or Event group instance from which the rule is fired. |
Example Add Event Rule
This rule adds the Post Surgery (evPOSTSURG) event if the “Was Surgery Performed” (SURGYN) item is Yes (“Y”) on the SURG form in the same Event Group.
#define SURGYN @Form.igSURG.SURGYN


Not(IsBlank(SURGYN))
&&
SURGYN = 'Y'


Form: SURG
Dynamic Action Scope: Event Group
Rule Action Identifier: this event group > evPOSTSURG
Adding Event Groups
Similar to Events and Forms, Event Groups can be added to a Study dynamically using the Add Event Group rule action. Unlike Events and Forms, however, all Event Groups after the first Event Group in the Study Schedule are dynamic and must be added using a rule. In this example Add Event Group rule, if the subject is eligible to be enrolled, the Logs Event Group is added to the casebook.
#define ENROLLYN @Form.ig_ENROLL.ENROLLYN
Not(IsBlank(ENROLLYN))
&&
ENROLLYN = "Y"
Form: ENROLL
Dynamic Action Scope: Global
Rule Action Identifier: $eg_LOGS
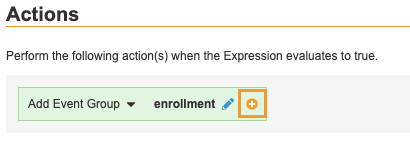
To add multiple Event Groups with a single rule, select an Event Group in the Actions panel, then click Add () and select another Event Group. Continue until you’ve added all the Event Groups you want to add using this rule.
Derive Values with Rules (Studies created before 22R3)
You can use rules in your Study to automatically fill an Item field with a derived value.
You can only create Set Item Value rules for Items with the Derived item type.
Note that Cross-Form Derivations will replace Set Item Value rules in Studies created after the 22R3 release.
Example Set Item Value Rule
On a Form, you may want to include an Item field for BMI. Instead of having your investigators calculate each subject’s BMI independently, you can configure Veeva EDC to derive this Item value automatically. Create an Item Definition for BMI and set the Item Type property to Derived. The BMI item must be on the same Form as the Height and Weight items.
Create a rule with the following expression, and then choose the Set Item Value action and set the item to your derived BMI item. Since this rule expression uses a floating identifier (@Form), you should qualify the action to the same level: select this form > ig_VS > BMI.
#define WEIGHT @Form.ig_VS.mu_WEIGHT
#define HEIGHT @Form.ig_VS.mu_HEIGHT

WEIGHT / (HEIGHT * HEIGHT)

Rule Details Form: Vital Signs
Once the user completes the Form, Veeva EDC will automatically populate the BMI item field with the result of the expression.
Cross-form Derivations
With Cross-form Derivations, Vault will derive values across forms in a casebook when you add the Derived Items component to forms in Studio’s drag & drop editor and create Set Derived Value rules.
Derived item values don’t depend on the submission of a form and derived values are automatically updated without form resubmission. Derived items can be configured to display or not display in both Data Entry and extracts.
As of 23R2, derivation rules where the result does not match the target item’s data type must be fixed or inactivated in order to deploy from DEV.
For more information about Cross-form Derivations, see Cross-form Derivations.
Visit Method
If Visit Method is configured, you can create rules that reference visit method values and can be used to open queries, create protocol deviations, and more using the visit_method__v attribute.
The following example might be used to add dynamic forms into a casebook when a certain visit method - in this case, Telephone Interview - is selected by the site:
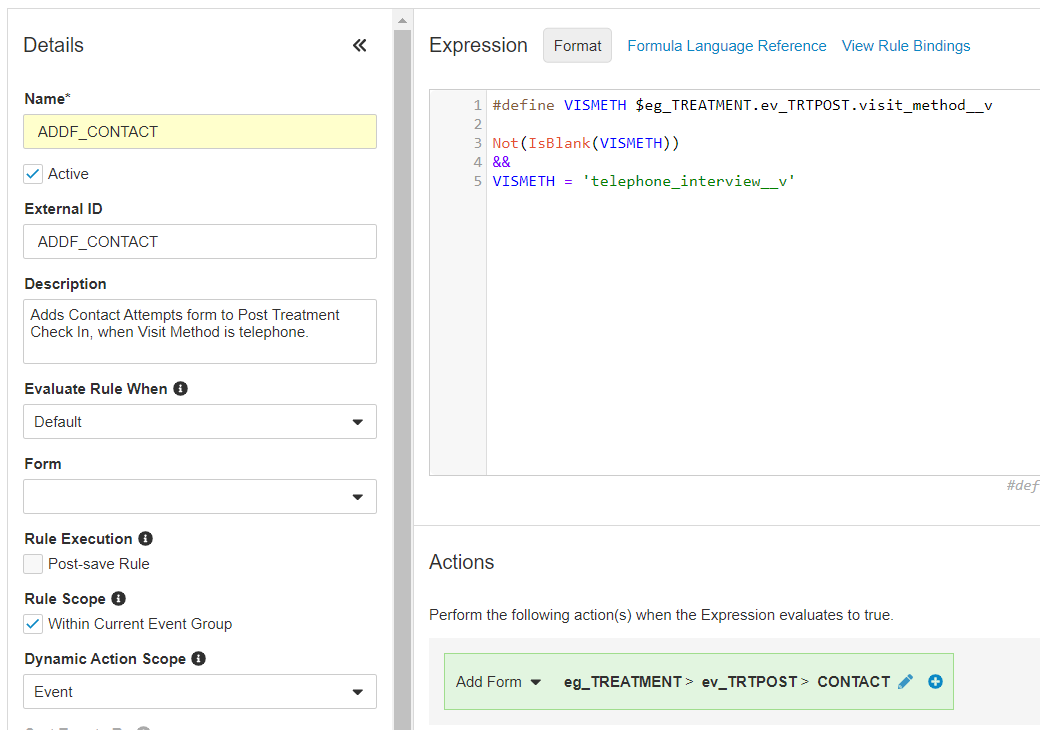
Another common use case would be to configure a rule to query when a virtual visit is selected for more than one consecutive event:
#define DAY3 @EventGroup.treatment_day_3.visit_method__v
#define DAY4 @EventGroup.treatment_day_4.visit_method__v

Not(IsBlank(DAY3))
&&
DAY3 = "virtual_visit__v"
&&
Not(IsBlank(DAY4))
&&
DAY4 = "virtual_visit__v"
Note that you must use the picklist code value, not the label value, when referencing visit method in the rule editor. See the following table for more information about Visit Method picklist values:
| Picklist Value Label | Picklist Value Name |
|---|---|
| On Site Visit | on_site_visit__v |
| Virtual Visit | virtual_visit__v |
| At Home Visit | at_home_visit__v |
| Alternate Facility Visit | alternate_facility_visit__v |
| Telephone Interview | telephone_interview__v |
For more information about Visit Method, see Visit Method.
Lab Modifiers
Lab Modifiers allow sites to use >, <, ≤, and ≥ when entering lab results to allow for results that are above or below the level of detection. If Lab Modifiers are used in your study and you would like to make a rule that includes Lab Modifiers, you must use Text(LabModVariable) = with the following syntax depending on which modifier is used:
| Lab Modifier | Syntax |
|---|---|
| > (Greater than) | GT |
| < (Less than) | LT |
| ≥ (Greater than or equal to) | GTE |
| ≤ (Less than or equal to) | LTE |
Example
For example, the expression for a rule that includes the Sodium analyte with a “>” modifier would look like the following screenshot.

For more information about Lab Modifiers, see Managing Analytes, Units, & Codelists.
Set Subject Statuses with Rules (23R2)
You can use rules in your Study to automatically set a subject’s Status based on user-entered data.
Vault maintains a history of each subject’s status over time. If a user later edits the controlling data, causing the rule to evaluate as false, Vault returns the Subject to the previous (most recent) status.
Learn about best practices for Set Subject Status rules.
Full Qualification for Subject Status Rule Actions: As of 23R2, subject status rule actions must be fully qualified. You must fix or inactivate any misconfigured rules in order to deploy from DEV. Studies that have already been deployed to TST/PRD won’t be affected but misconfigured rules will be flagged as invalid in the next casebook version.
Set Subject Status Rules Not Supported for Log Events: Log events do not have dates, and the Subject Status change date is derived from the Event Date that the Form triggering the rule is associated with. For this reason, configuring Set Subject Status Rules on Log events is not supported.
Unsupported Item Types for Set Subject Status Rules: File Attachment Items, Imaging Exam Items, and Default Data Items cannot be used as a target in Set Subject Status rules.
Available Subject Statuses
The following options are available for subject Status:
- Pre Screen
- Consented
- In screening
- Screen Failure
- Enrolled
- Randomized
- Started Treatment
- End of Treatment
- Withdrawn
- Started Follow Up
- Lost to Follow Up
- Complete
Vault only allows you to move a Subject into a more advanced Status. For example, you can move a subject from Enrolled to Randomized, but you can’t move a subject from Complete to Enrolled.
Vault records either the Event Date or the value for a date or datetime Item as the date for the status change. Vault records this date using different fields on the Subject object (subject__v), depending on the target Status. Note that the Pre Screen status doesn’t have a date field on Subject because it’s the initial subject status.
- In screening → Screened Date (
screened_date__v) - Screen Failure → Screen Failed Date (
screen_failed_date__v) - Enrolled → Enrolled Date (
enrolled_date__v) - Randomized → Randomized Date (
randomized_date__v) - End of Treatment → End of Treatment (
end_of_treatment_date__v) - Withdrawn → Withdrawn Date (
withdrawn_date__v) - Complete → End of Study Date (
end_of_study_date__v)
If you choose an Item for the status change date, that Item must be of the Date or DateTime data types and must not belong to a repeating Item Group. For unknown dates and times, Vault replaces the unknown part of the date or time with the minimum (earliest) possible value.
When a rule evaluates to true, Vault always adds a status date for a particular Status, regardless if that status is the latest or whether the subject actually moved into that status.
When the rule that sets the most advanced status is rolled back, for example, due to a form being reset, Vault also removes the subject status date for that status. If you have Enable Subject Status Date Rollback set to Yes in Studio > Settings, then any status date stored for a subject will be removed when the associated Subject Status rule evaluates to false.
When you have Enable Subject Status Date Rollback set to No in Studio > Settings, if a rule that is not setting the most advanced status evaluates to false, Vault doesn’t remove the subject status date for that status.
Set Subject Status Rules Created Pre-20R1
If you created any Set Subject Status rules prior to the 20R1 release (April 2020), you can continue to use them without choosing a date. However, if you edit the rule, you won’t be able to save your rule until you’ve chosen a date for the status change.
Set Subject Status & Subject IDs
If your Study uses the by_site subject ID generation method, Vault will increment the subject’s ID each time that a rule returns that Subject to the In Screening, regardless of existing Subject ID values.
Example Set Subject Status Rule
You may want to automatically set a subject’s Status as In screening once there is an Event Date for your screening event. You can do so using a Set Subject Status rule.
Create a rule with the following expression, and then choose the Set Subject Status action type and the In screening status.
Not(IsBlank(@Screening.Screening.event_date__v)
Once the Event Date for the Screening event is not blank (after a data entry user enters a date), Vault will update the Status for that Subject to In screening.
Send Email Notifications with Rules
You can use rules in your Study to automatically send an email notification to a group of users when certain conditions occur.
Learn more about sending email notifications.
Override a Form’s Assigned Review Plan
You can use the Override Review Plan rule action to override the default Review Plan assigned to a Form (the Form Definition selected in the Rule Details panel) with another Review Plan. For example, an Adverse Event form may have a lower-risk SDV plan assigned, with fewer items required for review. You can use a rule to override that assignment with a 100% SDV required plan when the adverse event is marked as serious, with, for example, an Is this adverse event serious? item.
Example override review plan rule:
#define aeser @Form.ig_AE.AESER

aeser = "Y"

Rule Details Form: Adverse Event

Rule Action: Override Review Plan: SDV or DMR
For the rule action, select Override Review Plan for SDV or DMR. Then, select the Review Plan that will override the default Review Plan when the rule evaluates true.
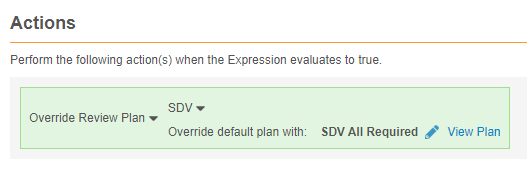
Once you select a Review Plan, you can click View Plan to review the form’s review requirements.

Formulas for Unit Conversion
You can also use formulas to define unit conversions. See Defining Default Units & Conversions in Studio.
Available Operators & Functions
Several operators and functions are available for use in data rule validation. See the Veeva CDMS Formula Reference for a complete list.
Blank Value Handling
If you have an identifier that includes numeric fields, including unit values, you must use the Blank Handling property in the Rule Details panel of the Rule Editor to choose how Vault handles blank values. For numeric fields, this dictates how Vault handles blank field values within the formula. You can choose between the following options:
- As Null: Vault treats the blank value as null, causing the entire expression to return a null/blank value. As Null is selected by default.
- As Zero: Vault substitutes a zero for the blank value, allowing you to complete the formula calculation.
Example
This example shows how different blank handling options affect the outcome of this formula:
Formula:
NUM1 + NUM2
| Blanks | “As zero” result | “As null” result |
|---|---|---|
| Both | 0 + 0 = 0 | Null + Null = Null |
| NUM1 | NUM1 + 0 = NUM1 | NUM1 + Null = Null |
| NUM2 | 0 + NUM2 = NUM2 | Null + NUM2 = Null |