Making Changes to Labs Post Go-Live
Most updates and/or changes to Analytes or Units in the Labs module can be made after a Study has gone live. You can find instructions for specific actions below.
Note that you must perform a Vault deployment in EDC Tools before and after making any changes Post Go-Live. You must also amend the Active Version of your sites in Production after making changes and deploying. To amend the Active Version of your sites, navigate to Tools > EDC Tools > Sites in your Production environment, click the actions menu in the Site Number column, and click Edit. Select the most recent Casebook Version from the Active Version dropdown menu and click Save.
Updating Analytes
To add a new analyte to an existing Lab panel:
- If the analyte is new to the Analyte Library, remember to perform a Vault deployment before adding it.
- Navigate to your Study in Studio.
-
From the Actions menu, select Create New Version.
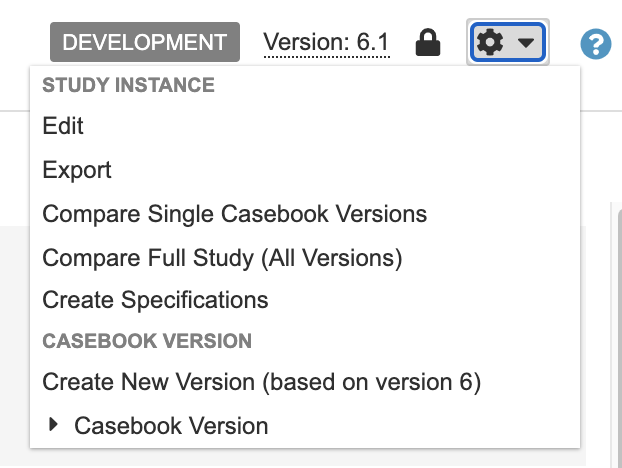
- Provide the reason for creating a new Casebook Version in the Change Reason field. In this case, for example, your change reason might be “Adding an analyte to a Lab panel.”
- Click Create.
- Once the new Casebook Version is created, navigate to the Lab Panels tab in Studio.
- Click the name of the Lab Panel that you’d like to add to. Add your new analyte in the Edit Lab Panel dialog and click Save.
- Deploy.
- Amend.
To add a new analyte to a new Lab panel:
- If the analyte is new to the Analyte Library, perform a Vault deployment before adding it.
- Navigate to Studio and create a new Casebook Version as detailed in the instructions above.
- Navigate to the Lab Panels tab in Studio and click + New Lab Panel.
- Add analytes and click Save.
- Navigate to Schedule > Drag & Drop Editor and add your new Lab panel to a form.
- Deploy.
- Amend.
To remove an analyte from an existing Lab panel:
- Navigate to Studio and create a new Casebook Version.
- Navigate to the Lab Panels tab and click on the name of the Lab panel you want to remove from.
- Move the analyte from the Selected Analytes column to the Available Analytes column in the Edit Lab Panel dialog to remove. Click Save.
- Deploy.
- Amend.
If you decide to remove an analyte, note that any data that was already added to that analyte will also be removed.
To update an analyte label:
- Navigate to Labs > Analyte Library.
- Click Edit Analytes and update the analyte Label.
- Perform a Vault deployment.
- Navigate to Studio and create a new Casebook Version.
- Navigate to your schedule and update the Label field in the properties panel of the updated analyte.
- Deploy.
- Amend.
Note that you can’t decrease Precision. You can, however, increase Precision in Studio after creating a new Casebook Version if using Local Labs. If using Global Labs, you can increase Precision after deploying via vault-level analyte deployments.
Lab Modifiers
To add Lab Modifiers (Global & Local Labs):
- Navigate to Labs > Analyte Library.
- Follow the steps here to configure Lab Modifiers if not configured.
- Perform a Vault deployment.
You can add Lab Modifiers to an In Use analyte, but you cannot remove them.
Deploying the Analyte Library
To deploy the Analyte Library:
- Navigate to Tools > System Tools > Deployment.
- Select a Source Environment and Target Environment.
-
In the Deploy Data section, select Analyte Library.
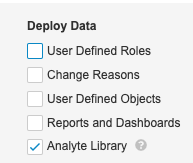
- Click Deploy. When finished, Vault sends you an email notification.
The analyte name and analyte Data Type can’t be updated if the analyte is In Use. An analyte is considered In Use when it’s associated with a Lab Panel or Lab Location.
Deployment will fail if you attempt to make changes to an analyte that is In Use and has already been deployed.
Updating Units (Study Level)
If your study was created before the 22R2 release and uses study-level Lab Codelists and Lab Units, use this method.
Note that Units and Codelists from the Labs module are copied into Studio when Lab Panels are saved. Do not manually add Lab Units in Studio.
To add a new unit to an existing unit codelist:
- Navigate to the Labs module and update or add the new unit in the System General Settings tab.
- Perform a Vault deployment.
- Navigate to Studio and create a new Casebook Version.
- Navigate to the Lab Panels tab.
- Click on the Lab Panel that is related to the new or updated unit. Click Save. Saving will copy all units and codelists for the selected analyte from the Labs module.
- Deploy.
- Amend.
To remove a unit from an existing unit codelist:
- Navigate to the Labs module and hide the unit in the System General Settings tab.
- Perform a Vault deployment.
- Navigate to Studio and create a new Casebook Version.
-
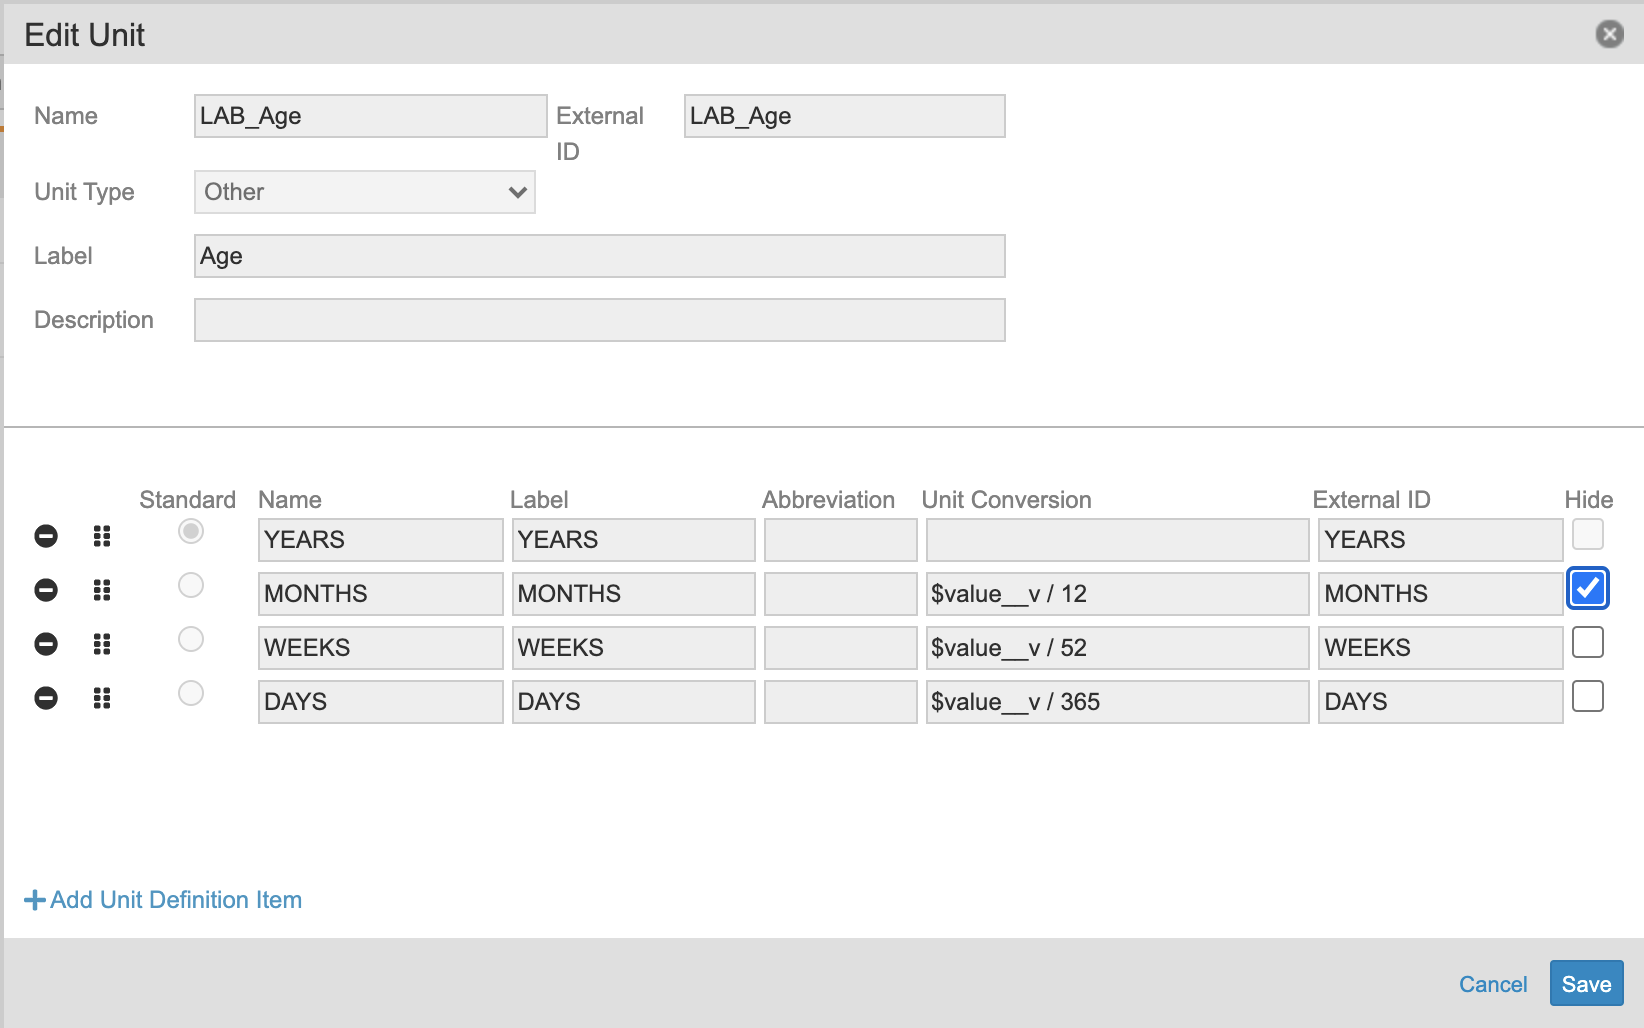
Navigate to the Units tab and click the name of the unit you’d like to remove. Click the Hide checkbox and Save.
- Deploy.
- Amend.
To update a unit label:
- Navigate to the Labs module and update the unit label via the System General Settings tab.
- Perform a Vault deployment.
- Navigate to Studio and create a new Casebook Version.
- Navigate to Units and select the unit that you’ll be updating.
- Update the Label field and click OK.
- Deploy.
- Amend.
Updating Units (Global Labs)
If your Study was created after 22R2, or you have migrated to Versionless (Global) Labs, use this method. With this feature, you no longer need to deploy each time you update a unit.
To update a Unit or its Unit Items:
- Navigate to Labs > System General Settings > Units in your DEV environment.
- Locate the Unit that you want to update in the list.
- Click the unit’s Name to open it.
- Make your changes in the Edit Unit dialog.
- Click Save.
- Follow your organization’s workflow for deploying and testing changes in your TEST (TST) environment.
- Deploy to your PRD environment.
An amendment isn’t required, because with Global Labs, Lab Units aren’t versioned.
Updating Codelists (Global Labs)
If your Study was created after 22R2, or you have migrated to Versionless (Global) Labs, use this method. With this feature, you no longer need to deploy each time you update a Codelist.
To update a Codelist or its Codelist Items:
- Navigate to Labs > System General Settings > Codelists in your DEV environment.
- Locate the Codelist that you want to update in the list.
- Click the codelist’s Name to open it.
- Make your changes in the Edit Codelist dialog.
- Click Save.
- Follow your organization’s workflow for deploying and testing changes in your TEST (TST) environment.
- Deploy to your PRD environment.
An amendment isn’t required, because with Global Labs, Lab Units aren’t versioned.
Study Update Restrictions
After you publish the initial version of your Casebook Definition, Vault prevents you from making certain changes in any later versions you may create. If you were to make these changes, it could cause errors during the casebook amendment process.
See Study Update Restrictions for a list of disallowed changes and available workarounds.