Job Management
From the EDC Tools area, you can manage jobs occurring in your Study. Interacting with these jobs in EDC Tools allows you to review and initiate jobs from a single location. A job represents a bulk evaluation or action upon collected study data. For example, a Subject Progress Listing job generates a list of all Subjects in a Study with their status details and operational information.
Accessing EDC Tools
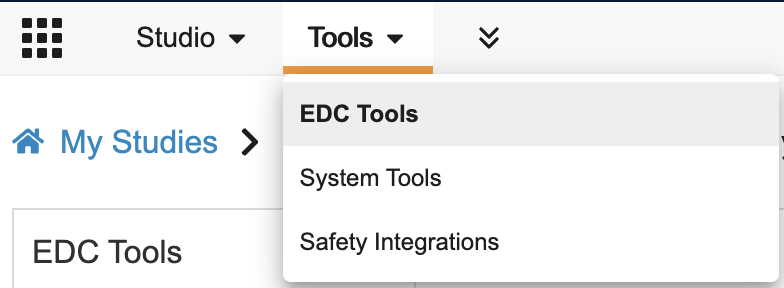
To access the EDC Tools administration area, click the Tools tab in the primary navigation bar, and then click EDC Tools.
Viewing Jobs
You can view a history of previously run jobs from EDC Tools > Job History. You can review your study’s scheduled jobs from EDC Tools > Jobs Schedule.
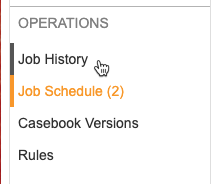
Use the Navigation panel to access these tabs. Job History and Job Schedule are in the Operations section.
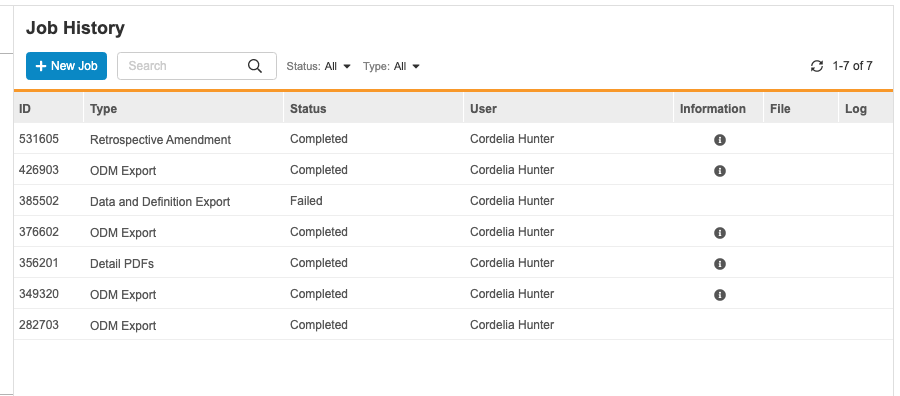
Job History
Jobs that are still running or that have finished running display in the Job History tab. You can view information about each job, including downloading job logs and any available output files.
The following jobs are not run from EDC tools, and do not appear in Tools > EDC Tools > Job History:
- From Tools > Coder Tools > Jobs: Unique Terms Report
- From Tools > System Tools > Job History: Vault Configuration Report
- From Tools > System Tools > Users: User Activity Report
- From Tools > System Tools > Users: User Access Report
- From Tools > System Tools > Users: User Training History
- From Tools > System Tools > Users: VeevaID Registration Report
- From the Review tab: Additive Review Listing
- From the Review tab: Study Summary Metrics Report
Job file expiration: Depending on your vault’s configuration, job logs and output files may expire after a certain number of days. Jobs continue to display in the Job History sub-tab even after any files expire.
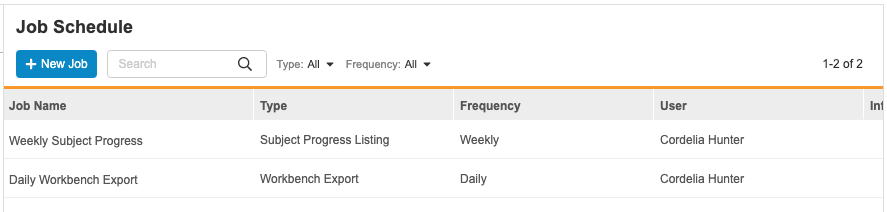
Job Schedule
You can view all of your scheduled jobs in the Job Schedule tab. From this area, you can create new jobs, run scheduled jobs on an ad hoc basis, and delete existing jobs.
Adding a Job
You can add job instances to your vault on an ad hoc basis from EDC Tools.
To add a job:
- Navigate to Tools > EDC Tools > Job Schedule for your Study.
-
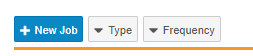
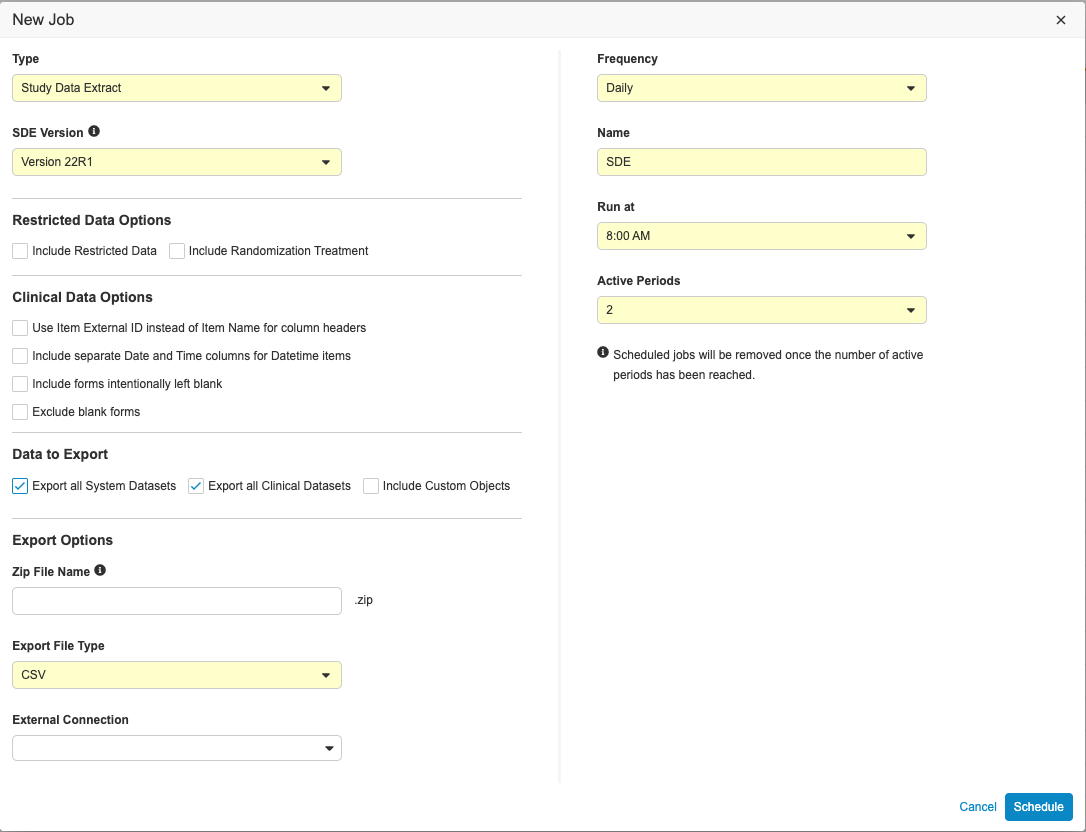
Click + New Job.
- Select a Type.
- Different options display depending on the type of job you selected. Select the required options.
-
Select a Frequency. To run the job just once after you click Save, choose Run Now. Otherwise, choose from the available scheduling options.
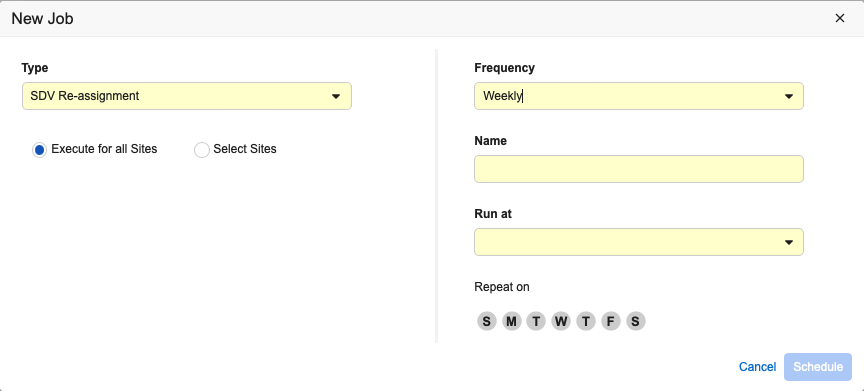
- Enter a Name for your job.
- Click Schedule.
- If you choose Run Now, Vault begins the job after you click Save. When finished, Vault sends you an email notification with a link to download the job log and any relevant output files. For scheduled jobs, Vault runs the job at the configured time, and you will receive an email notification with a link to download the job log and relevant output files each time the job runs.
Ad Hoc Runs of Scheduled Jobs
You can choose to run an ad hoc instance of an existing scheduled jobs.
To run a job:
- Navigate to Tools > EDC Tools > Job Schedule for your Study.
- Scroll to the Job you want to run.
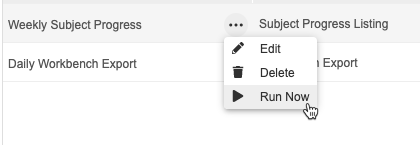
- Hover over the Job to show the Actions menu.
-
From the Actions menu, select Run Now.
- Vault begins the job. When finished, Vault sends you an email notification with a link to download the job log and any relevant output files.
Editing a Scheduled Job
When needed, you can edit a scheduled job. For example, you may want to have a job run weekly on Friday instead of Thursday.
To edit a job:
- Navigate to Tools > EDC Tools > Job Schedule for your Study.
- Scroll to the Job you want to edit.
- Hover over the Job to show the Actions menu.
- From the Actions menu, select Edit Job.
- Make changes to the job definition in the Edit Job dialog.
- Click Save. Veeva EDC now runs your job using the updated schedule.
Deleting a Job
To delete a job:
- Navigate to Tools > EDC Tools > Job Schedule for your Study.
- Scroll to the Job you want to delete.
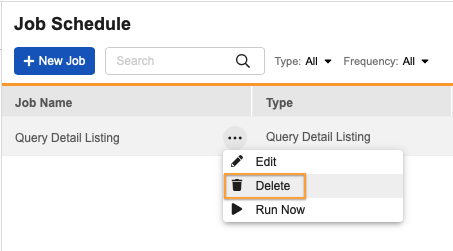
- Hover over the Job to show the Actions menu.
-
From the Actions menu, select Delete.
- In the Delete Scheduled Job confirmation dialog, click Continue.
- Vault deletes the job. The job will not run again. Any job logs and related output files remain available in the Job History tab until they expire.
Canceling a Running Job
You can cancel a job that is in the In Progress status. The following jobs are cancelable:
- Core Listing
- Retrospective Amendment
- Labs Mass Updates
- Data and Definition Export (Deprecated)
To cancel a job:
- Navigate to Tools > EDC Tools > Job History for your Study.
- Locate the job that you want to cancel in the list.
- Hover over the Job to show the Actions menu.
-
From the Actions menu, select Cancel.
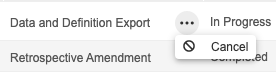
- In the Cancel Job confirmation dialog, click Cancel Job.
- Vault cancels the job.
Vault stops the job and moves it into the Canceled status. If you cancel the run of a scheduled job, that job continues to follow the configured schedule.
Refreshing the Job History
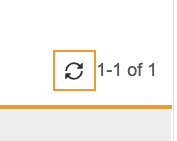
You can refresh the Job History, without refreshing the page, to see the most up-to-date job status and any available logs or output files.
Click Refresh () to refresh the Job History.
Job Statuses
Vault displays the status of your job in the job history, along with other details about the job. You can click the Information () icon for additional details about a job.
| Status | Meaning |
|---|---|
| Queued | Another job of the same type is currently waiting to run. Vault will run this job when the previous job is completed. |
| In Progress | Vault is currently performing the job. |
| Failed | The job instance encountered one or more errors. |
| Completed | The job instance completed without errors. |
| Canceled | The job instance was canceled. |
Job Failure in DEV and TST Environments: Job failure in a study in DEV or TST environments may be due to configuration changes. When this happens, Veeva recommends creating a new test study or deleting the old test data and creating new subjects before running the job. If there is existing data and configuration changes are made, the job may not successfully complete.
Extract Job Governor
The number of extract jobs that you run is regulated by the Extract Job Governor. Extract jobs include the Study Data Extract, Form Progress Listing, Query Detail Listing, Subject Progress Listing, Event Progress Listing, and Audit Trail Export jobs. The following rules are implemented for ad hoc and scheduled extract jobs under the extract job governor.
SDE to CDB jobs: You can run two (2) Send to CDB Study Data Extract jobs outside regular SDE job governance limits.
Ad Hoc Jobs
Under the extract job governor, an extract job can only be started if another job of the same type with the same job options isn’t already running (this includes jobs with a Queued or In Progress status). For example, if one user is running a Form Progress Listing, you can’t begin another Form Progress Listing at the same time.
Scheduled Jobs
You can schedule four SDE, Progress Listings, or Versioned Extracts jobs per study under the extract job governor, however, extract jobs of the same type must be scheduled at least one hour apart. The Study Summary Metrics Report and Additive Review Listing jobs have a limit of two jobs per study. The time zone that is associated with the job will be based on the time zone of the user who scheduled it. You can have up to 50 scheduled jobs per vault across the Review tab and EDC Tools.
The following jobs count toward the scheduled job limit:
- Study Data Extract (SDE)
- Progress Listings (Event, Form, Subject, Query) & associated versioned extracts
- Study Summary Metrics Report
- Additive Review Listing
- Audit Trail Export jobs (Study, Site, Subject)
Active Periods
You must select an Active Period when scheduling an export job in a non-production vault. Active periods are used to set an expiration date for your job. For example, if you select two active periods for a daily job, the job will run for two days, and you’ll receive a notification that the job has reached its expiration date.
Scheduled Jobs in Locked Studies: After a Production study is locked, scheduled jobs continue to run for seven (7) days before expiring. You can still run ad hoc jobs that don’t modify study data.
Study Priority
Users with the “Manage Study Priority” permission can set a Production instance of a study as a priority, meaning that new extract jobs for that study will be run in priority over jobs from other studies. Up to two studies can be marked as a priority at the same time. You can set a priority for the same study after the current priority expires.
To mark a study as a priority:
- Log in to the vault containing your study’s production environment.
- Navigate to Tools > EDC Tools.
- Click your study’s Name to open it.
- Hover over the Environment to show the Actions menu ().
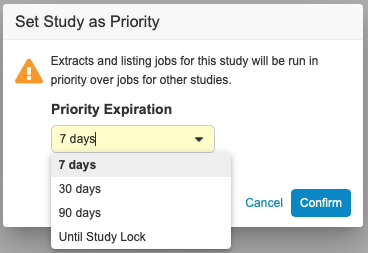
- From the Actions menu, select Set as Priority.
- In the Set Study as Priority confirmation dialog, choose when you’d like the priority to expire and click Confirm.
You can view the expiration date of your prioritized study in the Priority Expiration Date column.
To edit a priority expiration or remove priority from a study, hover over your chosen Environment and choose an option from the Actions menu.

For more information about roles and permissions, see Standard Clinical Data Study Roles and to learn more about study environments and instances, see Managing Study Environments.
Job Types
The following job types are available in EDC. Note that some jobs display in the Job History, even if you cannot initiate that job type from EDC Tools (for example, an ODM Export job, which is initiated from Studio).
Timezones: For listing and SDE jobs, Vault uses the UTC timezone, Site’s timezone, and user’s timezone across all datasets, which are displayed as separate columns for clinical datetime items. System datetime columns (like LASTRUN in the SDE) use the UTC timezone. Learn more about timezones here.
| Job | Description | Added When |
|---|---|---|
| Schedulable in EDC Tools > Jobs | ||
| Audit Trail Export by Study |
Exports a ZIP file containing a CSV version of the audit trail for each Casebook in the Study that you have permission to view. The ZIP file also contains a CSV list of all deleted Subjects in the study. The Audit Trail Export by Study also includes audit information for deleted records in your Study, such as those deleted by retrospective amendments. This job can be filtered by date range or user. |
An EDC Tools user initiates an Audit Trail Export by Study job from EDC Tools > Jobs. |
| Audit Trail Export by Site |
Exports a ZIP file containing a CSV version of the audit trail for each Subject in up to ten Sites. This job can be filtered by date range or user. |
An EDC Tools user initiates an Audit Trail Export by Site job from EDC Tools > Jobs. |
| Audit Trail Export by Subject |
Exports a ZIP file containing a CSV version of the audit trail for each selected subject. Up to 20 subjects can be selected at a time. The user will also have the option to select deleted subjects. This job can be filtered by date range or user. |
An EDC Tools user initiates an Audit Trail Export by Subject job from EDC Tools > Jobs. |
| Core Listing |
Exports Study data in a simplified CSV file. You can choose which Forms to include and which Sites to export data from. |
An EDC Tools user initiates a Core Listing job from EDC Tools > Jobs. |
| Data and Definition Export (Deprecated) |
Exports a ZIP file containing CSVs of data in your Study. |
An EDC Tools user initiates the Data and Definition Export job from EDC Tools > Jobs. |
| Data Change Extract |
Exports a ZIP file containing a CSV for the Data Change Extract Summary and the Data Change Extract. You can export as a CSV or Excel™ file and specify which forms to include and what time period (up to one year) to generate the extract for.
|
An EDC Tools user initiates the Data Change Extract from EDC Tools > Jobs. |
| Data Export |
Exports study execution data as a series of either CSV or SAS files, in a format determined in your study’s design, to either download or send to a configured FTP location.
|
An EDC Tools user initiates a Data Export job from EDC Tools > Jobs. |
| User Training Report |
Generates a training report for site users with access to the selected site in the current study. |
|
| VeevaID Registration Report |
Tracks the registration status and invitation history of Site users using the Just-in-Time (JIT) VeevaID workflow. The report includes the Invitation Date, Expiration Date, and Last Email Sent. |
|
| File Attachment Extract |
The File Attachment Extract job allows Lead Data Managers to send an extract of all File Attachment data to Vault File Staging. Once the job completes, the system automatically removes the files from file staging after 72 hours. Learn more about the File Staging Server |
A Lead Data Manager initiates the File Attachment Extract job in EDC Tools. |
| Study Data Extract |
The Study Data Extract job allows Lead Data Managers to extract and download study execution data. |
A Lead Data Manager initiates the Study Data Extract job in EDC Tools. |
| Detail PDFs |
Exports subject Casebooks as PDFs, including any entered data within those Casebooks. The PDF files exported from the Detail PDFs job in EDC Tools are optimized for Fast Web View. |
An EDC Tools user initiates a Detail PDFs job from EDC Tools > Jobs. |
| DMR Re-assignment |
Updates the DMR Requirement Mode of all existing Items in the Study to match the assigned Review Plan. |
An EDC Tools user initiates a DMR Re-assignment job from EDC Tools > Jobs. |
| SDV Re-assignment |
Updates the SDV Requirement Mode of all existing Items in the Study to match the assigned Review Plan. |
An EDC Tools user initiates a SDV Re-assignment job from EDC Tools > Jobs. |
| Event Progress Listing |
Generates a list of all Events in a Study with status details and operational information. |
An EDC Tools user initiates an Event Progress Listing job CSV export or report from EDC Tools > Jobs |
| Form Progress Listing |
Generates a list of all Forms in a Study with status details and operational information. |
An EDC Tools user initiates an Form Progress Listing job CSV export or report from EDC Tools > Jobs |
| Query Detail Listing |
Generates a list of all Queries in a Study with status details and operational information. |
An EDC Tools user initiates an Query Progress Listing job CSV export or report from EDC Tools > Jobs |
| Subject Progress Listing |
Generates a list of all Subjects in a Study with status details and operational information. |
An EDC Tools user initiates an Subject Progress Listing job CSV export or report from EDC Tools > Jobs |
| Form Progress Versioned Extract |
Generates a list of all Forms in a Study with status details and operational information according to the selected version. |
An EDC Tools user initiates a Form Progress Versioned Extract job from EDC Tools > Jobs. |
| Event Progress Versioned Extract |
Generates a list of all Events in a Study with status details and operational information according to the selected version. |
An EDC Tools user initiates a Event Progress Versioned Extract job from EDC Tools > Jobs. |
| Subject Progress Versioned Extract |
Generates a list of all Subjects in a Study with status details and operational information according to the selected version. |
An EDC Tools user initiates a Subject Progress Versioned Extract job from EDC Tools > Jobs. |
| Query Detail Versioned Extract |
Generates a list of all Queries in a Study with status details and operational information according to the selected version. |
An EDC Tools user initiates a Query Detail Versioned Extract job from EDC Tools > Jobs. |
| Recalculate Normalized DateTime Values |
After a site’s timezone is changed, this job recalculates all normalized datetime values (for datetime-type Items) to reference the new timezone. |
A user initiates a Recalculate Normalized DateTime Values job from EDC Tools, or a user edits the Timezone for a Site. |
| Test Data Verification |
Generates a CSV file that lists data in a study that is invalid due to study design changes. |
A user initiates a Test Data Verification job from EDC Tools > Jobs. |
| Vault Coder Jobs These Vault Coder jobs are schedulable in EDC Tools > Jobs. |
||
| Autocoding and Suggestions |
Autocodes pending Code Requests and creates suggestions. |
An EDC Tools user initiates an Autocoding and Suggestions job from EDC Tools > Jobs. The job then runs automatically. |
| Code Request Export |
Exports a CSV file of all Code Requests for a Study, including details about each Code Request and what each request was coded to.
|
An EDC Tools user initiates a Code Request Export job from EDC Tools > Jobs. |
| Delete Inactive Coding Requests |
The Delete Inactive Coding Requests job deletes coding requests that belong to inactive coding forms. |
An EDC Tools user initiates a Delete Inactive Coding Requests job from EDC Tools > Jobs. |
| Reconstitute Code Requests |
Updates existing Code Requests to use updated form configuration, and, if applicable, recreates previously deleted Code Requests to reference the updated configuration. |
An EDC Tools user initiates a Reconstitute Code Requests job from EDC Tools > Jobs. |
| Logged in Job History, initiated elsewhere These jobs are logged in EDC Tools > Jobs > Job History, but they originate elsewhere, either in EDC Tools or Studio. |
||
| Delete Site Data |
Deletes all subject Casebooks, including any collected data, all queries, and all Code Requests in that Site. |
An EDC Tools user initiates the Delete Site action from EDC Tools > Sites. |
| Delete Study Data |
Deletes all subject Casebooks, including any collected data, all queries, all scheduled jobs, and all Code Requests in that Study. |
An EDC Tools user initiates the Delete Study Data job from EDC Tools > Environments. |
| ODM Import |
Imported an ODM XML document into vault. |
A Studio user imports an ODM XML document when creating a casebook version. |
| ODM Export |
Exported an ODM XML document from vault. |
A Studio user exports an ODM XML document when publishing a casebook version. |
| Retrospective Amendment |
A retrospective amendment upgrades existing subject Casebooks to a new casebook version, applying the design changes to existing data. |
An EDC Tools user runs a retrospective amendment from EDC Tools > Casebook Versions. |
| Not logged in Job History, initiated elsewhere These jobs are not logged in EDC Tools > Jobs > Job History, and they originate elsewhere, either in Coder Tools, System Tools, or the Review tab. |
||
| Additive Review Listing |
Exports a ZIP file containing a CSV file of a report for items and event dates that have been additively reviewed in a Study. Initiated from the Review tab. |
Not logged in EDC Tools > Job History |
| Study Summary Metrics Report |
Generates a report with percentages of weekly or monthly monitoring of SDV and/or DMR activities. To generate this report, a user must have SDV/DMR permissions. Initiated from the Review tab. |
Not logged in EDC Tools > Job History |
| Unique Terms Report |
Allows users to view all unique coding requests across multiple studies and is the only job available in Coder Tools. Initiated from Tools > Coder Tools > Jobs. |
Not logged in EDC Tools > Job History |
| Vault Configuration Report |
Vault Configuration Reports include a summary of the vault. Initiated from Tools > System Tools > Job History. |
Not logged in EDC Tools > Job History |
| User Activity Report |
Allows tracking of the activity of a user in the vault. Initiated from Tools > System Tools > Users. |
Not logged in EDC Tools > Job History |
| User Access Report |
Details changes made to users and their access in one location and an easy-to-read format. Initiated from Tools > System Tools > Users. |
Not logged in EDC Tools > Job History |
| User Training History |
Lists the training progress of a user. Initiated from Tools > System Tools > Users. |
Not logged in EDC Tools > Job History |
Note that listing jobs (Event Progress Listing, Form Progress Listing, Query Detail Listing, and Subject Progress Listing) are not versioned and shouldn’t be used for integrations.
Job Logs & Output Files
Vault provides a CSV job log file for each job. This log includes details about which objects were affected by the job and whether or not the job was successful on each object. When applicable, Vault also provides a link to the output files from a job. For example, a link to download the ODM XML file for an ODM Export job.
To access these files, click the icon () in either the Log or File column. Job logs are available for 60 days after the job has finished running.
Learn more about potential audit descriptions.