Import Package Configuration
Availability: Clinical DataBase (CDB) is only available to CDB license holders. Contact your Veeva Services representative for details.
When preparing to import third party data into CDB, one of the major activities is configuring the manifest file that must be included with the data for import. This manifest file is a JSON (JavaScript Object Notation) file that CDB uses to configure import behavior for the specified Source, as well as to describe the data properties and required mapping. To configure an import package, you need to know what attributes require configuration and how to configure those attributes properly.
CDB includes the CDB Manifest Builder configuration tool for ease of file creation. The CDB Manifest Builder is a step-by-step wizard that guides you through all manifest file configuration options in a user-friendly interface. In the Manifest Builder, CDB presents you with every import option, which you can set without needing to understand JSON.
In the CDB Manifest Builder, you can choose to configure a new file from scratch or to import an existing file to modify. There are four (4) steps in the Manifest Builder:
- Package Configuration: Define package-level properties, such as the Name of the Study and Source, as well as how the incoming data should be matched to EDC data.
- Add Data Files: Upload CSVs for import or create CSV file templates for loading data. If the user uploads a CSV file, CDB reads the header row and automatically adds those values for use during the File Configuration step.
- File Configuration: Define all file-specific mappings, as well as the data type and properties for each column (such as Length, Format, and Precision). Available properties depend on the chosen data type. By default, CDB sets the data type to Text with a length of 500.
- Summary: Preview a summary of all configuration, then generate a ZIP package containing the configured manifest file and a CSV file with the header row for each file in the import package. CDB doesn’t save any configuration in the Manifest Builder, so the only way to maintain a configuration is to generate the ZIP package.
Accessing the CDB Manifest Builder
Users aren’t required to log into Vault to access the CDB Manifest Builder. The CDB Manifest Builder is accessible via direct link. The URL is different across general, limited, and pre-release vaults. Click the links below to open the appropriate version of the manifest builder.
Package Configuration
To create the manifest file:
- Navigate to the Manifest Builder.
- Select Import Manifest File (to build from an existing manifest.json file) or Create New Manifest File (to start from scratch).
- Click Next.
- Enter the Study Name. This must be an exact match to the Study Name in CDB.
- Enter the name of the Source.
- If you’re using OpenEDC, select the Primary Source checkbox.
- Select Yes to Enable Strict Import. Otherwise, leave this field set to No. When Strict Import is enabled, CDB will only import columns defined in the manifest file. All other columns in the file won’t be imported.
- For Match Study On, select Name or External ID. This is the field that CDB uses to match the Study.
- For Match Site On, select Name or Number. This is the field that CDB uses to match the Site.
- If you want to match on Events in EDC, select Yes. Otherwise, leave this set to No. See details about event matching below. If you selected Yes:
- For Match Events On, select Name or External ID. This is the field on the Event Definition that CDB uses to match the Event to.
- If you want to create a new Event when CDB can’t match the imported Event to an existing one, leave the Create new Event in CDB when the Event from the Import cannot be matched to an EDC Event selected. Otherwise, clear the checkbox. With this option, CDB creates an Event Group named “{source_name]_default_egd” for the new Event.
- If you aren’t matching to an Event in the CSV file, enter the Name of the Event to use as the Event Default.
- Click Next.

Add Data Files
If you have CSV files with your data already, you can import these to use when configuring your manifest. Otherwise, you can create new CSV files (with only the headers) to add your data later.
Hypen Types: There are two different types of hyphens, the “Hyphen Minus” and the “Unicode Hyphen”. The Hyphen Minus is the key that you typically get by pressing the - (Hyphen) key on your keyboard. In most modern fonts, these characters are visually identical. Veeva CDB only supports the use of the Hypen Minus in data imports. If you include a Unicode Hyphen, import will fail.
Import Data Files
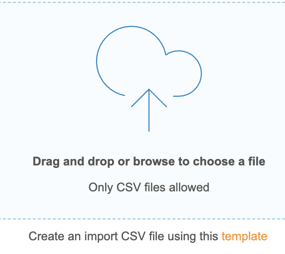
You can click in the Upload area to browse for and select your CSV files, or you can drag and drop your files into the Upload area. Then, click Next to move to the next step.
Add New Data Files
- Click Add New Data File.
- Enter the File Name.
-
To add additional data files, repeat steps 1 and 2.

- To remove a file, click Remove ().
- Click Next.
Add Codelists
Codelists are a type of data collection item in which site users select from a defined list of codes. These codes have assigned decodes. A decode is a user-friendly label for the code.
Import Codelists
You can use a CSV template to import codelists for a Source in step 3 of the CDB Manifest Builder wizard. The template is available below and in the Manifest Builder interface.
Download the Import Codelists Template
Template Criteria
The codelist import template must meet the following criteria for a successful import:
- Format: CSV
- Column Headers (All columns must be present in the file, but they can be blank):
- Codelist Name*
- Codelist External ID
- Codelist Description
- Codelist Item Code*
- Codelist Item Decode*
- Required Values: Values must be present for Codelist Name, Codelist Item Code, and Decode in each row (marked with an asterisk (*) above).
- Unique Item Codes: No duplicate Codelist Item Codes can exist within the same Codelist Name, either in the CSV file or against existing codelists already saved in the manifest file.
- Consistent Codelist External ID & Description: If a Codelist Name appears on multiple rows, its corresponding Codelist External ID and Codelist Description must be identical across all those rows.
To import codelists:
- Click Import Codelist(s). This opens the Upload area.
- Optional: Click Template to download the import codelist template. This generates a CSV file named “import-codelist-workbench-template.csv”.
-
Click inside the Upload area to browse for and select your codelist CSV file, or drag and drop it into the Upload area.
-
After selecting a file, a preview table appears where you can filter the rows by Import Status.

- Optional: To filter by Import Status, click Ready for Import or Errors (if applicable). Click Reset to reset the table to its default order.
- Click Save.
- Click Next.
Existing Codelists: When importing a CSV file to add additional codelist items to an existing codelist, the Codelist External ID and Description remain unchanged. The system ignores these values.
Add New Codelists
You can configure your import file to include the values and codes for codelist-type Items.
To add a new codelist:
-
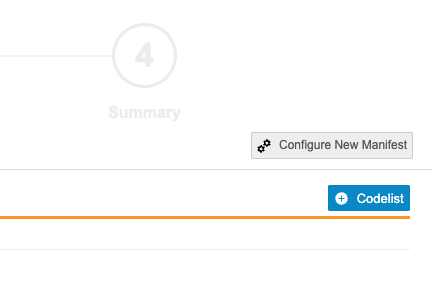
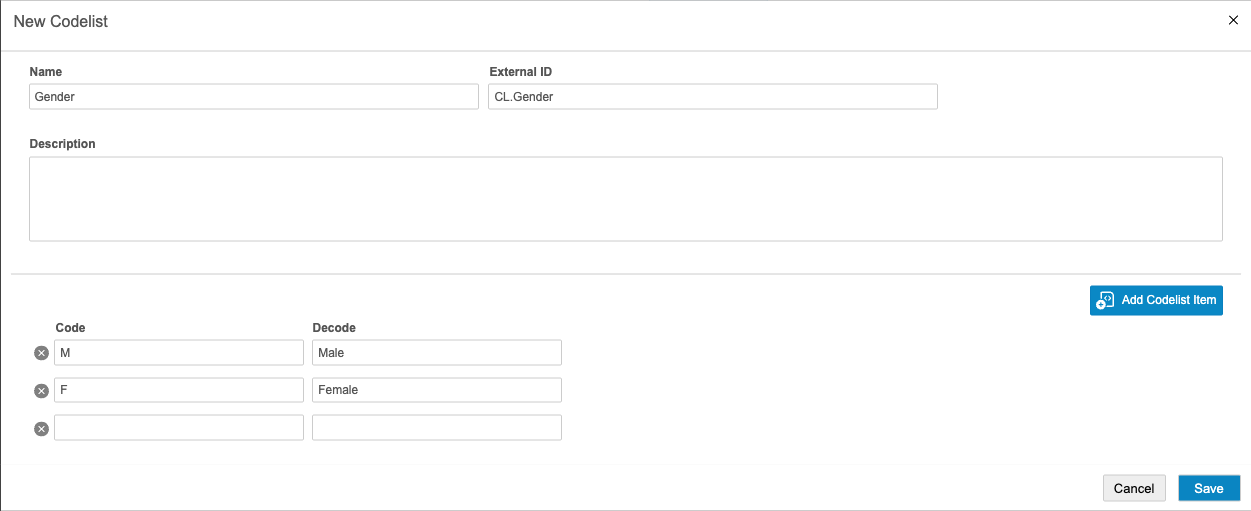
Click + New Codelist. This opens the New Codelist dialog.
- Enter a Name for your codelist.
- Optional: Enter an External ID and Description for your codelist.
-
Enter a Code and Decode for each codelist item.
-
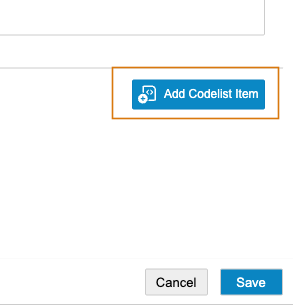
If you need additional rows for codelist items, click Add Codelist Item to add a new row.
-
To remove a codelist item, click Remove.

- When finished, click Save.
Now, you can reference this codelist in your item configuration.

Edit a Codelist
To edit a Codelist:
- In the manifest builder, navigate to the Codelists step.
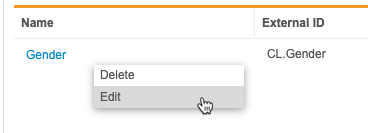
- Hover over the Name of the codelist you want to edit to show the Actions () menu.
-
From the Actions () menu, select Edit.
- Make your changes.
- When finished, click Save.
Delete a Codelist
To delete a Codelist:
- In the manifest builder, navigate to the Codelists step.
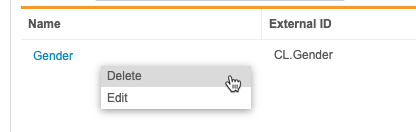
- Hover over the Name of the codelist you want to delete to show the Actions () menu.
-
From the Actions () menu, select Delete.
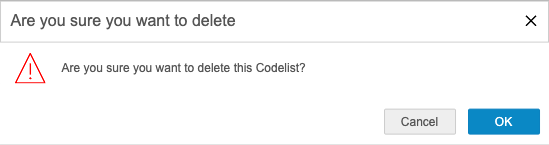
- In the confirmation dialog, click OK.
File Configuration
You will go through four (4) configuration steps for each CSV file: Column Mapping, Item Mapping, Reorder Columns, and Unique Identifiers. Switch between files in the File Selection header.
Column Mapping
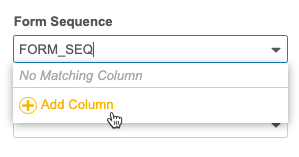
You can map the columns that don’t represent data items in step 3.1. To map columns when none exist, begin typing the desired column header in the field, then click Add Column. This adds the column header to the drop-down.
To map columns:
- Select the Study column.
- Select the Site column.
- Select the Subject column.
- Select Map to a column to use a column value for event matching or Set file to specific Event default to automatically add imported data to the Event Default.
- Select the Event column.
- Optional: Enter a Form Label. Workbench uses this as the Label for the Form. If you don’t enter a Form Label, Workbench uses the Name (provided by the CSV filename).
- For Strict Import, you can select Same as package level to use the same selection across the package. Otherwise, select Yes to Enable Strict Import for the data file, or select No to disable it. When Strict Import is enabled, CDB will only import columns defined in the manifest file. All other columns in the file won’t be imported.
- To specify columns for Form and Form Sequence (if your file has data that spans more than one Form), select the Advanced Options checkbox. Then, do the following:
- Select the Form column.
- Select the Form Sequence column.
- Click Next.
Column Headers: Do not use “Studyname”, “Sitename”, or “Subjectname” as column headers, as it can cause errors during export package generation.
Item Mapping
Now, you can add columns for each data item that you’re importing data for. For each Item, you can specify additional properties.
Name Overrides: By default, Workbench uses the Item Column (column header) as the item’s Name. You can override this by selecting the Name Override checkbox in the header and entering values for Item Name in each item’s row.
- Click Add Item.
- For Item Column, enter the header of the column containing the item’s value.
- If you selected the Name Override checkbox, enter an Item Name to use as the item’s Name.
- Enter an Item Label to use as the item’s Label.
- Select a Data Type. Depending on the data type you selected, CDB allows you to configure the applicable configuration columns (Length, Min, Max, Precision, Format, and Codelist).
- Enter or select values for the applicable configurations. Note, changing an item’s data type clears any previously configured values in the configuration columns for that item.
- Repeat steps 1 through 4 for each of your Items.
- Optional: Configure Blinding Options. See details below.
- To add another Item, click repeat steps 1 through 6.
- When finished, click Next to continue.
Blinding Options
Once you select the Blinding Options checkbox, Workbench adds the Blind all data on this file checkbox, as well as the Blinded Column and Determines Row Blinding columns to the Item Columns table.
Selecting the Blind all data on this file indicates that all data in the file is restricted. To only restrict certain Items, select the Blinded Column checkbox.
If your form contains a boolean-type Item that indicates whether or not the row should be blinded, select the Determines Row Blinding checkbox for that Item.
Data Type Validations
The Manifest Builder prevents incorrect data type configurations. The following table provides configuration guidelines for each data type:
| Data Type | Property | Range | Validation Message |
|---|---|---|---|
| Text | Length | 1-3000 | Length for Text must be between 1-3000 |
| Integer | Length | 1-19 | Length for Integer must be between 1-19 |
| Min | −9,223,372,036,854,775,808 | Min for Integer cannot be less than −9,223,372,036,854,775,808 | |
| Max | 9,223,372,036,854,775,807 | Max for Integer cannot be more than 9,223,372,036,854,775,807 | |
| Float | Length | 1-24 | Length for Float must be between 1-24 |
| Min | −999,999,999,999,999,999,999,999 | Min for Integer cannot be less than −999,999,999,999,999,999,999,999 | |
| Max | 999,999,999,999,999,999,999,999 | Max for Integer cannot be more than 999,999,999,999,999,999,999,999 | |
| Date | Format | Format selection is required | Required field(s) missing |
| DateTime | Format | Format selection is required | Required field(s) missing |
| Time | Format | Format selection is required | Required field(s) missing |
| Boolean | N/A | N/A | The boolean data type doesn't have any configuration properties. |
| Codelist | Codelist | An associated codelist definition must be selected | Item(s) [%Item Def name%] has data type set to codelist but have no codelist selected |
The Manifest Builder only checks for missing requirements after you navigate away from the configuration area.
Reorder Columns
If you didn’t add the item columns in your preferred order, you can reorder them. Use the Top, Up, Down, and Bottom buttons, or drag and drop columns, into your desired column order. When finished, click Next.

Unique Identifiers
If your file has Forms or Item Groups that are repeating, additional configuration is required.
If you don’t have repeating Forms or Item Groups in the file, select No for Does your data contain forms or item groups that repeat within a visit for a subject? and click Next.
If you do have repeating Forms or Item Groups, perform the following steps:
- Select Yes, there are repeating forms or item groups.
- Select the Group Identifier checkbox for each column that defines grouping.
- Select the Distinct Identifier checkbox for each column that distinctly identifies the Form or Item Group within the group.
- When finished, click Next.
How to Delete a File
You can delete a file from your manifest configuration at any time during step 3.
To delete a file:
- Locate the file you want to delete in the File Selection header.
-
From the File menu () menu, select Delete.

- In the confirmation dialog, click Delete Tab.
Review the Summary
The Summary page displays the configuration information for each of your data files. Carefully review your configuration here.
Edit Configuration from the Summary
You can modify package level details by clicking Edit in the Package Configuration panel. This returns you to step 1.2.
To modify file-level configuration:
- Locate the file you want to delete in the File Selection header.
-
From the File menu () menu, select Edit.

- This returns you to step 3.1 for the chosen file. Make your changes and click Next for each step until you’ve returned to step 4.
Generate the Summary
Once you’ve reviewed your configuration, you can generate the import package.
-
Click Generate Manifest.

- Save the manifest file in your chosen location.
- If you created CSV files from scratch, instead of importing ready CSV files into the builder, unzip the package and add data to your CSV files.
Import the Generated Package
Once your import package contains all of your data, compress the directory into a ZIP file. Then, you can import it into Workbench.