Managing CDB Deployments
Clinical programmers continually update listings, checks, and views for their data managers throughout a trial’s lifetime. With CDB’s Deployments feature, an organization can track these changes through their review, approval, and deployment.
You can deploy approved custom listings, checks, and views from their TST environment to their production environment. In the TST environment, you can review each object and mark it as Approved to identify it as ready for deployment. For each object, there is an approval log available for download, which tracks that object’s progress through the approval workflow. Once it’s approved, you can deploy it to production by adding it to a deployment package and deploy it from TST to production.
Prerequisites
For Studies created prior to the 21R3 release (December 2021), this feature must be enabled from the TST environment in CDB Workbench. See details below.
For Studies created after the 21R3 release, this feature is automatically enabled.
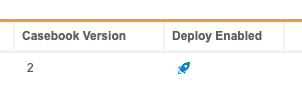
You can determine if this feature is enabled for your Study from the Deploy Enabled column of the Study Listing for your TST environment. If Workbench shows the Enabled icon (), the feature is enabled.
Users with the standard CDMS Super User study role can perform the actions described below by default. Users with the standard CDMS Lead Data Manager and CDMS Data Manager can perform the approval workflow functions described below. If your organization uses user-defined Study Roles, your role must grant the following permissions:
| Type | Permission Label | Controls |
|---|---|---|
| Standard Tab | Workbench Tab | Ability to access and use the Data Workbench application, via the Workbench tab |
| Functional Permission | Manage Deployments | Ability to create and manage study Environments and deploy Studies from EDC Tools, manage and deploy vault-level configuration from Tools > System Tools, manage and deploy listings, checks, and views in CDB, and enter License Keys |
| Functional Permission | View All Listings | Ability to view all listings |
Learn more about Study Roles.
Enable Deployment 21R3 & Earlier
If your Study was created prior to the 21R3 release (December 2021), then you must enable the deployment feature for your Study. If your Study was created after the 21R3 release, then this feature is automatically enabled for your Study.
Workbench includes the Deployment Enabled column in the Study listing. If the Deployment icon () displays in this column, then the feature is enabled in your Study. Note that Workbench only shows this column for TST environments.
You enable this feature from the Workbench instance containing your study’s TST environment.
- Log in to the vault that contains your study’s TST environment.
- Click the Workbench tab to open the CDB application.
- From the Studies page, locate your Study in the list.
- Hover over your Study to show the Study menu ().
- From the Study menu, select Deployment. This opens the Enable Deployment page.
- Click Continue.
- Select the Study Instance (environment) to use as the master set of listings and views. Workbench will create these listings and views in all of your study’s TST environments, removing any listings or views that don’t exist in the chosen master set.
- Click Enable.
Accessing Deployments
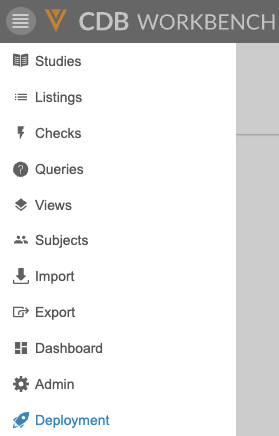
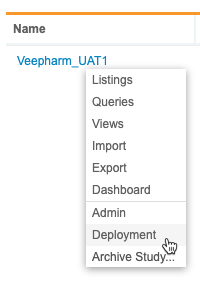
You can navigate to the Deployment area from the Navigation Drawer () after you select your Study, or from the Study menu () on the Studies page.
|
|
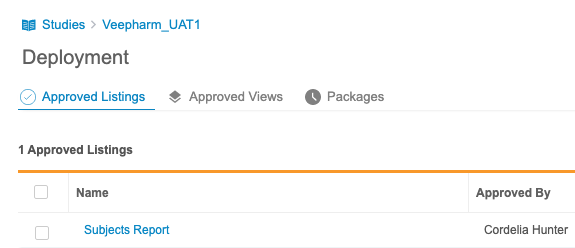
The Deployment tab has three subtabs:
- Approved Listings: This subtab lists all Listings and Checks in the Approved status.
- layers Approved Views: This subtab lists all Views in the Approved status.
- Packages: This subtab lists deployed packages.
Approval Statuses
You can only deploy listings and views that are in the Approved status. There are three approval statuses:
| Status | Description | Badge |
|---|---|---|
| Draft | The listing, check, or view has not yet been approved. This is the starting state for any new listings or views. |
|
| Ready for Approval | This listing, check, or view has been reviewed and is ready for approval. |
|
| Approved | This listing, check, or view has been approved and is ready for deployment. |
|
Returning to Draft Status: If a user saves changes to a Listing, Check, or View, Workbench returns it to the Draft status. If the Listing, Check, or View has been deployed, the only way to return it to the Draft status is to save a change.
Approval Workflow
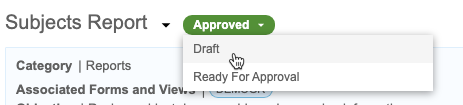
To deploy, that object must be in the Approved status. Objects start out in the Draft status, then users can move them into the Ready for Approval and Approved statuses from the Status menu. You can move an object to any status from any other status. There is no enforced order of statuses in the current release. The recommended workflow is to move objects from Draft to Ready for Approval when development is finished, then move them from Ready to Approval to Approved when review is finished and they are ready for deployment.
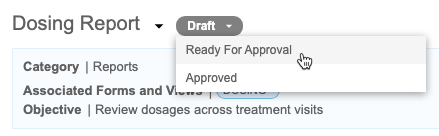
To move an object from Draft to Ready for Approval:
- Navigate to the Listing, Check, or View that you move to the Ready for Approval status.
-
- From the Status menu, select Ready for Approval.
-
-
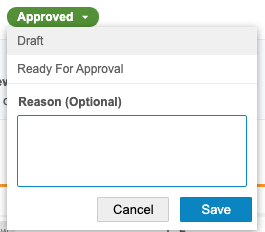
- Optional: Enter a Reason.
-
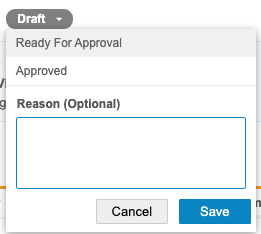
- Click Save.
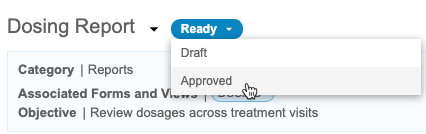
To move an object from Ready for Approval to Approved:
- Navigate to the Listing, Check, or View that you want to move to the Approved status.
-
- From the Status menu, select Approved.
-
-
- Optional: Enter a Reason.
-
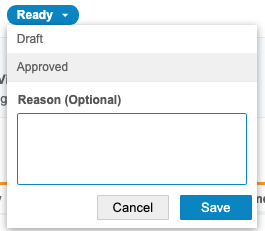
- Click Save.
To move an object from Approved to Draft:
- Navigate to the Listing, Check, or View that you want to return to the Draft status.
-
- From the Status menu, select Draft.
-
-
- Optional: Enter a Reason.
-
- Click Save.
Approval Logs
Workbench keeps a log of changes to a listing or view’s approval status. You can download this log as a CSV from the listing, check, or view. The CSV file is named “Approval Log <Study> <Listing/Check/View Title> <DateTime of Generation>.csv”.
To download the approval log:
- Navigate to the Listing, Check, or View for which you want to download the approval log.
-
- From the Listing, Check, or View menu (), select Approval Logs.
-
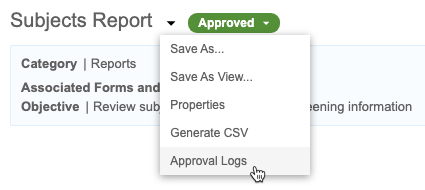
- Workbench generates the CSV file. Download it and review it in a CSV viewer of your choosing.
The approval log contains the following information for each status change:
| Column | Description |
|---|---|
| Vault ID | The Vault ID for the vault containing the listing or view. |
| Study Name | The Name of the Study. |
| Object ID | The unique Object ID for the listing or view. |
| Type | The Type of the object:
|
| Source | The Source associated with the object. |
| Object Name | The TItle property value for the object. |
| Object Short Name | The Short Title property value for object. |
| Category | The Category property value for the object. |
| Description | The Description property value for object. |
| Objective | The Objective property value for the object. |
| CQL Syntax | The CQL statement for the object. |
| Created By | The Name of the User who created the object. |
| Created On | The date and time the object was originally created. |
| Last Modified By | The Name of the User who last modified the object. |
| Last Modified On | The date and time that the object was last modified. |
| Last Modified In | The Name of the Study Instance (environment) in which the object was last modified. |
| Current Status | The Status that the object moved in to as part of this change:
|
| Transitioned By | The Name of the User who changed the status. |
| Transitioned On | The date and time that the status change occurred. |
| Transition Comment | The Reason provided for the status change. |
Viewing Approval Logs: The approval log contains a CQL Syntax column, which contains the CQL statement for the listing, check, or view. Microsoft Excel™ has a column character limit of 32,767. If the CQL statement is longer than 32,767 characters, Excel™ truncates the value. Veeva recommends viewing approval log CSVs in a viewer that does not have this character limit.
How to Deploy
You deploy listings/checks and views in separate packages. Once you have at least one listing/check or view in the Approved status, you can create a deployment package of listings/checks or views and deploy it to production.
Failed Deployment: If your deployment fails, contact Veeva Services for help resolving the issue.
Listings & Checks
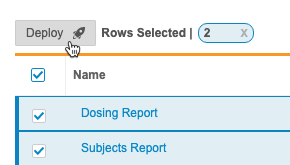
To deploy listings and checks:
- Navigate to the Deployments tab for your Study.
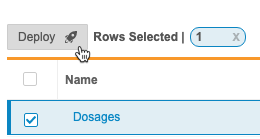
- In the Approved Listings, subtab, select the Listings and Checks you want to deploy.
-
- Optional: Select the Select All checkbox to select all Listings and Checks on the current page (up to 25).
-

-
- Click Deploy .
-
- Optional: Enter a Reason.
- In the confirmation dialog, click Deploy.
- Workbench begins the deployment job. You can check the progress from Deployment > Packages.
Changes to Name, Category & Source: CDB uses Name, Category, and Source to identify a unique Listing. If a Listing is updated with a change to the Name, Category, or Source, CDB considers it a new listing when deploying, and so the old version will need to be deleted in production.
Views
To deploy views:
- Navigate to the Deployments tab for your Study.
- In the layers Approved Views, subtab, select the Views you want to deploy.
- Optional: Select the Select All checkbox to select all Views on the current page (up to 25).
-
- Click Deploy .
-
- Optional: Enter a Reason.
- In the confirmation dialog, click Deploy.
- Workbench begins the deployment job. You can check the progress from Deployment > Packages.
Deployment Packages & Logs
You can review all Deployment Packages and their associated Deployment Logs from Deployment > Packages.
For each Deployment Package, Workbench shows the following information:
| Column | Description |
|---|---|
| Name | The Name of the Deployment Package (in the current release, this is always “Deploy”) and the date and time the deployment occurred. |
| Initiated By | The Name of the User who initiated the deployment and the date and time that they did so. You can hover over this value to show the Reason provided for the deployment if one was provided. |
| Current Status | The Status of the deployment job and the number of listings or views contained within this deployment package. |
Deployment Statuses
Deployment jobs move through the following statuses:
| Status | Description | Display |
|---|---|---|
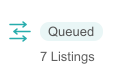
| Queued | The deployment is currently in the job queue. When other jobs finish, Workbench will begin this deployment. |
|
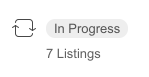
| In Progress | The deployment is currently in progress. |
|
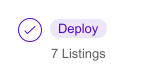
| Deployed | The deployment was successful. |
|
| Error | The deployment job failed. Contact your Veeva Services representative for help. |
|
Download the Deployment Package
To download a Deployment Package:
- Navigate to Deployment > Packages for your Study.
- Locate the Deployment Package you want to download in the list.
- From the package’s Package menu, select Download Package.
- Workbench generates a ZIP file for the package. When finished, Workbench shows a toast notification at the bottom of your screen. Click to download it.
Best Practices for Deployment
Best practices for deployment include:
- Before enabling deployment in your Study, download the object summary logs for each of your TST instances. This way, you have a record of those objects in case you accidentally select the incorrect TST instance as the master.
- Just before you deploy, download the object summary log in the production environment.
- Changes to the CQL for a Review Listing clear all review progress. So, when deploying changes to a Review Listing, download a CSV of the listing in the production environment.