Configuring Core Data Listings
Core listings are out-of-the-box listings that correspond to each Form represented in the Study. Data managers may prefer a specific format and a specific set of study attributes be included in all Core Listings. You can configure these at a vault level. This saves a substantial amount of time, as you won’t need to recreate each core listing individually with the preferred settings.
Prerequisites
By default, users with the standard standard CDB Administrator or CDMS Super User study role, or with the Vault Owner security profile, are able to perform the actions described below. If your organization uses user-defined Study Roles, then your role must grant the following permissions:
| Type | Permission Label | Controls |
|---|---|---|
| Standard Tab | Workbench Tab | Ability to access and use the Data Workbench application, via the Workbench tab |
| Functional Permission | Configure CDB | Ability to perform configurations in Workbench that apply to all studies from the Configurations area |
If your Study contains restricted data, you must have the Restricted Data Access permission to view it.
Learn more about Study Roles.
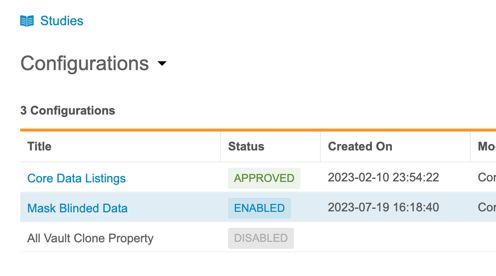
Accessing the Configurations Area
You can access the Configurations area of CDB via the Navigation Drawer ().

Once you’ve entered this area, you can manage your configuration settings.
Define Header Columns
In the first step, Define Header Columns, you can choose which @HDR contextual properties that CQL will automatically return in each Core Listing. You can learn more about these properties in the CQL Reference.
By default, the following columns are selected:
- Study.Name
- Site.Name
- Site.PI
- Event.Name
- Event.Date
- Event.Status
- Subject.Name
- Subject.Status
To add and remove columns, drag them between Available Columns and Selected Columns:
- In the Available Columns section, you can click Expand () to show the columns for each header context.
- Drag and drop a Column from Available Columns to Selected Columns. You can also drag and drop an entire header context to add all of its columns.
- Continue dragging and dropping columns into Selected Columns until you have all of your desired columns selected.
- Remove columns from Selected Columns by dragging them to Available Columns or by clicking Remove ()
- You can reorder columns by clicking Move Up () and Move Down ().
- When finished, click Next.
Event Group Sequence Number: CDB will only include @HDR.EventGroup.SeqNbr in the listing output when the referenced Event Group is repeating. If the Event Group is not repeating, CDB doesn’t include this column, even when included in the configuration.
Define Core Default
In the second step, Define Core Default, you can configure the default date format, which unit of measure (UOM) fields are included, and whether codes and decodes are included.
For these options, the value after the pipe (|) is the name of the column in the listing, with the item’s Name replacing “ITEM”.
Define Core Formats
In the Define Core Formats section, you can select the default format for dates, datetimes, and times. Select the checkboxes for your preferred format. CDB includes each selected format column in the core listing. The following formats are available:
-
Imputed ITEM -
Raw ITEM_RAW -
SDTM ITEM_SDTM
Define Inclusion
In the Define Inclusion section, you can select the included columns for UOM fields, codes, and decodes.
Included UOM Fields
For Included UOM Fields, you can select which UOM fields you want to include. Select the checkboxes of the fields you want to include in the core listing. CDB includes each selected column. You must select at least one of the four options.
| If you select _Translated Unit | ITEM_UOM_TRANSLATED_, CDB automatically includes the associated translated value. |
The following columns are available:
-
Value ITEM -
Unit ITEM_UOM -
Translated Value ITEM_TRANSLATED -
Translated Unit ITEM_UOM_TRANSLATED
Included Codes, Decodes
For Included Codes, Decodes, select Codes, Decodes, or both checkboxes to include the code and decode for a codelist-type Item. CDB includes each column you select in the listing. The following columns are available:
-
Codes ITEM -
Decodes ITEM
Reset Configurations
Click the Reset Configurations button to return to the default configuration options.

Review, Approve & Apply Configurations
You must first save your configuration changes, then you or another person in your organization may approve them and then apply them.
The recommended workflow is to save the changes, then move the configuration from Draft into Ready, then into Applied.
Mark Configuration as Ready
To mark the configuration as Ready:
-
From the Status menu, select Ready.
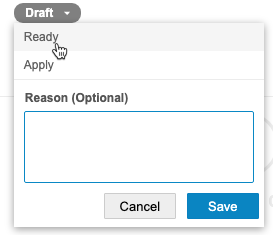
- Optional: Enter a Reason.
- Click Save.
Return from Ready to Draft
To return to the Draft status:
- From the Status menu, select Draft.
- Optional: Enter a Reason.
- Click Save.
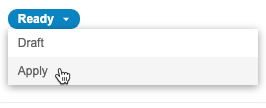
Apply Configuration
To apply your configuration to all Core Listings in your vault:
-
From the Status menu, select Apply.
- Optional: Enter a Reason.
- Click Save.
CDB moves the configuration into the Applied status. All Core Listings will now reflect your chosen configuration.
Download the Configuration Log
You can download a log (CSV) of configuration actions from the Configurations menu.

Each row in the log corresponds to each configuration transition, in reverse chronological order. For each row, the following information is captured:
- Vault ID: The Vault ID of the current vault
- Configuration: The configuration values as of the log event
- Last Modified By: The user who initiated the action for the log event
- Last Modified On: The date and time the log event occurred
- Current Status: The current status as of the log event
- Transition comments: Any reasons entered during status change