Creating Sets & Views
DQS has two methods for creating virtual tables based on the result set of a CQL statement: You can create Views, which are virtual tables based on the result set of a CQL statement. A View can combine Forms to create View Listings. Each view contains rows and columns, where the fields are from one or more real tables in the study database. A View Listing always shows up-to-date data, decorations, and access to the associated queries. Each time you open a view, Workbench recreates the data, using the view’s CQL statement.
-
Sets run every hour to create a data snapshot that can be referenced quickly by multiple listings without repeatedly running the query. Sets improve query performance and enable advanced data transformations.
-
A View is a predefined CQL statement that runs every time it is referenced. Each time you open a view, Workbench recreates the data, using the view’s CQL statement.
Sets and Views can combine Forms to create Set Listings or View Listings. Each set or view contains rows and columns, where the fields are from one or more real tables in the study database. A View Listing always shows up-to-date data.
Prerequisites
Users with the standard CDMS Super User study role can perform the actions described below by default. If your organization uses user-defined Study Roles, your role must grant the following permissions:
| Type | Permission Label | Controls |
|---|---|---|
| Standard Tab | Workbench Tab | Ability to access and use the Data Workbench application, via the Workbench tab |
| Functional Permission | Browse Sets and Views | Ability to access the Sets and Views tab within Workbench and browse Sets and Views. Ability to save a View as a Check |
| Functional Permission | Create View | Ability to create new Sets and Views in Workbench |
| Functional Permission | Modify View | Ability to edit (modify) existing Sets and Views in Workbench |
| Functional Permission | Delete View | Ability to delete Sets and Views in Workbench |
If your Study contains restricted data, you must have the Restricted Data Access permission to view it.
Learn more about Study Roles.
Some example use cases for sets and views include:
Sets:
- Joining multiple forms and performance-heavy listings: When combining data across multiple forms, system performance can suffer. Using DQS Sets creates a virtual table that the system stores to reference whenever needed.
- Trending Analysis: Avoid complex CQL when performing trending analysis, such as tracking subject vitals or measurements over time across multiple events.
- @Form Attributes / Folding: Sets supports CQL queries that use @Form attributes, unlike views.
Views:
- Exceeding the Set limit: Each study can have up to 15 sets. Use Views instead of Sets for use cases where a Set is not needed.
- Real-Time data: Views are updated every time the CQL is run. When an up-to-the-second query result is required rather than hourly snapshot data, use Views.
Both Sets and Views offer the following benefits:
-
Restricting Data Access: Views provide an additional level of table security by restricting access to a predetermined set of rows and columns.
-
Hiding Data Complexity: A view can hide the complexity that exists in a multi-table join.
-
Rename Columns: Users can rename a column within the context of the View, without affecting the base tables.
-
Store Complex Queries: Users can store more complex CQL in Views.
-
Simplify Commands for the User: Users can select information from multiple tables without needing to know how to actually perform a join.
-
Multiple Sets and View Facilities: Workbench supports different views created on the same table for different users.
Accessing Sets & Views
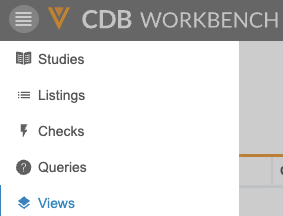
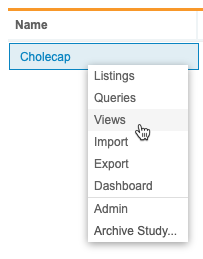
You can access views from the Sets and Views area of DQS. You can navigate to the Sets and Views area from the Navigation Drawer () or, after you select your Study, from the Study menu () on the Studies page.
|
|
How to Open a Set or a View
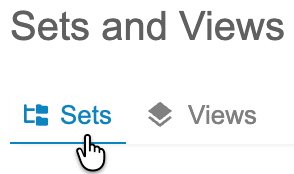
From the related tab in the Sets and Views page, you can click the Title of a set or a view to open it. You can also open a Set or a View from the menu:
- Navigate to Sets and Views for your Study.
-
Select the Sets or Views tab.
- Locate the View that you want to open in the list.
- Click the Title.
Search for a Set or View
You can search for a specific set or view, using the Title, Category, Objective, Description, and Source columns. This search uses “contains”.
To search:
- Navigate to your Study in Workbench.
-
In the top navigation bar, click Search ().

-
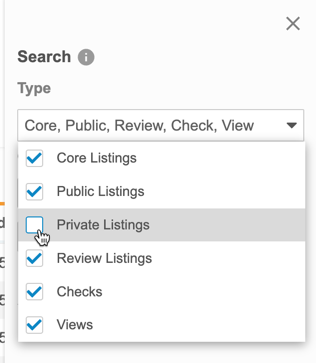
By default, Workbench searches across all object types. You can select and clear checkboxes in the Type drop-down to change which objects Workbench is searching.
- Select the Column to search. The default is Title.
- Enter your Search Text.
- Click Search or press Enter to search.
- Click the set or view Title in the Results section to open it.
Workbench shows your search results in the Results section of the Search panel.
Click Close () to close the Search panel.
Sort & Filter
You can sort and filter either tab in the Sets and Views page by the following columns:
- Title
- Category
- Objective
- Created On
- Created By
- Modified On
- Modified By
- Last Uploaded
If a column already has a sort or filter applied, Workbench shows the Sort icon ( for ascending or for descending) and the Filter icon (filter_list). You can click these in the Column Header to edit the sort or filter. You can also sort and filter columns that don’t already have a sort and filter.
How to Sort
To sort the Sets and Views page:
- Navigate to the Sets and Views page for your Study.
- From the Sets or Views tab, locate the column you want to sort by.
- In that column, hover to show the Sort & Filter button.
- Click Sort & Filter (filter_list).
- Click to expand Sort by.
- Select Ascending or Descending for the sort order.
How to Filter
To filter the Sets and Views page:
- Navigate to the Sets and Views page for your Study.
- From the Sets or Views tab, locate the column you want to sort by.
- In that column, hover to show the Sort & Filter button.
- Click Sort & Filter (filter_list).
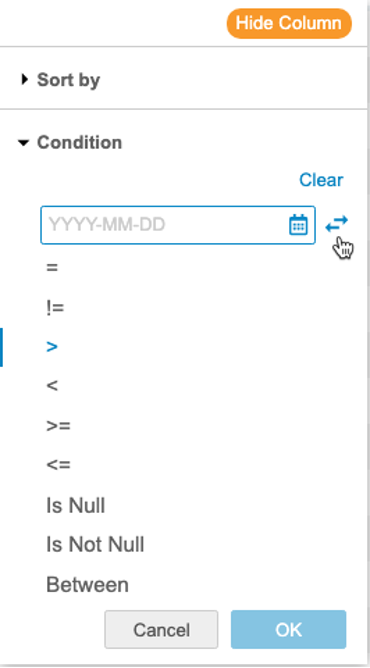
- Click to expand Condition.
- Select an Operator. Workbench uses the entered Value and chosen Operator to compare the values within the column. Learn more about the available comparison operators in the CQL Reference.
- If required, enter a Value compare values against. Note that you can only use a static value and not a function. For dates, use the YYYY-MM-DD format or use the calendar picker.
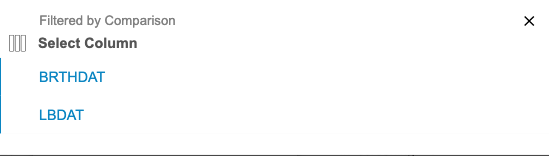
- You can also filter by comparisons. After selecting an Operator, click Compare. Then, you can select from the available columns. See below.
- Click OK.
How to Reset a Filter
To reset (remove) a filter from a column, open the Sort & Filter menu and click Clear.
Hide Set or view Columns
You can hide and show columns as needed without removing them from your set or view using the Hide Columns option.
This setting persists across the object and Study until you unhide the columns.
DQS represents hidden columns with an orange, dotted line. DQS shows one dotted line for each set of hidden columns (columns next to each other that are all hidden).
To hide a column:
- Navigate to your set or view.
- Hover over the Column Header to show the Sort & Filter menu (filter_list).
-
Click Hide Column.
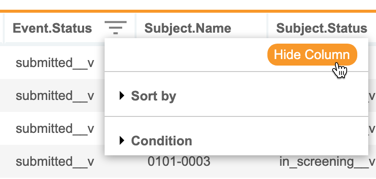
- DQS hides the column. Hidden columns are indicated by a dotted orange line. Click Unhide Columns to show all hidden columns.
To hide or show multiple columns:
- Navigate to your set or view.
-
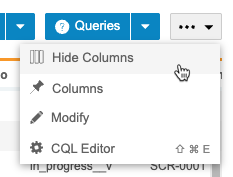
From the Actions menu (), select Hide Columns.
-
In the Show/Hide Columns dialog, you can select columns to show. To hide a column, clear the column’s checkbox. You can click Select All and Clear to select or clear all column checkboxes at once.
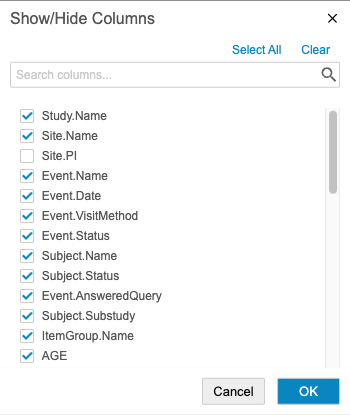
- When finished, click OK.
Show the CQL for a Set or View
To show the CQL for a set or view:
- Navigate to Sets and Views area for your Study.
- From the Sets or Views tab, locate the Set View that you want to check in the list.
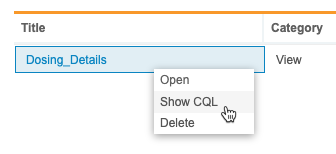
- Hover over the Title to show the menu.
-
- From the menu, select Show CQL.
-
Working with Sets
DQS Sets are data sets that Vault materializes based on user-defined CQL statements to make available for reference by other listings. Sets are automatically populated with data meeting the conditions of the set definition either hourly or every 24 hours.
We recommend you consider using a Set in the following circumstances:
- Slow-performing listings: Sets allow you to precompute an expensive result once and reference it multiple times instead of repeating the CQL query each time you load the listing.
- Code reuse: Capture the shared CQL in a single Set, and reference it across multiple listings, cutting down on time spent adding the same CQL in each listing.
- Automated data refresh: Sets refresh automatically at a defined interval.
Creating a Set from a Listing
You can create a set from existing CQL definitions, including from listings, metrics, checks, views, and other sets. There is a maximum of 15 sets per study master.
To create a new Set:
- Navigate to the listing from which you want to create a Set.
-
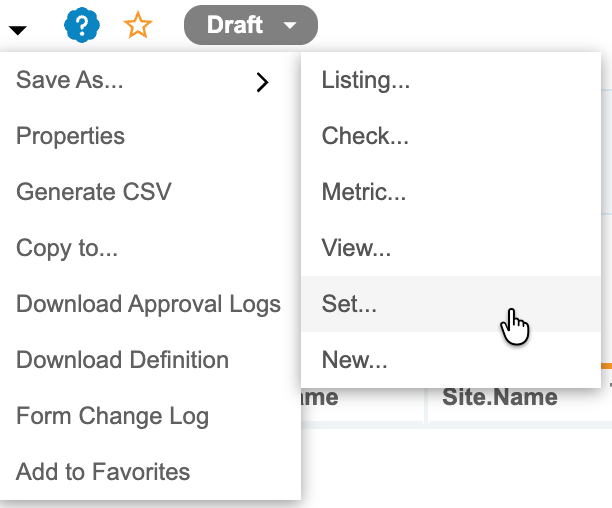
From the Listing menu (), select Save as > Set.
-
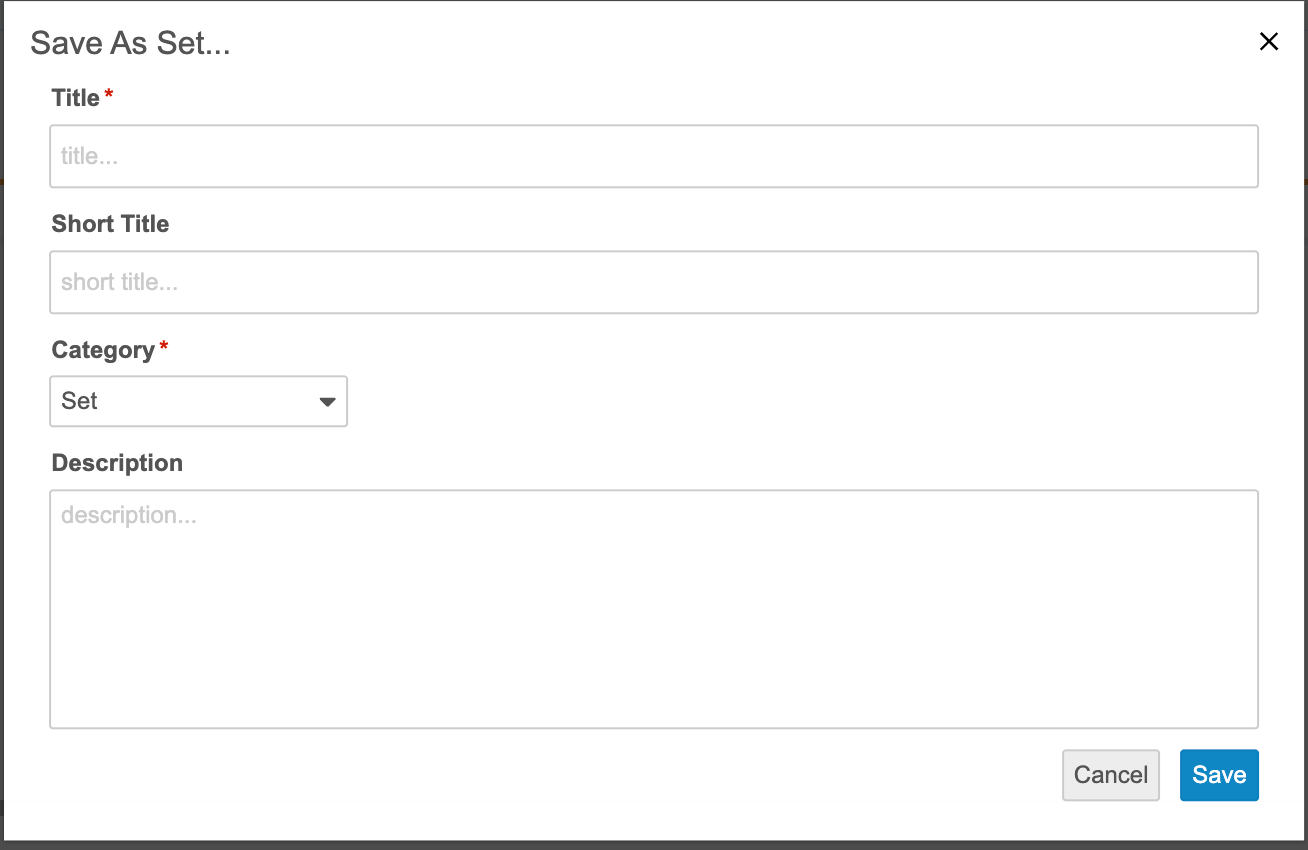
In the Save As Set dialog, enter a Title. The title can’t contain any spaces. Note that this value must be unique across all the sets within the Study.
-
Optional: Enter a Short Title.
-
Optional: Enter a Description.
- Click Save.
Creating a Set from the CQL Editor
You can create Sets directly from the CQL editor. To create a new Set using the CQL editor:
- Navigate to your Study in Workbench.
-
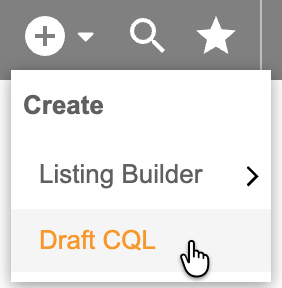
From the Create menu, select Draft CQL. A new listing draft opens.
- Draft your CQL statement to show the desired data in the listing. Learn more about [CQL](/lr/monitors/cdb/cql-reference/ and rules for defining sets with CQL.
- Click Apply.
-
Review the listing. If needed, edit the CQL query again and reapply until you’re satisfied with the data shown in the listing. Note that the CQL statement must be valid to save the draft as an object type.

-
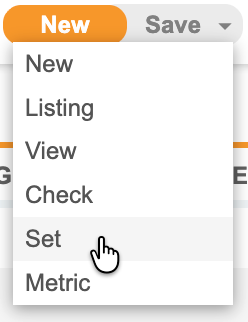
When your CQL statement is valid, click the Save menu and select Set.
-
In the Save As Set dialog, enter a Title.
- Optional: Enter a Short Title.
- Select a Category.
- Optional: Enter a Description.
- Click Save.
Referencing a Set
Reference CQL is the statement that you use to refer to your set in any listings that use the set.
To identify the reference CQL for your set:
- Navigate to Sets and Views > Sets.
- Click the Title of the set you want to edit. The Set page opens.
-
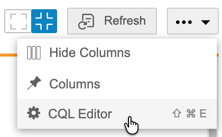
In the Actions menu on the upper right, click CQL Editor.
-
In the CQL Editor, click Reference CQL.
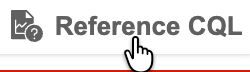
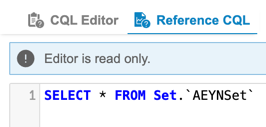
- The Reference CQL tab opens. Here, you can view and copy the CQL statement used to reference this Set.
Editing a Set
You can edit your set to modify the CQL as needed. See examples of CQL for sets. To edit a set:
- Navigate to Sets and Views > Sets.
- Click the Title of the set you want to edit. The Set page opens.
-
In the Actions menu on the upper right, click CQL Editor.
- Make your desired changes in the CQL Editor.
- Click Apply.

Deleting a Set
To delete a set:
- Navigate to Sets and Views > Sets.
- Hover over the Title of the set you want to delete to display the Actions menu.
-
In the Actions menu, click Delete.
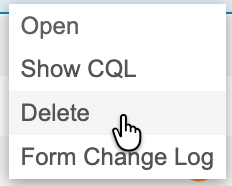
- In the Delete Set dialog, enter a Reason.
- Click Delete.
Note that deleting a set will make any listings or export definitions created with that set invalid.
Example: Set Creation - Data Set for Adverse Event and Concomitant Medication Forms
The following example shows a CQL statement creating a set called Set_AE_CM for the Adverse Event and Concomitant Medication forms:
SELECT @HDR.Site.Name, @HDR.Subject.Name, @HDR.EventGroup.RepeatLabel, @HDR.Event.Date, @Form.CreatedDate, @Form.SDV, AETERM, AESTDAT, AEENDAT, CMTRT, CMSTDAT, CMENDAT
FROM	   @HDR
	 left join AE on @HDR.Event.ID = AE.@Form.Event.ID
	 inner join CM on @HDR.Event.ID = CM.@Form.Event.ID
WHERE (((`@Form`.`Status` = 'submitted__v')) OR (`@HDR`.`Event`.`Status` IN ('did_not_occur__v')))
You can invoke Set_AE_CM in full or using selected attributes in another listing in the following ways:
Using select *:
select * from Set_AE_CM
Selected attributes from Set_AE_CM:
select `Site.Name`, `Subject.Name`, `EventGroup.RepeatLabel`, `Event.Date`,
	 @Form.CreatedDate, `Form.SDV`, AETERM, AESTDAT, AEENDAT
from Set.Set_AE_CM
As shown in this example, you can access any @HDR attributes defined in the set by surrounding them with back ticks (`). You can access @Form attributes defined in the set by using either @Form notation or back ticks (`). Learn more about CQL for sets.
Working with Views
Creating a View
- Navigate to your Study in Workbench.
- From the Create New menu, select Listing.
- Drag and drop Properties from Available Properties to Selected Properties to add them to your view. You can drag a group of properties, or click Expand to choose individual properties.
- Click Remove () to remove a property from your view.
- Click Items in the left-hand Listing Builder menu.
- Drag and drop Forms from Available Properties to Selected Properties to add them to your view. You can drag an entire Form, or click Expand to choose individual Items on that Form.
- Click Remove () to remove an item from your view.
- Click Arrange in the left-hand Listing Builder menu.
- Drag and drop properties, forms, and items to reorder them.
- Click Rows in the left-hand Listing Builder menu.
- Select a Row Structure:
- By Subject: This option attempts to display data from multiple forms across events in a single row for the subject, independent of the study schedule, and displays all data where subjects match across events. Any selected schedule-related fields, such as Event Date or Event Name are set to null in the listing.
- By Schedule: This option displays form data from different events on separate rows. We recommend this option if schedule-related fields are required. This is the default option for all core listings.
- Click Columns in the left-hand Listing Builder menu.
- Select a Column Structure:
- Wide (Side by Site): With this option, each column represents a single unique item or item property.
- Stacked (Union): With this option, each column can contain multiple items or item properties stacked together, where the user can include up to five (5) items and/or item properties per column.
- Click Aliases in the left-hand Listing Builder menu.
- Enter a Column Alias for any columns that you want to use non-default headers.
- Click Sort & Filter in the left-hand Listing Builder menu.
- Use the Sort & Filter menu to apply sort orders and filters to any columns.
- Optional: Click Preview to preview your view.
- Click Validate and Save.
- Enter a Title for your view. Note that this Title must be unique within your Study.
- Enter a Short Title.
- Select a Category for your view. These Categories are defined by an administrator and may restrict other users from performing certain actions on the view.
- Enter a Description.
- Click Save. Workbench saves your view and opens it.
How to Create a View with CQL
To create a new View:
- Navigate to the listing from which you want to create a View.
-
- From the Listing menu (), select Save as View.
-
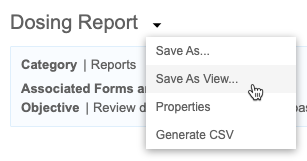
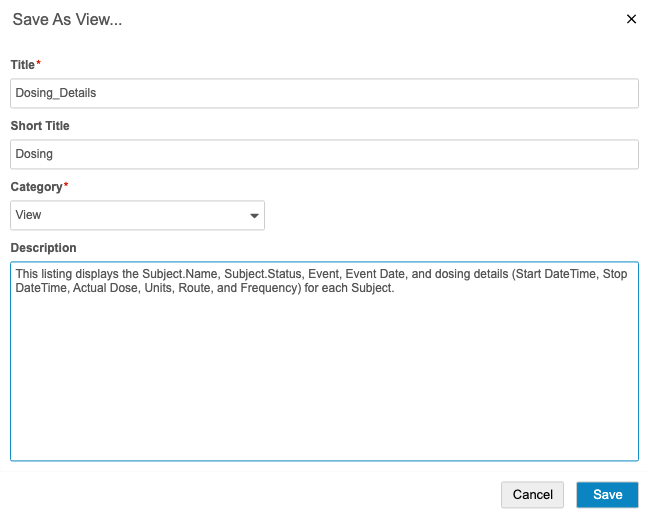
- Enter a Title. The title can’t contain any spaces. Note that this value must be unique within the Study.
- Optional: Enter a Short Title.
- Optional: Enter a Description.
-
- Click Save.
-
CQL Statement
To edit the CQL statement for a view:
- Navigate to the View you want to edit.
-
From the Actions menu (), select CQL Editor. Workbench opens the CQL Editor in the bottom half of your browser window.
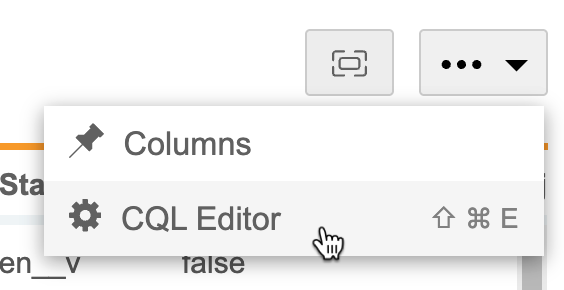
- Make your changes to the statement. See the CQL Reference for details about creating a CQL statement.
-
- Click Apply. If there are no errors in your statement, DQS updates the listing to reflect the results of your statement. If there are errors, DQS displays them in a banner above the Query field. Resolve them, and then click Apply again.
-
-
- Optional: Click Reset to return the saved statement.
-
- Click Close (X) to close the CQL Editor.
-
- To save the changes to your View, click Save.
-
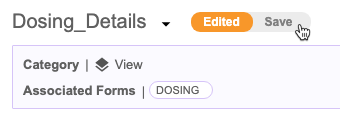
- In the confirmation dialog, click Save.
Copy a View with Save As
You can create a copy of a View using the Save As option.
To copy a View:
- Navigate to the View you want to copy.
-
- From the View () menu, select Save As.
-
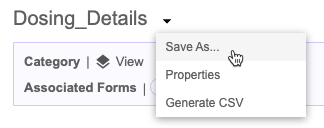
- Enter a Title for your new view.
- Enter a Short Title.
- Optional: Enter a Description.
- Click Save.
How to Delete a View
You can delete views. If you delete a view, any custom listings or export definitions that reference the deleted View are marked as Invalid.
To delete a view:
- Navigate to the Views tab.
- Locate the View you want to delete in the list.
- Hover over the Title to show the View menu ().
-
- From the** View** menu, select Delete.
-
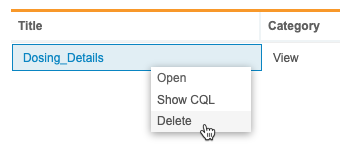
- In the confirmation dialog, click Delete.
Example: Simply CQL for Two Adverse Event Forms
If your Study uses two different Adverse Event forms (Adverse_Event and Serious_Adverse_Event), you could use UnionAll() to create a Custom Listing showing data from both forms.
select @HDR.Site.Number as `Site Number`
     , @HDR.Subject.Name as `Subject ID`
     , @HDR.Event.Name as `Event Name`
     , AETERM as AE_1
     , AESEV as AE_2
     , AESDTC as AE_3
from Adverse_Event as AE,
(select distinct @HDR.Subject.Name as SubjName, @Form.SeqNbr as AEID, AETERM)
from AE3001_LV1
WHERE (@Form.Status = 'submitted__v' or @HDR.Event.Status IN ('did_not_occur__v')) AND AETERM is not NULL) as AE

union all

select @HDR.Site.Number as `Site Number`
     , @HDR.Subject.Name as `Subject ID`
     , @HDR.Event.Name as `Event Name`
     , AETERM as AE_1
     , AESEV as AE_2
     , AESDTC as AE_3
from Adverse_Event as SAE,
(select distinct @HDR.Subject.Name as SubjName, @Form.SeqNbr as AEID, AETERM)
from AE3001_LV1
WHERE (@Form.Status = 'submitted__v' or @HDR.Event.Status IN ('did_not_occur__v')) AND AETERM is not NULL) as SAE
However, this is a complicated CQL statement and may be difficult for users to work with. You can create a View based on this listing (View_AE), and then modify the Custom Listing that references the View as the source, instead of both Forms. This significantly shortens the CQL statement.
View_AE CQL:
select @HDR.Site.Number as `Site Number`
     , @HDR.Subject.Name as `Subject ID`
     , @HDR.Event.Name as `Event Name`
     , AETERM as AE_1
     , AESEV as AE_2
     , AESDTC as AE_3
from Adverse_Event as AE,
WHERE (@Form.Status = 'submitted__v' or @HDR.Event.Status IN ('did_not_occur__v')

union all

select @HDR.Site.Number as `Site Number`
     , @HDR.Subject.Name as `Subject ID`
     , @HDR.Event.Name as `Event Name`
     , AETERM as AE_1
     , AESEV as AE_2
     , AESDTC as AE_3
from Adverse_Event as SAE,
WHERE (@Form.Status = 'submitted__v' or @HDR.Event.Status IN ('did_not_occur__v')
Custom Listing Referencing View_AE:
select V_AE.`Site Number`
     , V_AE.`Subject ID`
     , V_AE.`Event Name`
     , V_AE.`AE_1`
     , V_AE.`AE_2`
     , V_AE.`AE_3`
from View_AE as V_AE,
(select distinct @HDR.Subject.Name as `Subject Name`, @Form.SeqNbr as AEID, AETERM
from AE3001_LV1
WHERE (@Form.Status = 'submitted__v' or @HDR.Event.Status IN ('did_not_occur__v')) AND AETERM is not NULL) as AE
WHERE V_AE.@HDR.Subject.Name = AE.@HDR.Subject.Name
Pin Columns in a Set or View
You can pin columns in your set or view so that those columns remain visible even when you scroll to the right.
To pin columns:
- Navigate to the Set or View you want to modify.
- Click Columns.
- Select a Number of columns to pin. This is a count of columns from the left, the leftmost column being 1.
- Click outside of the Pin Columns menu to close it.
Workbench pins the columns, showing a bolded border on the right side of the rightmost pinned column.
Edit Properties
To edit a set or view’s properties:
- Navigate to the Set or View you want to edit.
-
- From the menu, select Properties.
-
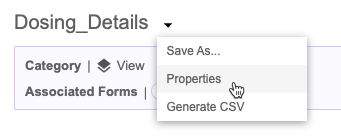
- In the Properties dialog, click Edit.
- Make your changes.
- Click Save.
Limitations for Sets & Views
The following CQL functionality isn’t supported when defining Sets and Views:
| Functionality | Supported for Sets | Supported for Views |
|---|---|---|
Group By clauses with mismatched projections columns |
||
select * |
||
@ItemGroup.Name attribute |
||
Call notations |
||
Compact |
||
| Reference Objects | ||
| Nested references to other sets or views | ||
| Greater than 100 columns | ||
| Row-level blinding | ||
UnPivot() |
||
| Duplicate column aliases | ||
@Form attributes other than @Form.SeqNbr in the projection |
||
@ItemGroup attributes other than @ItemGroup.SeqNbr in the projection |
The following CQL functionality isn’t supported when referencing Sets and Views:
| Functionality | Supported for Sets | Supported for Views |
|---|---|---|
| Combining Sets and Views in the same listing | ||
| Referencing Sets or Views | ||
| Review-enabled listings | ||
| Checks | ||
Inclusion of a view’s @Form and @ItemGroup attributes in the projection or filter (WHERE clause) |
||
If using On Subject ALIGN, whether UNALIGN can be used in the CQL statement |