Clean Patient Tracker
The Clean Patient Tracker offers a centralized, subject-centric page for data managers to review the data cleanliness of each patient in a study. It replaces manual, error-prone methods like Excel® spreadsheets. Data cleanliness refers to a state where patient data is complete, accurate, and free from issues.
Key Features
The Clean Patient Tracker provides several key features:
- Subject Grid: The subject grid allows you to view the cleanliness status of all subjects in a single grid.
- Direct Action: You can take immediate action on data management tasks, such as reviewing and closing queries.
- Visual Charts: You can utilize charts to gain insights into data cleaning progress and easily identify sites that may be falling behind.
- Advanced Filtering: With Advanced Filtering, you can filter the subject grid and charts by various criteria, including site, country, and cohort. This helps you focus on specific data segments.
- Reporting: You can download progress reports in CSV format for further analysis.
Prerequisites
Users with the CDMS Lead Data Manager and CDMS Data Manager standard study roles can use the clean patient tracker by default. For users with custom study roles, your role must grant the following permissions:
| Type | Permission Label | Controls |
|---|---|---|
| Standard Tab | Workbench Tab | Ability to access and use the Data Workbench application, via the Workbench tab |
| Functional Permission | View All Listings | Ability to view all listings |
If your Study contains restricted data, you must have the Restricted Data Access permission to view it.
Learn more about Study Roles.
Accessing the Clean Patient Tracker
You can access the Clean Patient Tracker on the Subjects page by using the Study menu () from the main Studies page or the Navigation Drawer () when inside a selected Study.
About the Clean Status
The Clean column in the subject grid indicates the data quality of a subject. True means that all submitted data for that subject is Clean, and the subject now holds the Clean status. False means that all submitted data for that subject is not yet Clean.
The following criteria are required to indicate that a subject is Clean:
- All Queries Closed: The system closes all open or answered queries.
- All Checks Completed: All data checks have run successfully without any invalid executions.
- All Review Listings Completed: No rows for the given subject are new or in progress.
- SDV Complete: All required Source Data Verification (SDV) is complete.
- All Terms Coded: There are no uncoded medical terms.
Clean Status Determination: The system determines a subject’s cleanliness by the Clean status of the submitted data. It captures overdue events, missing forms, and/or in-progress log forms independently of the Clean status.
Interacting with the Subject Grid
The main grid displays detailed information for each subject. It provides direct links to your work, so you can view and act on cleaning tasks.

To manage queries, click the number in the Open Queries or Answered Queries columns to jump to a filtered list. From there, you can respond to or close the queries.
To complete reviews, click the number in the Incomplete Reviews or Checks columns to go directly to the filtered list and complete those tasks.
Viewing Subject Information
Columns
The Clean Patient Tracker includes the following columns:
| Column | Description |
|---|---|
| Cohort | The Cohort the subject is assigned to. If there is no assigned Cohort, this column is blank. |
| Arm | The Arm the subject is assigned to. If there is no assigned Arm, this column is blank. |
| Substudy | The Substudy the subject is assigned to. If there is no assigned Substudy, this column is blank. |
| Country | The Study Country of the Subject |
| Site | The Site number assigned to the Subject |
| Subject Name | The Subject ID (Name) of the Subject. Clicking the value in this column opens the subject’s Casebook in the Review tab of Veeva EDC. |
| Subject Status | The Status of the Subject |
| Latest Event Group | The Event Group associated with the latest Event. DQS displays the event group’s Repeat Label. |
| Latest Event | The most recent Event based on the entered Event Date, including scheduled, unscheduled, and non-EDC events. |
| Overdue Forms | The number of forms overdue for a given subject is determined when the following conditions are met: the overdue form date is earlier than today, the form is not submitted, and the form is not marked as Intentionally Left Blank (ILB). Blank repeating forms and third-party forms are excluded from the overdue count. Overdue forms are not part of the subject’s clean score calculation. |
| Overdue Events | The number of Events in the Overdue status for the Subject (scheduled, incomplete Events where the Planned Date is earlier than the current date, and the Event is NULL and not entered) |
| In-Progress Log Forms | The count of In-Progress and/or In-Edit log forms for each subject. Log forms are not part of the scheduled data collection and are not considered overdue. They also do not contain defined Event Dates. Users should be attentive to any Serious Adverse Events still in-progress. |
| Incomplete SDV | The total count (number) of Event Dates and/or Visit Methods that are SDV Required and incomplete. |
| Open Queries | The total count (number) of Queries in the Open status. This includes both EDC and third-party queries. Clicking the link in this column opens a query listing of these queries in the Queries page of DQS so that you can take action on those open queries. |
| Answered Queries | The total count (number) of Queries in the Answered status. This includes both EDC and third-party queries. Clicking the link in this column opens a query listing of these queries in the Queries page of DQS so that you can take action on answered queries. |
| Uncoded Terms | The total count (number) of coding terms where the Coding Status is Open, Uncoded, Rejected, Noncurrent, or Updated. |
| Incomplete Reviews | The total count (number) of incomplete review listings. Clicking the link in this column opens the Review Dashboard filtered by the incomplete review listings for the given subject. Incomplete reviews are totaled by adding all invalid review listings and review listings containing the subject where at least one row associated with the subject is Unreviewed, In-Progress or No Review. The incomplete review column is based on review-enabled listings, where the review listing must contain the subject name and site number (or site name). Note that Review Listings with changes are also included in this count. |
| Incomplete Checks | This column shows the number of active Checks that didn’t run as scheduled for the Study. If the Study has at least one Check that is scheduled to run hourly and didn’t run as scheduled, this column shows (for every subject) the total number of checks that need attention. Reasons for incomplete checks include a missing third party source, a missing third party data package, or a study design change. Once the Check is modified to accommodate the change and runs successfully, this column updates accordingly. See Automating Queries with Checks for additional details. |
| Clean | This column shows “true” when the subject is clean. When the subject isn’t clean, this column shows “false”. A subject is considered clean when there are zero incomplete SDVs, open queries, answered queries, uncoded terms, and incomplete checks. If all these counts are zero, the subject is deemed clean. Overdue events are not included in this determination. |
| Summary | This column indicates whether the Subject is signed, frozen and/or locked. |
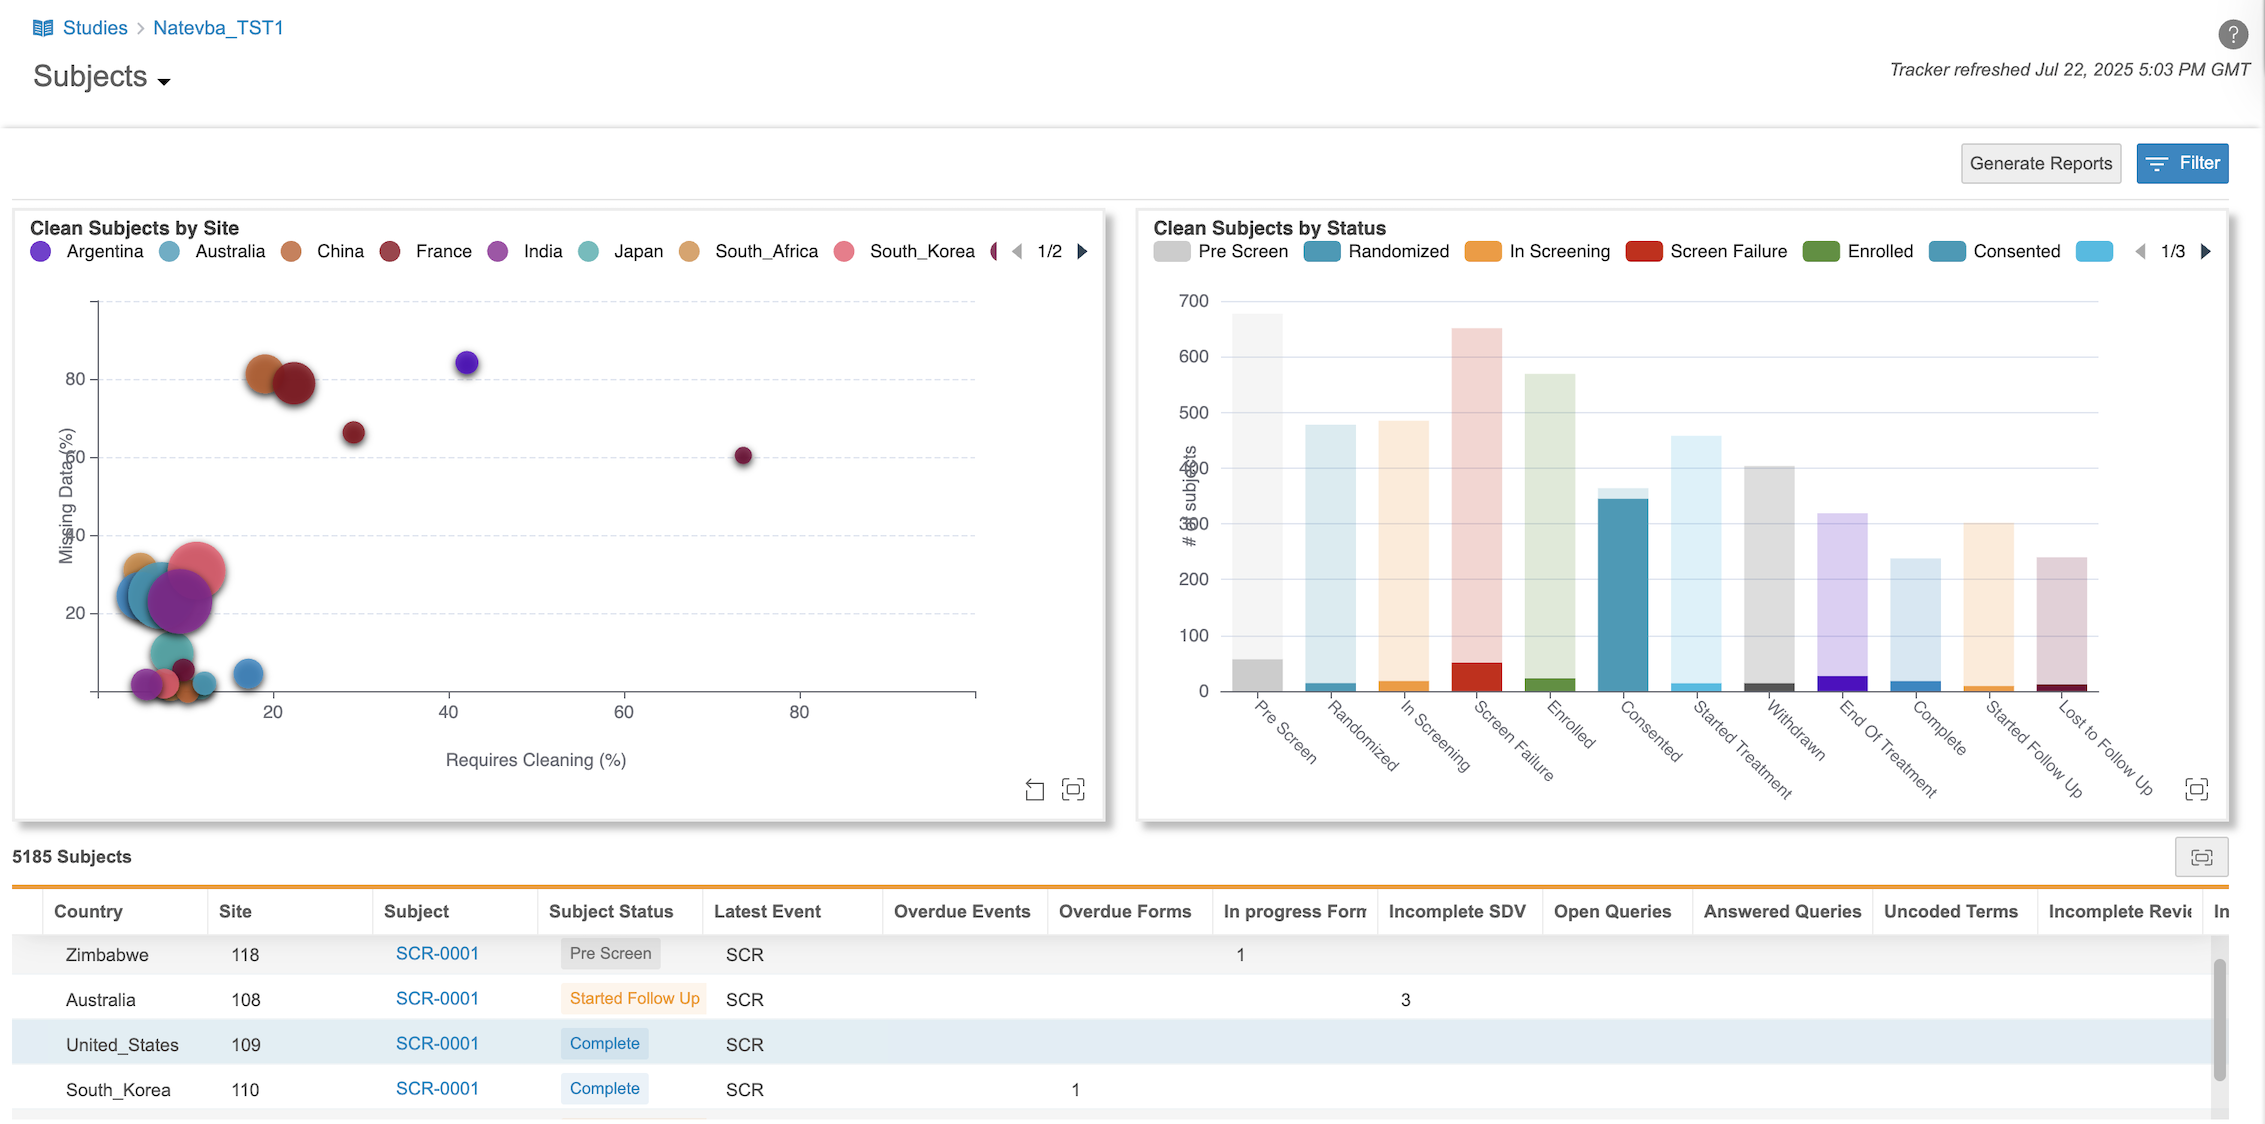
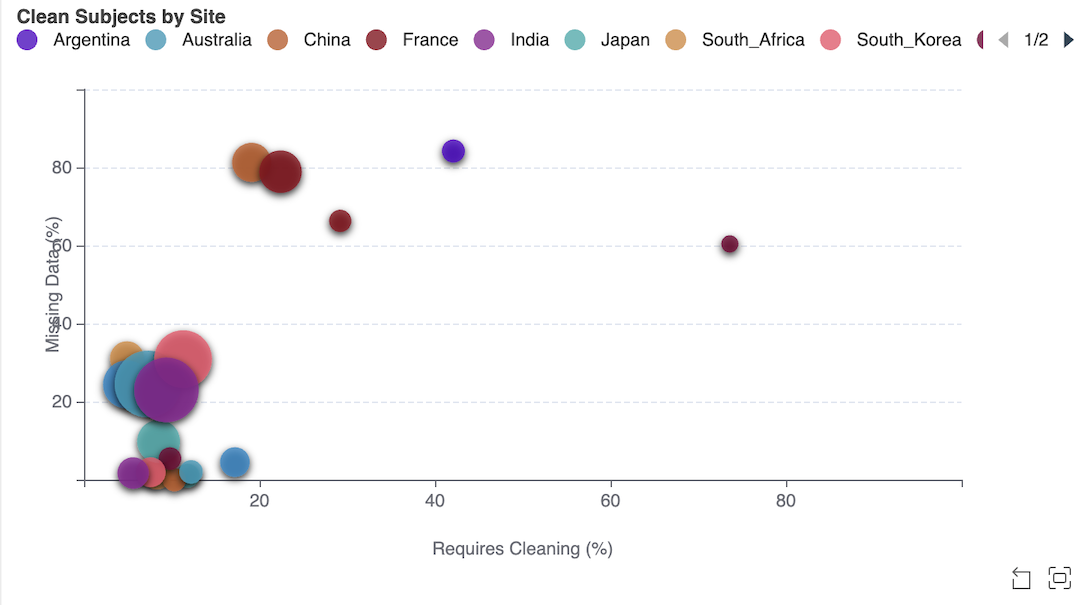
Site Chart
The Site Chart provides a high-level overview of data quality across different sites, making it easy to identify which sites need the most attention. It helps you quickly answer questions such as: Which sites have the highest percentage of overdue data? Which sites have the most outstanding cleaning tasks?
- X-axis: The percentage of subjects with overdue data and/or in-progress log forms.
- Y-axis: The percentage of subjects requiring cleaning.
Each bubble on the chart represents a site.
- Bubble Size: The bubble size indicates the total number of subjects at that site. Larger bubbles mean more subjects.
- Bubble Color: The bubble color represents the country the site is located in, allowing for quick geographical insights.
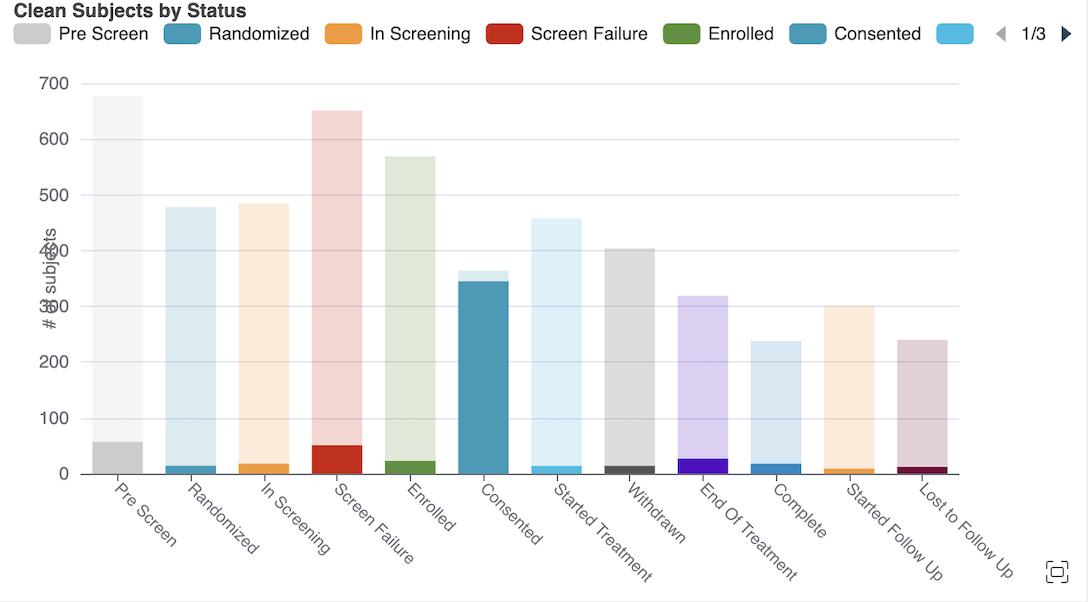
Subject Status Chart
The Subject Status Chart helps you prioritize your cleaning efforts by showing which subject statuses require the most cleaning attention. This chart displays subjects with outstanding cleaning requirements, categorized by their current status.
Interactive Chart Features
Both the Site Chart and the Subject Status Chart are fully interactive with each other and the main subject grid.
- Interactive Filtering: Clicking on elements within one chart (e.g., a specific site on the Site Chart or a subject status on the Subject Status Chart) will automatically filter the data displayed in the other chart and the main subject grid. This allows you to drill down into specific areas of interest.
- Maximizing and Zoom Controls: You can maximize either chart for a more detailed view. For the Site Chart, you can use zoom controls to focus on specific data points.
These interactive features enable more efficient action on the insights you gain from the charts, helping you streamline your data cleaning processes.
Sorting & Filtering
You can easily sort and filter subjects using the Sort & Filter menu. To open the Sort & Filter menu, click the column header for the column you want to sort by or apply a filter to.
- Sorting: You can click on any column header to open the Sort & Filter menu and choose to sort in ascending or descending order.
- Filtering: You can apply filters based on conditions. This includes using operators like Equals, Contains, Greater than, and Is Null to narrow down the subject list. For example, you can filter to show only subjects from a particular site with open queries. Filters apply to the grid and the Site and Subject Status charts.
If a column already has a sort or filter applied, the system displays the Sort icon ( for ascending or for descending) and the Filter icon (filter_list).
Filter Operations
The following filter operations are available in the Clean Patient Tracker. To simplify filtering, the system automatically displays only the operators that are relevant for the selected column’s data type (e.g., text, numbers, or dates).
Comparison Operators
= (Equals): Matches values that are identical.!= (Does not equal): Matches values that are not identical.> (Greater than): Matches values numerically greater than the specified value.< (Less than): Matches values numerically less than the specified value.>= (Greater than or equal to): Matches values numerically greater than or equal to the specified value.<= (Less than or equal to): Matches values numerically less than or equal to the specified value.BETWEEN...AND...: Check whether a value is within a range of values.
List Operators
IN(): Checks if a value matches any value in a specified list.NOT IN(): Checks if a value does not match any value in a specified list.
Values in the list must be separated by a comma. For example, Site IN [0001,0002] returns all subjects that are in site 0001 and/or site 0002. Country Not IN [Canada, USA, Mexico] returns subjects that are not from Canada, USA, or Mexico.
Value Existence
IS NULL: Finds entries where the field is empty (has no value).IS NOT NULL: Finds entries where the field is not empty (has any value).
Text Search Operators
CONTAINS: Checks if a specified sequence of characters exists anywhere within the value.DOES NOT CONTAIN: Checks if a specified sequence of characters does not exist anywhere within the value.STARTS WITH: Checks if a value begins with a specific sequence of characters.ENDS WITH: Checks if a value ends with a specific sequence of characters.
Text search operators are case-insensitive.
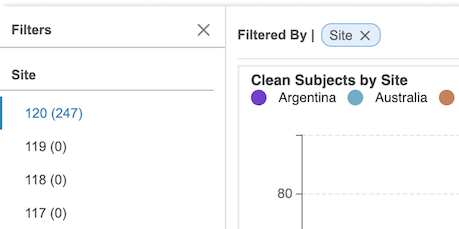
Filtering by Site
You can filter the list of subjects by Site in the Filters panel. This helps you focus your data cleansing on one site at a time. The panel lists every site in your study along with a count of its total subjects.
When you click a Site name in the panel, the entire view, including both the charts and the subject grid, instantly updates to show data only for that selected site. To see all sites again, simply deselect the Site in the panel.
Click Close () to close the Filters panel. Click Filter to reopen it.
Filtering by Column
You can also filter your list of subjects using the Sort & Filter menu. You can select a comparison operator and, if required, a value to filter by, and use that as a filter.
To filter your listing with a conditional filter:
- Locate the column you want to filter by in the datasheet.
- Hover over the Column Header to show the Filter icon (filter_list).
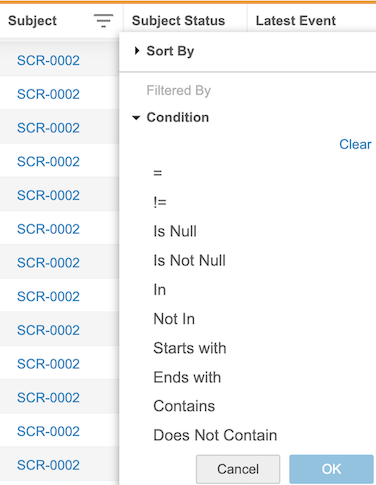
- Click the Filter icon (filter_list) to open the Sort & Filter menu.
- Under Condition, select an Operator. Workbench uses the entered Value and chosen Operator to compare the values within the column. There are different operators available for different column data types.
- If required, enter a Value to compare values against. Note that you can only use a static value and not a function.
- Click OK.
Filtering by Summary & Subject Status
You can filter to show only subjects in certain statuses. For example, in the Summary column, you can filter to return subjects that are signed but not locked, regardless of their frozen status.
To filter the Summary column:
- Hover over the Summary column to show the Filter icon (filter_list).
- Click the Filter icon (filter_list) to open the Sort & Filter menu.
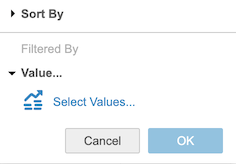
-
Under Value, click Select Values.

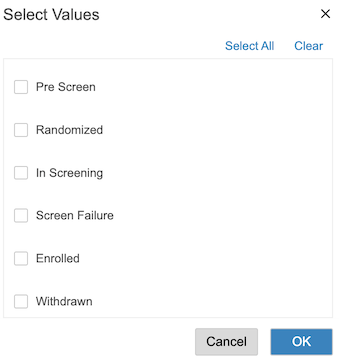
-
Select the checkboxes for the Values you want to filter by.

- To clear the filter, click Clear or remove values one-by-one by unchecking each box.
- Click OK to close the dialog.
- Click OK again to apply the filter.
To filter the Subject Status column:
- Hover over the Subject Status column to show the Filter icon (filter_list).
- Click the Filter icon (filter_list) to open the Sort & Filter menu.
-
Under Value, click Select Values.
-
Select the checkboxes for the Values you want to filter by.
- To clear the filter, click Clear or remove values one-by-one by unchecking each box.
- Click OK to close the dialog.
- Click OK again to apply the filter.
Sorting
You can sort by a single column using the Sort & Filter menu.
To sort by a column:
- Locate the column you want to sort by in the datasheet.
- If the column isn’t already sorted or filtered, hover over the Column Header to show the Filter icon (filter_list).
- Click the Filter icon (filter_list). This opens the Sort & Filter menu.
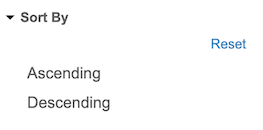
- Under Sort by, select Ascending (A to Z) or Descending (Z-A) for a sort order. Workbench sorts the datasheet by the column values in the chosen sort order. Workbench shows a Sort icon ( for ascending or for descending) in the column header.
Resetting a Column’s Sort Order
To reset (remove) the sort and return the listing to the default order, open the Sort & Filter menu and click Reset.
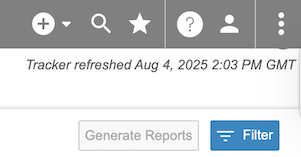
Reporting Capabilities
You can download detailed progress reports in CSV format directly from the Clean Patient Tracker. This includes the Subject report, a CSV file that reflects the current view of the subjects grid with applied filters, and Event and Form reports.
Downloading Progress Reports
To download a Subject report:
- Navigate to the Clean Patient Tracker.
-
From the Subjects menu (), select Download Subject Report.
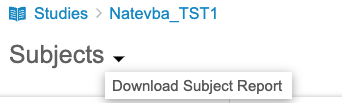
- Save the CSV file.
To download Form and Event reports, click either Form Progress Report or Event Progress Report to download that report.
![]()
The ZIP file contains both the Event and Form progress reports. The system generates these reports hourly. A report can only be generated if one hasn’t been generated in the past hour.