Importing 3rd Party Data
DQS allows you to import data from 3rd party systems for cleaning and reporting in the DQS Workbench application. This is intended for importing subject data that exists outside of the subject’s Casebook in Veeva EDC, for example, data about a Subject from an IRT system.
Availability: Veeva DQS (formerly CDB) is only available to DQS license holders. Contact your Veeva Services representative for details.
Prerequisites
Before you can import data into DQS, your organization must perform the following tasks:
- Create a Study, Study Country, and Study Sites.
- Create and publish Casebook Definition, a complete set of design definition records, and a study schedule in Veeva EDC Studio. See details here
- Create Casebook records for each of your Subjects
Users with the CDMS Lead Data Manager standard study role can perform the actions described below by default. If your organization uses user-defined Study Roles, your role must grant the following permissions:
| Type | Permission Label | Controls |
|---|---|---|
| Standard Tab | Workbench Tab | Ability to access and use the Data Workbench application, via the Workbench tab |
| Functional Permission | View Import | Ability to access the Import page |
| Functional Permission | API Access | Ability to access and use the Vault EDC API. (This permission is also required to use CDB, and to raise queries on EDC data in CDB.) |
| Functional Permission | Approve Import | Ability to approve or reject an import package that contains configuration changes |
| Functional Permission | Download Import Package | Ability to download import packages |
| Functional Permission | Upload 3PD Packages | Ability to import data via the CDB Package Loader. |
Learn more about Study Roles.
Preparing Data for Import
You can import your data as a series of CSV files to your vault’s FTP server or by uploading them using the DQS Package Loader within the DQS user interface.
To import your data, you’ll first need to create the CSV files, which list your clinical data, and a manifest file (.json), describing your data and how DQS should process it. Then, you’ll create a ZIP package (.zip) containing all of those files for import into DQS.
Manifest Builder: DQS includes the DQS Manifest Builder for ease of file creation. The DQS Manifest Builder is a step-by-step wizard that guides you through all manifest file configuration options in a user-friendly interface. In the DQS Manifest Builder, DQS presents you with every import option, which you can set without needing to understand JSON.
Data CSVs
Create a CSV for each data collection form in your study that is independent of EDC. For each CSV, you must provide four (4) required columns, and then a column for each execution data item. For the four required columns, you can name them whatever you choose, as long as you define those names in your manifest file for each CSV. Note that these column names are case-sensitive and must be an exact match to the values provided in your manifest file.
Aside from the study, site, subject, event, and sequence columns, DQS considers every column to be a data item and will import it as such. There is a limit of 410 item columns per listing.
| Column | Description | Manifest File Key |
|---|---|---|
| Study |
In this column, provide the Name of the Study. For your Study, provide the Name of your Study ( Don't use "Studyname" as a header for this column, as it can cause errors during export package generation.
|
study |
| Site |
In this column, provide the Name (site number) of the Site (from the Site record in Veeva EDC). Don't use "Sitename" as a header for this column, as it can cause errors during export package generation.
If you don’t define a Site column in the manifest file and exclude the column from the CSV file, then Workbench can match based on the Subject column. Workbench expects Subject IDs to be unique at the Study level when doing so. |
site |
| Subject |
In this column, provide the Subject ID for the subject (from the Subject record’s Name field in Veeva EDC). Don't use "Subjectname" as a header for this column, as it can cause errors during export package generation.
|
subject |
| Event | In this column, provide the Event (visit) associated with the data row. Depending on the edc_matching configuration in your manifest file, you can use the Name or External ID of the EDC Event Definition, the Event Date of the EDC Event, or use Events in this column to have Workbench create events separate from the EDC schedule. You can also set a default Event for all rows in the manifest file and exclude this column entirely, which assigns all rows to that Event. Learn more about event matching below. | event |
| Form *Optional |
In this column, provide the Form associated with the data row (from the Name of the Form Definition record in Veeva EDC). This column is only needed if you’re importing data for multiple Forms in a single CSV. If you don’t include this column, Workbench assumes that each data row is an occurrence of a single Form. Learn more about form mapping below. |
form |
| Form Sequence *Required for repeating Forms, optional for non-repeating Forms |
The Sequence Number of the Form, if the form is repeating. A repeating Form represents the collection of the same data more than once during a single Event for a single Subject. Then, the Sequence Number uniquely identifies the data row. If there is more than one row (form) for a Subject and Event, Workbench assumes that the form is repeating and uses this column to set the Sequence Number. This column is required if your Form is repeating, but it is optional if your Form is not repeating. In that case, Workbench sets the Sequence Number to “1” for each row by default. If you don’t include this column for a repeating Form, it can result in a cartesian product, because Workbench defaults Sequence Number to “1”, resulting in rows with the same Subject/Site/Form/Form Sequence Number identifier. With the 20R1 release, we renamed “sequence” as “formsequence”. You can continue to import data using “sequence” until the 20R2 release (August 2020). |
formsequence |
| Item Group *Optional |
In this column, provide the Item Group associated with the Item columns after it (from the Name of the Item Group Definition record in Veeva EDC). This column is only needed if you’re importing data for forms with multiple Item Groups. If you don’t include this column, Workbench assumes that all Items in the data row are in a single Item Group. Learn more about item group mapping below |
itemgroup |
| Item Group Sequence *Required for repeating Item Groups, optional for non-repeating Item Groups |
The Sequence Number of the Item Group, if the item group is repeating. A repeating Item Group represents the collection of the same data more than once during a single Form for a single Subject. Then, the Sequence Number uniquely identifies the data row. If there is more than one set of Items in a form row for a Subject and Event, Workbench assumes that the form is repeating and uses this column to set the Sequence Number. If you don’t include this column for a repeating Item Group, it can result in a cartesian product, because Workbench defaults Sequence Number to “1”, resulting in rows with the same Subject/Site/Form/Form Sequence/Item Group/Item Group Sequence Number identifier. For non-repeating Item Groups, this column is optional, so you may leave it blank or not provide it if none of your item groups are repeating. In that case, Workbench sets the Sequence Number to “1” for each row by default. |
itemgroupsequence |
| Row ID *Optional 21R2 & Earlier |
Provide a list of columns that, when their values are combined, Workbench can use to uniquely identify a row. This is useful when you don’t have a numerical key to identify a sequence. For example, when importing lab data, you could use Study, Subject, and Lab Test to uniquely identify rows. If you include a rowid column mapping, Workbench ignores any values for sequence and automatically sets the sequence to “1”. If omitted, Workbench uses the default array of columns to identify rows: study, subject, event, form, and formsequence.While providing a single list of columns for rowid is still supported, it is planned for removal in a future release. Instead, define groupid and distinctid as lists of columns for the rowid. See the row below. |
rowid |
| Row ID *Optional 21R3 & Later |
Group ID: This is a legacy field for data imports created before the 21R3 release. For data imports after the 21R3 release, you should use Distinct ID. Using Group ID creates data integrity issues because it does not automatically increment form or item group sequence numbers like Distinct ID. For example, if your data doesn’t explicitly map the form or item group sequence number, it defaults to 1. This can cause multiple records to import with the exact same values for Study, Site, Subject, and Event, Form, Form Sequence Number, Item Group, and Item Group Sequence Number. As a result, CQL views these as duplicate records, which can cause inconsistent listing results. Distinct ID: Provide a list of columns that, when their values are combined, Workbench can use to uniquely identify a record within the context of the group (as defined by the Row External ID: You can assign an External ID to a data row, like the external ID from EDC. This can help you identify the source of a query on third party data. Provide the column that contains the value for External ID for the row in |
rowid with groupid, distinctid, and rowexternalid |
| Veeva Clinical Operations Global Study ID *Optional |
In this column, provide the Global Study ID from Veeva Clinical Operations. This key is used for studies that have the Clinical Operations - EDC Connection enabled. The Global Study ID acts as an alternative method for study matching in addition to Match on Name and External ID. | veeva_clinops_study_id |
Hypen Types: There are two different types of hyphens, the “Hyphen Minus” and the “Unicode Hyphen”. The Hyphen Minus is the key that you typically get by pressing the - (Hyphen) key on your keyboard. In most modern fonts, these characters are visually identical. Veeva DQS only supports the use of the Hypen Minus in data imports. If you include a Unicode Hyphen, import will fail.
Here is an example CSV file:
| STUDY_ID | SITE | SUBJECT_ID | VISIT | INITIALS | DOB | GENDER | RACE |
|---|---|---|---|---|---|---|---|
| S.Deetoza | 101 | 101-1001 | Screening | CDA | 03-27-1991 | F | Hispanic |
In this example, we have the following column mappings:
- Study: STUDY_ID
- Site: SITE
- Subject: SUBJECT_ID
- Event: VISIT
The INITIALS, DOB, GENDER, and RACE columns are all data items.
Manifest File
Your manifest file provides the Study and Source for DQS, lists the files in your ZIP, and for each file, lists which columns map to the required data points.
Source is a custom defined value that allows you to identify the contents of the package. This value is stored in the Source field in Workbench, so you can use it to identify data from this package in Workbench via CQL. The Source value must be unique within your Study.
For your Study, provide the Name of your Study (study__v) record. If your study’s name contains a whitespace character, you must use the value with the whitespace in your manifest file, but then you must replace the whitespace with an underscore (_) in your data files.
For Source, specify the source of the data. The system applies this source to all imported data. Then, as an array, list each CSV file, including its filename (with the extension) and its column mappings, as the value for “data”.
You can choose to include configuration metadata about each data item in your import file. See details below.
Save this file as “manifest.json”.
Note that Workbench will only accept manifest files with this exact filename (case-sensitive) and extension.
Example Manifest: Single Form
Here is an example manifest file for the Deetoza study that imports a package from an eCOA containing the Survey form:
{
  "study": "Deetoza",
  "source": "eCOA",
  "data": [
    {
      "filename": "Survey.csv",
      "study": "protocol_id",
      "site": "site_id",
      "subject": "patient",
      "event": "visit_name"
    }
  ]
}
Example Manifest: Multiple Forms
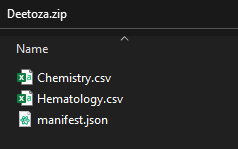
Here is an example manifest file for the Deetoza study that imports a package from a laboratory vendor, containing the Chemistry and Hematology forms:
{
  "study": "Deetoza",
  "source": "lab",
  "data": [
    {
      "filename": "Chemistry.csv",
      "study": "STUDY_ID",
      "site": "SITE_ID",
      "subject": "SUBJECT_ID",
      "event": "VISIT",
      "formsequence": "LAB_SEQ"
    },
    {
      "filename": "Hematology.csv",
      "study": "STUDY_ID",
      "site": "SITE_ID",
      "subject": "SUBJECT_ID",
      "event": "VISIT",
      "formsequence": "LAB_SEQ"
    }
  ]
}
You could also use a Row ID mapping and import Chemistry and Hematology lab data using a single CSV file. In that CSV file, you could use a Lab Test Set column to indicate Chemistry or Hematology for the row.
{
  "study": "Deetoza",
  "source": "lab",
  "data": [
    {
      "filename": "Labs.csv",
      "study": "STUDY_ID",
      "site": "SITE_ID",
      "subject": "SUBJECT_ID",
      "event": "VISIT"
    }
  ]
}
Form Label Overrides
When importing third party data sources, you can define a Label for a Form by mapping the form_label key, which can be referenced with CQL in a listing.
There are two different ways to use the form_label key where the expected inputs are different based on whether or not the form key is used in the manifest.
If the form key is used in the manifest to map in a column in the data file and the form_label key is also used, then the input for the form_label key would also represent a column in the data file where the form label can be found. The form_label key would be part of the data array along with the form key:
{
  "study": "Deetoza",
  "source": "lab",
  "data": [
    {
      "filename": "hematology_lpanel.csv",
      "study": "STUDY_ID",
      "site": "SITE_ID",
      "subject": "SUBJECT_ID",
      "event": "VISIT",
      "formsequence": "LAB_SEQ",
      "form": "FORM_NAME_COLUMN"
      "form_label": "FORM_LABEL_COLUMN"
    }
  ]
}
If the form key is NOT used and the form_label key is used in the manifest, then the input expected for the form_label key is a string where that string value equals the form label to be used. To define the Label for a Form, add the label form_label to the data array:
{
  "study": "Deetoza",
  "source": "lab",
  "data": [
    {
      "filename": "hematology_lpanel.csv",
      "study": "STUDY_ID",
      "site": "SITE_ID",
      "subject": "SUBJECT_ID",
      "event": "VISIT",
      "formsequence": "LAB_SEQ",
      "form_label": "Hematology"
    }
  ]
}
To override the Name and Label for an Item, add the name and label properties to the item’s configuration. See details below.
Optional: Event Matching
By default, Workbench matches the Event from the form’s CSV file to the Name of the matching Event Definition record in Veeva EDC. You can also choose to have Workbench match the Events based on the event definition’s External ID. You can also define a default Event in the manifest file and automatically assign all rows to that Event. If your data was collected outside the event scheduled in EDC, you can choose to not map to any EDC event and have Workbench create events as needed to match those in your import package.
If your Event is within a repeating Event Group, Workbench uses the event definition’s External ID and appends a sequence number to it for matching. The sequence number increments for each unique Event in the file. If an Event is reused in more than one Event Group, it isn’t considered repeating. Instead, Workbench matches it to the first matching Event in the EDC schedule.
Default Behavior
If you don’t include any event matching configuration in your manifest file, the following defaults apply:
- Workbench matches using the Name of the Event Definition.
- Workbench attempts to match with existing EDC Events. If there is no matching Event in EDC, Workbench creates a new Event.
This default behavior is equivalent to the manifest configuration below:
{
  "study": "Deetoza",
  "source": "Labs",
  "edc_matching": {
    "event": {
      "target": ["name"],
      "generate": true
    }
  }
}
Match on Name (Default)
If you don’t include edc_matching in your manifest file, Workbench automatically matches using the Name of the Event Definition. You can also specify Name-based batching in the manifest file.
{
  "study": "Deetoza",
  "source": "Labs",
  "edc_matching": {
    "event": {
      "target": ["name"]
    }
  }
}
Match on External ID
To match on the External ID (formerly known as OID) of the Event Definition, you must include edc_matching and set the event target to external_id. See the example excerpt below:
{
  "study": "Deetoza",
  "source": "Labs",
  "edc_matching": {
    "event": {
      "target": ["external_id"]
    }
  }
}
Set a Default Event
You can choose an Event as the default Event from the manifest file, instead of listing an Event in the CSV. Then, Workbench automatically assigns all rows in that CSV file to that Event. This is controlled by the default key. Use the Name of the Event Definition for default. You can set a default for a specific data file or set a default at the package level.
Example: Package-level Default Event
{
  "study": "Deetoza",
  "source": "lab",
  "edc_matching": {
     "event": {
       "default": "treatment_visit"
     }
   },
  "data": [
    {
      "filename": "Labs.csv",
      "study": "STUDY_ID",
      "site": "SITE_ID",
      "subject": "SUBJECT_ID",
      "event": "VISIT",
      "rowid": ["LAB_TEST_SET", "LAB_TEST_SEQ"]
    }
  ]
}
Example: File-level Default Event
{
  "study": "Deetoza",
  "source": "Labs",
  "edc_matching": {
    "event": {
      "default": "treatment_visit",
    }
  }
}
Handling of Unmatched Events
By default, if Workbench can’t match an Event to one in EDC, either by Name or External ID, Workbench creates new Events for any non-EDC events that are specific to the Source. Those Events are placed in a new Event Group named “{source_name]_default_egd”. These new Events become part of the overall Workbench Header Event record (accessible via CQL from @HDR.Event). This is controlled by the generate key. The manifest configuration of the default behavior is generate: true. If your data was collected outside the EDC event schedule, you can choose to not match with any EDC events by setting generate to false. If you set generate to false, Workbench won’t create new Event Definitions. Instead, import will fail for any rows without matching EDC Events.
Example: Match on External ID and Ignore Unmatched Events
{
  "study": "Deetoza",
  "source": "Labs",
  "edc_matching": {
    "event": {
      "target": ["external_id"],
      "generate": false
    }
  }
}
If your data was collected entirely outside the EDC schedule, you can choose to have Workbench create new Events for each Event, without trying to match to an EDC Event. To do so, set event to false, as shown in the example below:
{
  "study": "Deetoza",
  "source": "Labs",
  "edc_matching": {
    "event": false
  }
}
Optional: Form & Item Group Mapping
You can choose to map rows in your CSV to different Forms and Item Groups, including defining how Workbench interprets repeating forms nad item groups within your data set. This allows Workbench to transform a single CSV into multiple Forms and Item Groups, instead of a single Form and single Item Group.
For example, a Labs form could contain multiple Item Groups - one Item Group per each lab test category. You would use an itemgroup column to indicate which Item Group the data items in the row belong to. Workbench treats all unmapped columns in the row as items. Workbench imports those items within the row’s specified item group. You can specify additional metadata for those columns in the item configuration. See details below.
Use the table below to understand how Workbench will handle your data with different Form and Item Group configuration scenarios:
| Form Defined | Item Group Defined | Result |
|---|---|---|
| No | No | Workbench treats each row as one occurrence of a single Form. |
| Yes | No | Workbench treats each row as a different Form, identifying the Form from the form column. Each unique value in the form column is handled as a different Form. |
| No | Yes | Workbench treats each row as an instance of an Item Group (as defined in the itemgroup column) and groups these rows together by Subject and Form. To treat each Item Group as a repeating Item Group, use an itemgroupsequence column. |
| Yes | Yes | Workbench groups rows together by Subject, form, and itemgroup. Each unique value in the form column is handled as a different Form, and each unique value in the itemgroup column is an Item Group. |
Example Manifest: Multiple Forms
In the example below, the “Labs.csv” file contains multiple Forms. These are identified in the form column of the “Labs.csv” file.
{
  "study": "Deetoza",
  "source": "lab",
  "data": [
    {
      "filename": "Labs.csv",
      "study": "protocol_id",
      "site": "site_id",
      "subject": "subject_id",
      "event": "visit",
      "form": "form"
    }
  ]
}

Example Manifest: Multiple Item Groups
In the example manifest file below, the Labs form has multiple Item Groups. These are identified in the lab_category column of the “Labs.csv” file.
{
  "study": "Deetoza",
  "source": "lab",
  "data": [
    {
      "filename": "Labs.csv",
      "study": "protocol_id",
      "site": "site_id",
      "subject": "subject_id",
      "event": "visit",
      "item_group": "lab_category"
    }
  ]
}

Optional: Codelist Configuration
You can configure Codelists to reference from codelist-type Items. A codelist is a set of code and decode pairs that a user can select from when entering data.
For each codelist, you provide a name, external_id (optional), and codelist_data. codelist_data accepts code and decode pairs.
"codelists": [
  {
    "name": "SEX",
    "external_id": "SEX",
    "codelist_data": [
      {
        "code": "M",
        "decode": "Male"
      },
      {
        "code": "F",
        "decode": "Female"
      }
    ]
  }
]
Optional: Item Configuration
Within your manifest file, you can include Item metadata to inform how DQS Workbench handles data items. You can specify a data type for each Item, as well as additional properties depending on your data type selection.
When item configuration is omitted, DQS Workbench treats all items as text.
Simple vs. Advanced Configuration
The item “config” object has two configuration formats, simple and advanced. For simple configuration, you specify only the item’s data type. The item’s properties use the default values. For advanced configuration, you specify the data type and properties.
"items" {
    "Weight": "float"
}"items" {
"Weight": {
"type": "float",
"precision": 2
}
}Defining the Name & Label
You can define the Name and Label of your Item in its configuration. These keys are available for mapping with all item data types.
Map the label key to provide a label. If omitted, this value defaults to match the item’s Name. By default, Workbench uses the column header as the Name of the Item. You can override this by mapping the name_override key in your manifest file. The Name can only include alphanumeric characters, dashes, and underscores. No whitespaces are allowed.
"items":
			{
			"REQ_NUM":
				{
				"type": "text",
				"length": 10,
				"name_override": "REQUISITION_NUM",
				"label": "Requisition Number"
				},
			"EVENTTYPE":
				{
				"type": "text",
				"length": 10,
				"label": "Event Type"
				},
			"COL_DATE":
				{
				"type": "date",
				"format": "ddMMMyyyy",
				"name_override": "COLLECTION_DATE",
				"label": "Collection Date"
				},
			"COL_TIME":
				{
				"type": "time",
				"format": "HH:mm",
				"label": "Collection Time"
				}
			}
Available Properties by Data Type
There are different configuration properties available for each data type.
| Data Type | Example Configuration | Property | Property Description |
|---|---|---|---|
| text |
|
Length | The number of characters allowed. The default length is 500. Text must be greater than zero (0) and less than or equal to 3000. |
| integer |
|
Min | The minimum (lowest) allowable value cannot be less than -9,223,372,036,854,775,808. The default is -9,223,372,036,854,775,808. |
| Max | The maximum (highest) allowable cannot be greater than 9,223,372,036,854,775,807. The default is 9,223,372,036,854,775,807. | ||
| Length | The number of digits allowed. The digit must be at least one (1) and not exceed 19. | ||
| float |
|
Length |
The number of digits allowed, both to the left and to the right of the decimal point. Must be at least one (1) and not exceed 24. The maximum number of digits allowed, both to the left and to the right of the decimal point. If the maximum value has more digits than this property, Workbench uses that number instead. |
| Precision |
The number of decimal places allowed. If the maximum value has more decimal places than this property, Workbench uses that number instead. |
||
| Min | The minimum (lowest) allowable value cannot be less than -999,999,999,999,999,999,999,999. | ||
| Max | The maximum (highest) allowable value cannot be greater than 999,999,999,999,999,999,999,999. | ||
| date |
|
Format |
The format pattern with which to parse date values. See a list of supported date formats below. The default is "yyyy-MM-dd". |
| datetime |
|
Format |
The format pattern with which to parse datetime values. See a list of supported date and time formats below. The default is "yyyy-MM-dd HH:mm". |
| time |
|
Format |
The format pattern with which to parse time values. See a list of supported time formats below. The default is "HH:mm". |
| boolean |
|
N/A | The boolean data type doesn't have any configuration properties. Workbench accepts "true"/"false", "yes"/"no", and "1"/"0" for boolean values. |
| codelist |
|
Codelist | This specifies which Codelist this item uses. A codelist is a defined list of code and decode pairs (codelist items) that users can select from when entering data. See how to define Codelists above. |
Supported Date & Time Format Patterns
The format patterns listed below are available for date, datetime, and time items. For datetime items, combine a date and time pattern, for example, “yy-MM-dd HH:mm”. If you use a time format pattern for a date, or vice versa, your import will fail with an error (D-012).
| Format Pattern | Example | Description |
|---|---|---|
| dd MM yy | 02 18 20 | 2-digit day, 2-digit month, and 2-digit year, using a whitespace ( ) delimiter |
| dd MM yyyy | 02 18 2020 | 2-digit day, 2-digit month, and full year, using a whitespace ( ) delimiter |
| dd MMM yyyy | 02 Feb 2020 | 2-digit day, Abbreviated month (text), and full year, using a whitespace ( ) delimiter |
| dd-MM-yy | 18-02-20 | 2-digit day, 2-digit month, and 2-digit year, using a dash (-) delimiter |
| dd-MM-yyyy | 18-02-2020 | 2-digit day, 2-digit month, and full year, using a dash (-) delimiter |
| dd-MMM-yyyy | 18-Feb-2020 | 2-digit day, Abbreviated month (text), and full year, using a dash (-) delimiter |
| dd-MMM-yyyy HH:mm:ss | 18-Feb-2020 12:10:50 | 2-digit day, Abbreviated month (text), and full year, using a dash (-) delimiter, with the time including seconds |
| dd/MMM/yy | 18/Feb/20 | 2-digit day, Abbreviated month (text), and 2-digit year, using a forward slash (/) delimiter |
| dd-MMM-yy | 18-Feb-20 | 2-digit day, Abbreviated month (text), and 2-digit year, using a dash (-) delimiter |
| ddMMMyy | 18Feb20 | 2-digit day, Abbreviated month (text), and 2-digit year (no delimiter) |
| dd MMM yy | 18 Feb 20 | 2-digit day, Abbreviated month (text), and 2-digit year, using a whitespace ( ) delimiter |
| dd.MM.yy | 18.02.20 | 2-digit day, 2-digit month, and 2-digit year, using a period (.) delimiter |
| dd.MM.yyyy | 18.02.2020 | 2-digit day, 2-digit month, and full year, using a period (.) delimiter |
| dd/MM/yy | 18/02/20 | 2-digit day, 2-digit month, and 2-digit year, using a forward slash (/) delimiter |
| dd/MM/yyyy | 18/02/2020 | 2-digit day, 2-digit month, and full year, using a forward slash (/) delimiter |
| ddMMMyyyy | 18Feb2020 | 2-digit day, Abbreviated month (text), and full year (no delimiter) |
| ddMMyy | 180220 | 2-digit day, 2-digit month, and 2-digit year (no delimiter) |
| ddMMyyyy | 18022020 | 2-digit day, 2-digit month, and full year (no delimiter) |
| MM/dd/yy | 02/18/20 | 2-digit month, 2-digit day, and 2-digit year, using a forward slash (/) delimiter |
| MM/dd/yyyy | 02/18/2020 | 2-digit month, 2-digit day, and full year, using a forward slash (/) delimiter |
| MMddyy | 021820 | 2-digit month, 2-digit day, and 2-digit year (no delimiter) |
| MMddyyyy | 02182020 | 2-digit month, 2-digit day, and full year (no delimiter) |
| MMM dd yyyy | Feb 18 2020 | Abbreviated month (text), 2-digit day, and full year, using a whitespace ( ) delimiter |
| MMM/dd/yyyy | Feb/18/2020 | Full month (text), 2-digit day, and 4-digit year, using a forward slash (/) delimiter |
| MMMddyyyy | Feb182020 | Full month (text), 2-digit day, and 4-digit year (no delimiter) |
| yy-MM-dd | 20-02-18 | 2-digit year, 2-digit month, and 2-digit day, using a dash (-) delimiter |
| yy/MM/dd | 20/02/18 | 2-digit year, 2-digit month, and 2-digit day, using a forward slash (/) delimiter |
| yyyy MM dd | 2020 02 18 | Full year, 2-digit month, and 2-digit day, using a whitespace ( ) as a delimiter |
| yyyy-MM-dd | 2020-02-18 | Full year, 2-digit month, and 2-digit day, using a dash (-) as a delimiter |
| yyyy-MM-dd'T'HH:mm | 2020-02-18T12:10 | Full year, 2-digit month, and 2-digit day, using a dash (-) as a delimiter with the time |
| yyyy.dd.MM | 2020.18.02 | Full year, 2-digit day, and 2-digit month, using a period (.) as a delimiter |
| yyyy.MM.dd | 2020.02.18 | Full year, 2-digit month, and 2-digit day, using a period (.) as a delimiter |
| yyyy/MM/dd | 2020/02/18 | Full year, 2-digit month, and 2-digit day, using a forward slash (/) delimeter |
| yyyyMMdd | 20200218 | Full year, 2-digit month, 2-digit day (no delimiter) |
| yyyyMMdd'T'HH:mm | 2020218T12:10 | Full year, 2-digit month, 2-digit day (no delimiter) with the time |
| dd/MM/yyyy HH:mm | 18/02/2020 18:30 | 2-digit day, 2-digit month, 4-digit year, using a slash (/) as a delimiter, and the 24-hour time |
| MM/dd/yyyy HH:mm | 02/18/2020 18:30 | 2-digit month, 2-digit day, 4-digit year, using a slash (/) as a delimiter, and the 24-hour time |
| yyyy-MM-dd'T'HH:mm:ss+HH:mm | 2020-02-18T18:30:22+00:00 | 4-digit year, 2-digit month, 2-digit day, using a dash (-) as a delimiter, and the 24-hour time with seconds, with the time offset from UTC (+HH:mm) Note: The manifest file should surround the T with single quotes ('), but do not include those single quotes in the CSV file. |
| yyyy-MM-dd'T'HH:mm:ssZ | 2020-02-18T18:30:22Z | 4-digit year, 2-digit month, 2-digit day, using a dash (-) as a delimiter, and the 24-hour time with seconds in UTC time Note: The manifest file should surround the T with single quotes ('), but do not include those single quotes in the CSV file. |
| yyyyMMdd'T'HH:mm:ssZ | 20200218T18:30:22Z | 4-digit year, 2-digit month, 2-digit day, and the 24-hour time with seconds in UTC time Note: The manifest file should surround the T with single quotes ('), but do not include those single quotes in the CSV file. |
| yyyy-MM-dd'T'HH:mmZ | 20200218T18:30Z | 4-digit year, 2-digit month, 2-digit day, and the 24-hour time in UTC time Note: The manifest file should surround the T with single quotes ('), but do not include those single quotes in the CSV file. |
| yyy-MM-dd'T'HH:mm:ss | 2020-2-18T12:10:41 | Full year, 2-digit month, 2-digit day using a dash (-) as a delimiter with the time, including seconds Note: The manifest file should surround the T with single quotes ('), but do not include those single quotes in the CSV file. |
| ddMMyyyy'T'HH:mm:ss | 10122024T16:15:30 | 2-digit day, 2-digit month, 4-digit year, with no delimiter, and the 24-hour time Note: The manifest file should surround the T with single quotes ('), but do not include those single quotes in the CSV file. |
| yyyyMMdd HH:mm:ss | 20241210 16:15:30 | 4-digit year, 2-digit month, 2-digit day, with no delimiter, and the 24-hour time including seconds |
| MM/dd/yyyy HH:mm:ss | 12/10/2024 16:15:30 | 2-digit month, 2-digit day, 4-digit year, with a slash (/) delimiter, and the 24-hour time including seconds |
| yyyy-MM-dd'T'HH:mm:ss | 2024-12-10T16:15:30 | 4-digit year, 2-digit month, 2-digit day, with a dash (-) delimiter, and the 24-hour time Note: The manifest file should surround the T with single quotes ('), but do not include those single quotes in the CSV file. |
| HH:mm | 18:30 | 24-hour time |
| HH:mm:ss | 18:30:15 | 24-hour time with seconds |
Example Package: Single Form, Item Metadata
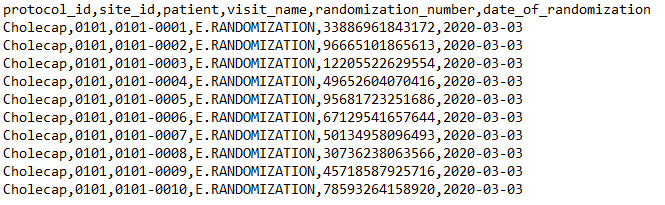
Here is an example import package from Verteo Pharma’s randomization vendor, containing the Randomization form with item metadata:
manifest.json:
{
  "study": "Cholecap",
  "source": "IRT",
  "data": [{
    "filename": "Randomization.csv",
    "study": "protocol_id",
    "site": "site_id",
    "subject": "patient",
    "event": "visit_name",
    "items": {
      "randomization_number": {
        "type": "integer",
        "length": "14"
      },
      "date_of_randomization": {
        "type": "date",
        "format": "yyyy-MM-dd"
      }
    }
  }]
}
Randomization.csv:
Strict Import
The Strict Import parameter in the manifest file allows you to restrict data ingestion to only those items defined in the manifest, instead of all item columns in your data CSV files. You can apply this option to the entire package or to individual files. File-level settings override the package-level setting.
The "strict_import" parameter accepts true or false. Set this to true to enable strict import.
Optional: Restricting Data (Blinding)
You can restrict (blind) data at the Item, row, listing data file, and Source levels to hide it from users who don’t have permission to access restricted data. For example, your study may only order certain labs for subjects who are using the study drug. Knowing which labs a subject has would unblind the subject. You can restrict this information to prevent blinded users from identifying those subjects.
| Restriction Level | Manifest File Configuration |
|---|---|
| Item |
|
| Form Record *To restrict data for a specific form record that is being imported. Use the column that describes if that row is blinded or not. |
|
| Listing Data File |
|
| Source Package |
|
For users who have access to restricted data (typically lead data managers), restricted data behaves the same way as unrestricted data. For blinded users (users without the Restricted Data Access permission), the following behavioral rules apply to any imported restricted data:
- If an Item (column) is restricted:
- The CQL projection doesn’t return the restricted item’s column.
- The CQL projection doesn’t return any derived columns that reference the restricted item.
- If a blinded user references the restricted Item in their CQL statement, CQL still doesn’t return the column.
SHOWandDESCRIBEdo not return the restricted Item.
- If a row is restricted:
- The result set doesn’t return any rows from the Form or Item Group.
- If a listing file (csv) is restricted:
- The default
@HDRcolumns are included in the listing, but no Item columns are included.
- The default
- If a Source (package) is restricted:
- CQL doesn’t return any Items or column results from the restricted Source in any listing.
- DQS marks all Item Definitions, Item Group Definitions, and Form Definitions within the Source as restricted.
- All data rows are marked as restricted.
- The default @HDR columns will still appear in the core listings.
ZIP Package
Once you’ve finished creating your manifest file and your CSVs, zip the files together. Don’t place these files in a folder before zipping them. You can name this ZIP folder whatever you’d like. However, we recommend that you name it with a unique identifier, for example, “Study-Name_Source_datetime.zip”. Don’t include any folders in the ZIP folder. All CSV files and the manifest file must be at the same level.
Accessing your Vault’s FTP Server
Each vault in your domain has its own FTP staging server. The FTP server is a temporary storage area for files you’re uploading to or extracting from Vault.
Server URL
The URL for each staging server is the same as the corresponding vault, for example, veepharm.veevavault.com.
How to Access FTP Servers
You can access your staging server using your favorite FTP client or through the command line.
Use the following settings with an FTP client:
- Protocol: FTP (File Transfer Protocol)
- Encryption: Require explicit FTP over TLS (FTPS). This is a security requirement. Your network infrastructure must support FTPS traffic.
- Port: This does not typically need to be added and will default to Port 21.
- Host: {DNS}.veevavault.com. For example: “veepharm” is the DNS in veepharm.veevavault.com.
- User: {DNS}.veevavault.com+{USERNAME}. This uses the same user name that you log in with. For example: veepharm.veevavault.com+tchung@veepharm.com.
- Password: Your login password for this vault. This is the same password used for your standard login.
- Login Type: Normal
- Transfer File Type: Transfer files as binary
If you are experiencing issues uploading large files, increase the FTP client timeout setting to 180 seconds.
If you have remote verification enabled on a proxy or a firewall, FTP traffic from computers on your network to Veeva FTP servers might be refused. If possible, work with your IT department to disable remote verification. If it cannot be disabled, contact Veeva Support.
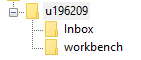
FTP Directory Structure
Inside your user directory, there is a “workbench” directory. This is where you will upload your 3rd party data. DQS is automatically aware of any files that you put here.
DQS moves any successfully imported files into “workbench/_processed”. See details below.
Importing the Data
You can import data into Workbench in two ways: by using an FTP client or the DQS Package Loader within the DQS user interface.
Importing with an FTP Client
To import your data with an FTP Client, upload your ZIP file to the “workbench” directory of your FTP staging server, using an FTP client of your choice. Once you upload your ZIP to the FTP staging server, DQS imports it and transforms your data.
Importing with the DQS Package Loader
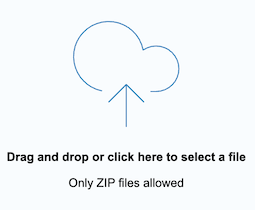
To import data using the Workbench user interface, upload your ZIP files via the DQS Package Loader.
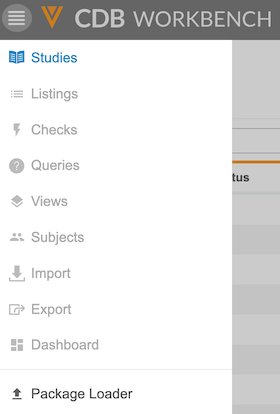
To access the DQS Package Loader:
-
In the top navigation bar, click Upload Data Packages, or from the Navigation Drawer, click Package Loader.
-
Drag and drop your ZIP file into the Drag and drop area. You can also click into this area to browse for and upload your file.
- Your uploaded files appear under Selected Packages. Click X to remove a file.
- Click Upload.
You can upload a maximum of 10 packages at once, with each file not exceeding 200 MB. When a file exceeds this limit, an error message appears, and the system prevents the upload.
Import Notifications
When the import is finished, Workbench sends the user who uploaded the file, as well as any other users subscribed to the Source, an email notification. If the reprocessing of a package results in a change from the previous load, Workbench will also send a notification to the user who uploaded the file and users subscribed to that Source.
Notifications for Data Pending Approval
For third party data packages pending change approval, Workbench sends an email notification immediately after upload. This notification confirms that the package is in the Paused state and pending approval.
Third party data requires approval in the following scenarios:
- The first import from a source
- When changes are made to the manifest.json file
- When changes are made to the CSV file structure
This applies to both Veeva EDC and OpenEDC studies.
The first import of an OpenEDC primary package does not require approval.
Successful Import
Upon successful import:
- DQS creates all definition records and the relationships between them.
- DQS automatically sets the Source field with the value provided in your manifest on all imported records to uniquely identify the data source. (Any Forms imported from Veeva EDC automatically have this value set to “EDC”. Third-party data sources and OpenEDC primary sources cannot use the name “EDC.”)
- DQS creates a Core Listing for each unique Form in your import package. See details below.
- DQS moves your import ZIP file from:
- “workbench” and into “workbench/_processed/{study}/{source}” if you used an FTP client for import. DQS also appends the date and time of import to the filename.
- Vault File Staging and into “workbench/_processed/{study}/{source}” if you used the Package Loader for import.
You can now view your listing in the Workbench. In the current release, Workbench doesn’t show your new listings right away. First, navigate to your study’s Listings page, click to open another Core Listing, and then return to the Listings page. Then, your new data listings will display in the list. You can now click on the Name of one of your listings to open it.
Failed Import
Upon failed import:
- DQS appends the date and time of the attempted import to the ZIP file’s filename.
- DQS moves your import ZIP file from:
- “workbench” and into “workbench/_error” if you used an FTP client for import
- Vault File Staging and into “workbench/_error” if you used the DQS Package Loader for import
- DQS creates an error log (“<import datetime>_<package name>_errors.csv”).
See this list of possible errors and how to resolve them.
Error Limit: Import logs only capture up to 10,000 errors and warnings and will stop recording after meeting this threshold.
View Sources & Import Packages
You can review the Sources for your Study and any associated import packages from the Import page.
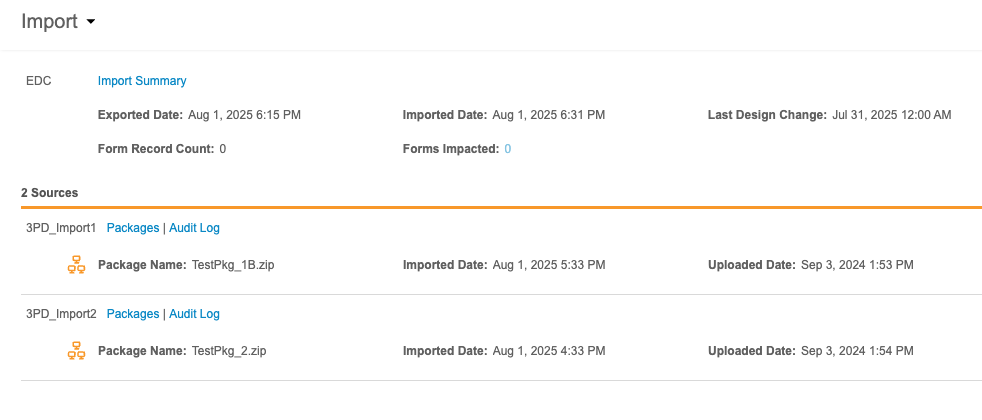
At the top of this page is the import information for the Primary Source, whether that source is Veeva EDC or a third party EDC system. This header includes the following information:
- A link to download the Import Summary
- Exported Date (the date this data was exported from the EDC system)
- Imported Date (the date this data was imported into Workbench)
- Last Design Change (the date and time of the last study design/protocol change in the EDC system)
- Form Record Count (the number of form records impacted by newly imported package)
- Forms Impacted (the number of forms impacted by newly imported package)
The Import Summary summarizes all incremental loads from the Veeva EDC. It includes the following information for each day:
- Date
- # Number of Incremental Packages (the number of incremental packages imported during this day)
- # Number of Full Packages (the number of full packages imported during this day)
- Errors (Indicates with “Yes” or “No” if there were errors encountered during import)
You can filter this list by Import Date Range.

Click on a Date to review all packages for that day. For each import package, Workbench includes the following information:
- EDC Exported Date
- Uploaded Date
- Imported Date
- Full Load (true/false checkbox)
- Total Form Records Imported
- Status
- Details
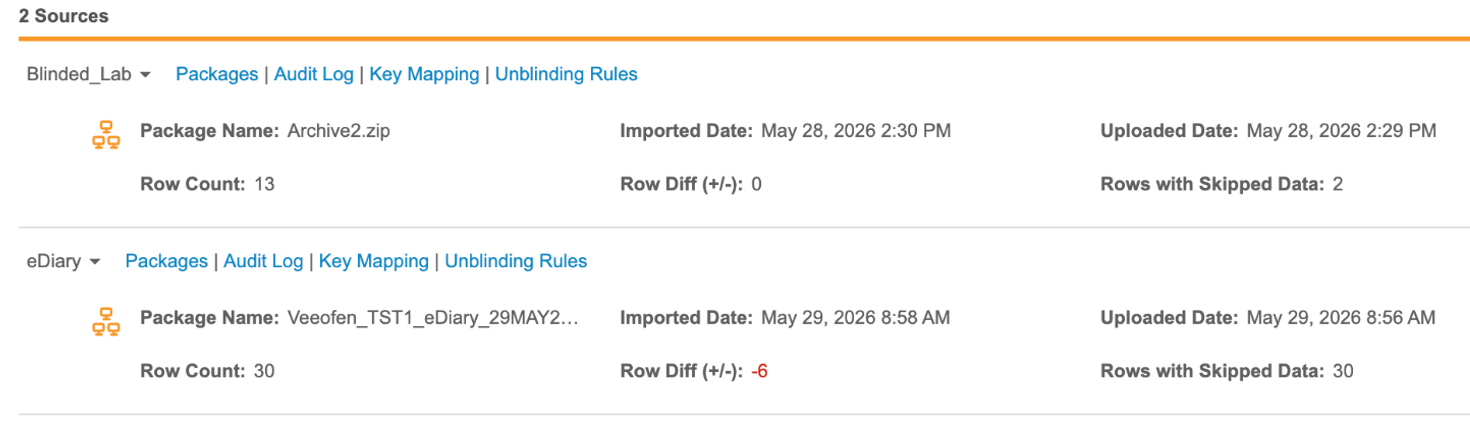
The Sources section includes the following information:
- Package Name
- Imported Date
- Uploaded Date
- Row Count
- Row Diff (the difference in rows compared to the previous package)
- Rows with Skipped Data: (the number of rows where one or more values failed to import)
Review & Approve Imports with Changes
To ensure that data being imported into DQS doesn’t change from the approved format and structure, DQS detects any changes to package configurations from one load to the next for each third party Source.
If the system detects changes in configuration at the package, file, or blinding level, or changes in the CSV file structure, DQS pauses the import process. The package isn’t processed and enters the Paused status until a user with approval rights either approves or rejects the package. The user who uploads the package receives an email notification when this occurs, confirming the package requires action in DQS.
If the user approves the package, DQS records the approval reason and imports the data package. Once a package is approved, DQS notifies subscribers to the approved change via email. DQS displays a change indicator on all associated Listings and Views. Users are able to dismiss this indicator and download the form change log for any listing or view. If the user rejects the package, DQS records the rejection reason, marks the package as Rejected, and assigns it the Not Imported status. DQS then reverts to the last successfully imported data package for the Source.
When a package is in the Paused status, all other uploaded packages for that same Source enter a queue and will wait for the paused package to be approved or rejected. Once the paused package is approved or rejected, DQS skips to the last queued package for processing. Any packages between the last paused package and the last package in the queue aren’t processed. For example, if “Package 1” is uploaded and paused, then packages 2-5 are uploaded while “Package 1” is still in the Paused state, once “Package 1” is approved or rejected, DQS will skip to “Package 5”, leaving packages 2-4 unprocessed.
For the first uploaded package in a new Source, DQS automatically applies the Paused status, and a user must approve or reject that first package before any data from that Source appears in the system.
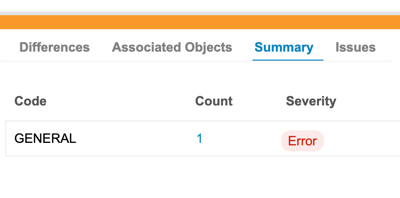
For packages requiring approval, Workbench now includes a Package Detail panel with tabs for Differences, Associated Objects, and (Issues) Summary. The Differences tab displays the changes in the manifest between the current and previous packages. Users can review the previous and current value of the changes that they’re approving. The Associated Objects tab displays the Export Definitions, Listings, and Views that the changes in the package may potentially impact. The Summary tab displays an aggregation of error and warning codes for the package, including the Code, Count, and Severity.
To approve or reject an import package requires the Approve Import permission, which is by default assigned to the standard CDMS Super User and CDMS Lead Data Manager study roles.
Approve an Import
To approve an import:
- Navigate to your Source.
- Filter the list of import packages by Pending Approvals.
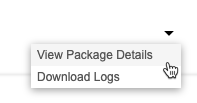
-
From the Package menu (), select View Package Details.
- In the Package Details panel, click Differences to show the changes.
- Review the changes.
- Click Approve Package.
- Optional: Enter a Reason.
- Click Approve.
The package is approved and will now enter the queue for processing.
Reject an Import
To reject an import:
- Navigate to your Source.
- Filter the list of import packages by Pending Approvals.
-
From the Package menu (), select View Package Details.
- In the Package Details panel, click Differences to show the changes.
- Review the changes.
- Click Reject Package.
- Optional: Enter a Reason.
- Click Reject.
- In the Reject Package confirmation dialog, click Confirm.
Review Associated Objects
You can review the associated objects for an import package from the Associated Objects tab of the Package Details panel. This tab lists the Export Definitions, Listings, and Views that the changes in the package may potentially impact.
To access this tab, open the Package Details panel and then click to open the Associated Objects tab.
Workbench shows a change icon (orange circle) badge on the form pill for each changed Form.
For any files that are mapped in the “form” attribute of the manifest file, the Associated Objects tab won’t display any objects potentially impacted in that imported file.
Review Issues Summary
You can review the aggregation of errors and warnings from the Summary tab of the Package Details panel. This tab displays a table with Code, Count, and Severity (Warning or Error) columns, allowing you to identify issues at a glance.
To access this tab, open the Package Details panel and click Summary.
Clicking the number in the Count column takes you to the Issues tab and sets the filter to the corresponding Code.
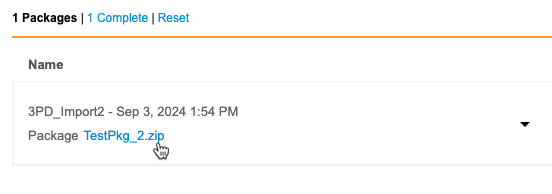
Viewing Import Status
You can check the status of your import package from Import > Packages. This page lists the status of every import package, from both Vault EDC and third party tools. You can also download import packages and issue logs (errors and warnings) from this page.
Complete Status: For an import package to move into the Complete import status, a Workbench user in your Study must open a listing. Otherwise, the import stays in the In Progress status. If your Study has the auto swap feature enabled, this isn’t required. This is the case for all incremental and OpenEDC studies, as they have the auto swap feature enabled by default.
Users without the Restricted Data Access permission can download the import package log, but they can’t download the data file. Users with Restricted Data Access can download a package with blinded data.
Filtering
You can easily filter the list to show only complete or failed imports using the Import Status Filters. Click Error to show only failed imports, or click Complete to show completed imports.
Reprocessing
Workbench automatically reprocesses production third party data packages that contain the recoverable warning codes listed below 24 hours after the import or last reprocess time.
- D-002: Site not found
- D-003: Subject not found
- D-004: Event not found
- D-032: Subject not found
The presence of these codes means that individual rows in the data file could not be imported because a match to the Primary Source was not found.
Workbench does not reprocess packages with other warning or error codes because the reprocess looks for newly entered data from the Primary Source, and only the above warnings can resolve via newly entered data. Note that automatic reprocessing is only for production environments, not TST, TRN, or VAL (even if they have the above warnings).
You can also manually re-trigger the processing of a third party data package that is not currently being processed without uploading a new file.
To manually reprocess a source package:
- Navigate to Study > Import.
-
From the Package menu (), select Reprocess Package.
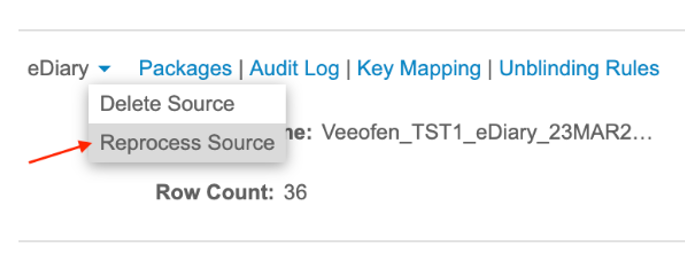
- The source’s latest package will be reprocessed.
You must have the Reprocess Source permission to manually reprocess a source package.
Workbench Import Statuses
When an import package is able to import with only warnings, Workbench highlights the status in orange to indicate that there are warnings. When import finishes, you can download the issue log to review the warnings.
| Status | Description |
|---|---|
| Queued | The package is in the processing queue. There is a package ahead of this one in line that also contains changes, and this package is waiting for a paused package to be approved or rejected. |
| Paused | CDB detected a change in the manifest, and so import is paused until you approve or reject the package. |
| Approved | The change in the manifest was approved. CDB will now import the package. |
| Rejected | The change in the manifest was rejected. |
| Skipped | The package was skipped and not imported. Another package was imported for the Source before this package was processed. This status can only apply to third party packages. |
| In Progress | The import process has begun for this package, and Workbench has not identified any errors or warnings. |
| In Progress (with warnings) | The import process is ongoing, but Workbench has identified a warning. |
| Error | Import failed because there are one or more errors in the import package. Download the issue log and review the errors. |
| Complete | Workbench imported the package successfully, with no errors or warnings. |
| Complete (with warnings) | Workbench imported the package successfully, but there are one or more warnings. Download the issue log and review the warnings. |
| Not Imported | Workbench skipped this package because a newer package for the same source was uploaded before processing began. When a package enters the Not Imported status, Workbench also replaces the processing date with “Replaced”. |
| Reprocess in Progress | Workbench has begun reprocessing this package because a new package from another source was imported. |
| Reprocessed Complete | Workbench finished reprocessing this package with no errors or warnings. |
| Reprocessed Complete (with warnings) | Workbench finished reprocessing this package, but there are one or more warnings. Download the issue log and review the warnings. |
| Reprocessed Error | Reprocessing failed because there are one or more errors in the import package. Download the issue log and review the errors. |
Download the Import Package
To download the import package:
- Navigate to Import for your Study.
- Locate your Source in the source list.
- Click Packages to open the Packages page for your Source.
- Locate your import package in the list.
-
Click the Package link.
- Extract the files from the ZIP folder and view them in a tool of your choosing.
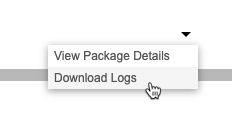
Download the Logs
You can download the Import Log (CSV) for any import and the Issue Log (CSV) for an import that fails. The Import Log lists details about the import job and the data ingestion into Workbench.
The import log lists the following:
- Transformation Start Time
- Transformation Completion Time
- Transformation Duration
- Import Start Time
- Import Completion Time
- Import Duration
To download the import log:
- Navigate to Import for your Study.
- Locate your Source in the source list.
- Click Packages to open the Packages page for your Source.
- Locate your import package in the list.
- From the Package () menu, select Download Logs.
Issue Log
The Issue Log lists all errors and warnings that Workbench encountered while importing the package.See a list of possible errors and warnings here.
To view the issue log:
- Navigate to the Packages page for your Source.
- Locate your import package in the list.
- From the Package () menu, select View Package Details.
- In the Package Details panel, click Issues.
- Optional: In the Issue Log panel, click Download () to download a CSV of the log.
To download the issue log without first viewing it in the application:
- Navigate to the Packages page for your Source.
- Locate your import package in the list.
- From the Package () menu, select Download Logs.
Viewing Imported Data
Incremental Ingestion: With incremental ingestion, the UI displays the most recently imported third-party data package (regardless of age), along with all third-party data packages imported within the last 30 days.
Upon upload, Workbench creates a Form for each unique file in the import package. Workbench automatically generates a Core Listing for each unique Form in a Study, whether that form comes from Veeva EDC or is imported from a 3rd party system.
The default CQL query for these Core Listings is:
SELECT @HDR, * from source.filename
In the laboratory import example above, DQS creates two Core Listings: Chemistry and Hematology (one for each CSV file), using these queries:
| Chemistry |
|
| Hematology |
|
Definitions
DQS creates a Form Definition for each CSV file to define your imported data as “forms” within the DQS Workbench application. These records use the CSV filename (without the extension) as the Name, for example, “hematology”. DQS also creates an Item Group Definition to group your data items together within the form. DQS names these by prepending “ig_” to the CSV filename (without the extension), for example, “ig_hematology”.
Both of these definitions display as a column within your listing (form_name and ig_name). You can edit the listing’s CQL query to hide these columns.