Performing DMR
Data managers can perform data management review (DMR) after a form is submitted to ensure that data collection follows study protocols. For help with SDV, see Performing SDV.
Prerequisites
To use the Additive Review feature (perform DMR on Event Dates and Items that don’t require review), a study designer must enable it for your Study.
Before you can perform SDV on study data, the following configurations are required:
- A study designer creates at least one Review Plan using the DMR review task.
- A lead data manager assigns the Review Plan to the Site.
Users with the CDMS Data Manager and CDMS Lead Data Manager study roles can perform the actions described below by default. If your organization uses user-defined Study Roles, your role must grant the following permissions:
| Type | Permission Label | Controls |
|---|---|---|
| Standard Tab | Review Tab | Ability to access the Review tab |
| Functional Permission | View DMR | Ability to view DMR status |
| Functional Permission | Edit DMR | Ability to perform DMR |
If your Study contains restricted data, you must have the Restricted Data Access permission to view it.
Learn more about Study Roles.
DMR Requirements
Sponsors can define which items require DMR for a given study or site using Review Plans. See Creating a Review Plan for details. If no Review Plan exists, the Requirement Mode for all Items in your Study or Site is set no review required. DMR is required for all Forms and Items in your Study or Site.
Vault displays the DMR status in the Event & Form List panel.
When you view a Form in the Content panel, you can click the DMR status icons to complete the review.
How to Perform DMR
You can perform DMR or DMR from the Content panel by clicking on the DMR and DMR status icons. As you perform DMR or DMR, Vault highlights the Items with unsaved reviews in yellow. You must click Save for Vault to save your DMR or DMR changes and update the Event and Form review statuses.
DMR an Event Date
To perform DMR on an Event Date:
- Navigate to the Casebook containing the Event in the Review tab.
- Click to open the Event you want to review in the Schedule panel.
- Click the DMR icon for the Event Date to complete your review.
- Optional: Click Next DMR Task to quickly move to the next open DMR task.
- Click Save.
Performing DMR on an Event will apply DMR to the Event Date, Visit Method (if configured), and associated forms.
DMR a Form
To perform DMR on a whole Form:
- Navigate to the Casebook containing the Form in the Review tab.
- Click to open the Form you want to review in the Schedule panel.
- Click the DMR icon in the Form Header to complete your review.
- Optional: Click Next DMR Task to quickly move to the next open DMR task.
- Click Save.
DMR an Item Group
To perform DMR on an Item Group:
- Navigate to the Casebook containing the Item in the Review tab.
- Click to open the Form containing the Item Group in the Schedule panel.
- In the Content panel, locate the Item you want to DMR.
- Click the DMR icon to complete your review.
- Optional: Click Next DMR Task to quickly move to the next open DMR task.
- Click Save.
DMR an Item
To perform DMR on an Item:
- Navigate to the Casebook containing the Item in the Review tab.
- Click to open the Form containing the Item in the Schedule panel.
- In the Content panel, locate the Item you want to DMR.
- Click the DMR icon to complete your review.
- Optional: Click Next DMR Task to quickly move to the next open DMR task.
- Click Save.
Completing DMR
Last Updated: 24R1
This video goes over how to complete data management review (DMR) in the Review tab of EDC.
Additive Review
From time to time, you may need to perform additional DMR on Event Dates or Items where DMR isn’t required by the review plan. You can track these reviews by using Additive Review.
When you turn on Additive Review mode, it turns on for the entire Study and not just for the Casebook being viewed. However, Additive Review is user-specific, meaning that it will only apply to the user who enables it. Once you enter Additive Review mode, Vault remains in Additive Review mode for up to 24 hours, or until you toggle Additive Review mode off.
While Additive Review mode is on, you can perform SDV on any Event Date or Item within the Casebook and record a reason for the review. When you save your reviews, Vault displays a plus () icon. You can hover over that icon to show the Additive Reason.
You can perform additive reviews alongside required and optional SDV.
Creating Change Reasons for Additive Review: If your study requires custom additive review reasons, a CDMS Deployment Administrator or Vault Owner can create them at the vault level by selecting ‘Review’ for the Change Reason Type and ‘Additive’ for the subtype.
To perform additive review:
- Navigate to the Casebook you want to review in the Review tab.
-
Click the Additive Review toggle to turn on Additive Review mode.

-
Select an Additive Reason.
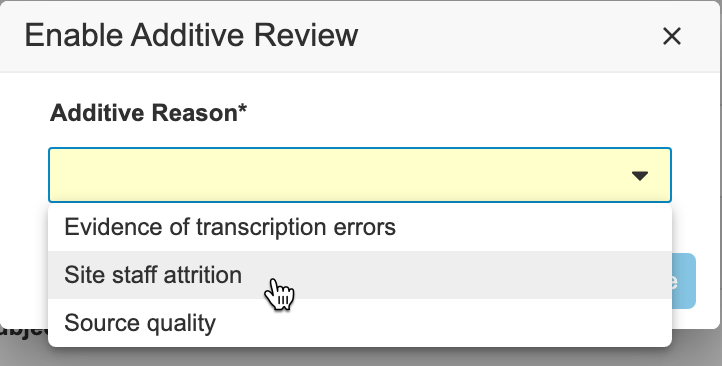
- Click Save. This starts Additive Review mode.
- Optional: To change the Additive Reason:
- Hover over the Additive Review toggle’s label.
-
Click Change Additive Reason.
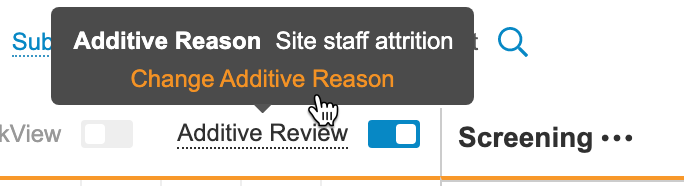
- Select a new Additive Reason.
- Click Save.
- Perform the necessary DMR. See instructions for each level of data above.
- When finished, click Save.
Vault will send you an email with an Additive Review summary that includes the following columns:
- Study
- Country
- Site
- Subject
- Subject Status
- Event Group
- Event Date
- Form Label
- Form Sequence
- Item Group Label
- Item Group Sequence Number
- Item Label
- Review Plan
- Last Reviewed By
- Last Reviewed Date
- Additive Reason
- Last Run of Listing
Additive Review
Last Updated: 23R1
This video shows how to perform additive review in the Review tab.
DMR Icons
Vault uses these icons to represent DMR review statuses:
| Icon | Name | Meaning |
|---|---|---|
| DMR Complete | A checked icon indicates that the required DMR is complete |
|
|
|
DMR Optional Complete | A checked icon with “optional” appended indicates that DMR is optional and completed |
|
|
DMR Optional | An unchecked icon with “optional” appended indicates that DMR is optional and incomplete |
| DMR Required | An unchecked icon indicates that DMR is required and incomplete |
|
| No Icon | DMR Not Required | No icon indicates that DMR is not required for the Event, Form, or Item. |
In the Event & Form List panel, Vault uses different icons to indicate dmr requiredness and completeness.
| Icon | Name | Meaning |
|---|---|---|
| DMR Not Started | DMR is 0% complete (not started) for the Required items or event dates. |
|
| DMR In Progress | DMR is in progress for the Event or Form, but DMR is not complete for 100% of the Items or Event Dates where DMR is Required. |
|
| DMR Complete | DMR is 100% complete for the Required items or event dates. |
|
| Planned | This Event is still in the Planned status, and so there is no associated Review State for it or its Forms. |
Clearing DMR
You can clear DMR to indicate that DMR should be performed again, or has been invalidated. To clear DMR, click the icon or link (for Item Groups) a second time. The icons for each item return to their unchecked state.