Managing Observations
Before generating a query, discrepancies must be reviewed by the data management team and/or discussed across various teams. Observations allow data managers to collaborate with colleagues before generating queries.
You can create observations on Form Items, single-function Form Items, and Event Dates using EDC or third party data. Observations are visible wherever the Item is displayed, so the observation follows the data in all the listings where the data appears. This applies to Core, Review, and Custom data listings.
An observation decoration appears in each cell that contains at least one associated Open or Pending observation. Observations remain in the listing even if the cell value changes.
Availability: Clinical DataBase (CDB) is only available to CDB license holders. Contact your Veeva Services representative for details.
Prerequisites
Users with the CDMS Lead Data Manager and CDMS Data Manager standard study roles can perform the actions described below automatically. If your organization uses custom Study Roles, your role must grant the permissions listed in the table below.
Users with the CDB Data Provider study role, or roles based on it, must have access assigned to listings by Source from Admin > Users.
| Type | Permission Label | Controls |
|---|---|---|
| Standard Tab | Workbench Tab | Ability to access and use the Data Workbench application, via the Workbench tab |
| Functional Permission | API Access | Ability to access and use the Vault EDC API. (This permission is also required to use CDB.) |
| Functional Permission | Create Observation | Ability to create new observations. |
| Functional Permission | View Observation | Ability to view observations. |
| Functional Permission | Close Observation | Ability to close observations. |
| Functional Permission | Reply Observation | Ability to reply to observations and set their status as pending and/or open. |
If your Study contains restricted data, you must have the Restricted Data Access permission to view it.
Learn more about Study Roles.
Viewing Observations in Workbench
You can view all observations and observation messages on the Observations page. You can also filter and sort observations and navigate to the listing where the observation was created via the Observation Details panel.
To view all observations in a study:
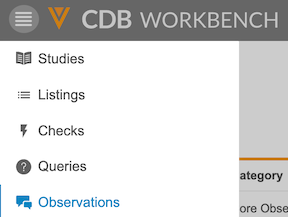
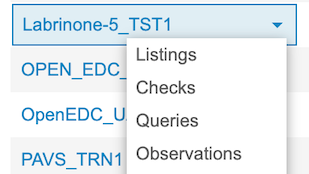
Select your Study from the Studies page. Then, open the Observations page either from the Navigation Drawer or the Study menu.
|
|
Observation Details Panel
You can work with individual observations in the Observation Details panel. To open the Observation Details panel, click the observation you want to view. To close the panel, click Close (x) or click the observation a second time. You can also drag the top edge of the Observation Details panel to resize it.
To navigate to the listing where the observation was created from the Observation Details panel, click the link in the Origin field.

Summary Links
Every listing with observations offers summary links near the top of the page. You can click these links to go to the All Observations page, which is filtered to show only the observations created from that specific listing. Links are grouped by status: Open, Pending, and Closed.

Observation Statuses
Each observation can have the following (3) statuses: Open, Pending, or Closed. These statuses indicate which actions have been taken and what still needs to occur on an observation. Any single observation in either the Open or Pending status is considered Outstanding.
Replying to an observation moves it to the Open or Pending status depending on which status you select in the Observations tab.
| Status | Decoration | Meaning |
|---|---|---|
| Open |

|
Open indicates that an observation has not been addressed. This is the status assigned to all newly created observations. |
| Pending |

|
Pending indicates that an observation has received a response. |
| Open & Pending |

|
This decoration appears when both Open and Pending statuses are present. It is not a status of its own. There are only three statuses: Open, Pending, and Closed. |
| Closed | - - | Closed indicates that an observation requires no further action or discussion. Decorations are not present for Closed observations, but they are still visible in the details panel. |
Observation Decorations
Observations are highlighted with decorations at both the row and cell levels. Row level decorations are located in the Review column. When hovering over a decoration at the row level, a tooltip appears if the record contains at least one open, pending, or outstanding observation (with a status of Open or Pending). A tooltip also appears in the individual cell linked to the observation when hovering over the decoration. Decorations are not displayed for observations in the Closed status, but they are still visible in the details panel.

Creating Observations
You can create an observation individually or in a batch action. Creating an observation moves it to the Open status.
To create an observation individually:
- Navigate to the listing.
- Click the Cell where you want to create an observation.
-
From the Observations tab, click Create Observation.

-
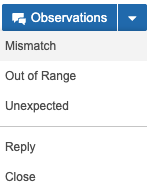
Choose a category from the dropdown menu (Mismatch, Out of Range, or Unexpected).
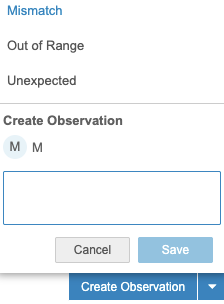
- Enter your observation details.
- Click Save.
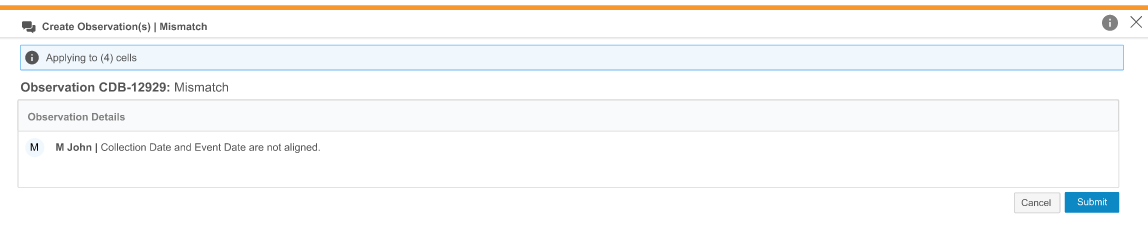
To create multiple observations in a batch action:
- Navigate to the listing.
- Click Observations in the upper-right navigation bar.
-
Choose a category from the dropdown menu (Mismatch, Out of Range, or Unexpected). Your selected category is displayed above the listings.
-
Click the Cells where you want to create an observation.
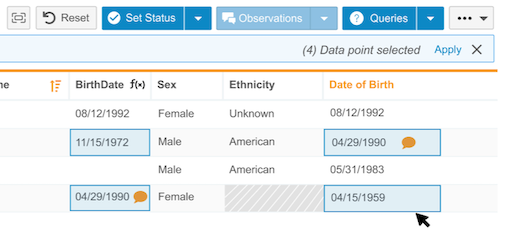
- Click Apply.
- Enter your observation details.
- Click Submit.
You can’t create, respond to, or close observations on locked Form Items or Event Dates.
Assigning Observations
Users with View All Listings and View Observations permissions can be assigned to an observation. Assigning observations allows for tracking multiple reviews, questions between colleagues on a data item, or other collaboration.
To assign a user from the Observations page:
- Click the Row containing the observation.
- From the Observation Details panel, click Reply > Assign.
- Select the user’s name from the Assign dropdown menu.
-
Enter a message in the Message field.
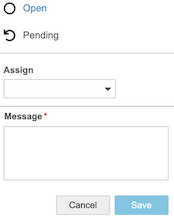
- Click Save.
Responding to an Observation
You can respond to an observation in the Observations tab. Responding to an observation changes the status to Open or Pending, depending on your selection.
To respond to an observation:
- Navigate to the listing.
- Click the Cell containing the observation.
- Click Reply.
- Optional: Set the status of the observation to Open or Pending.
- Enter a message.
- Click Save.
Closing an Observation
You can close an observation individually or in a batch action. Closing an observation moves it to the Closed status. Observations can be closed when Open or Pending.
To close an observation individually:
- Navigate to the listing.
- Click the Cell containing the observation.
-
Click Close.
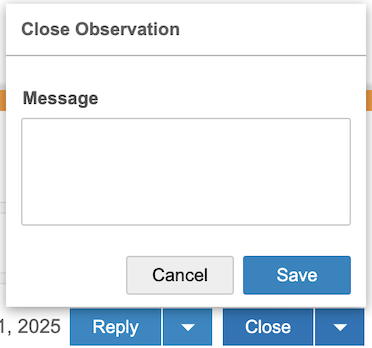
- Optional: Enter a message.
- Click Save.
To close multiple observations in a batch action:
- Navigate to the listing.
- Click the Cells containing the observation.
- Click Close.
- Optional: Enter a message.
- Click Save.
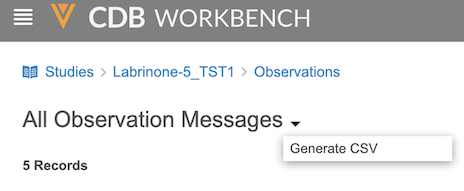
Exporting Observations
You can export all observations and observation messages in your study as a CSV file. The CSV file contains the same columns as the observation listing, and any sorting or filters you apply in the listing also apply to the exported list.
To export observations:
- Navigate to the Observations page for your Study.
- Click the Title of the observation listing you want to export.
-
From the Observations menu, select Generate CSV.
- To download the CSV file, refresh the page and click the Download CSV icon () at the top right of the page.