Using the CDMS Training Integration
CDMS Training LMS: As of September 9, 2024, Veeva’s own LMS, CDMS Training, has replaced Absorb LMS.
You can use the CDMS Training integration to prevent users from accessing a Study before they have completed the appropriate product training. Veeva Clinical Data integrates with the CDMS Training Learning Management System. You can assign CDMS Training courses to specific Study Roles, including user-defined roles, from EDC Tools > Learning Systems. Users with those Study Roles will be required to complete the assigned courses before they can view study-related records in EDC. Until they have completed their training, the system marks their Study Access as Disabled. Once training is complete, the system updates their Study Access to Enabled.
Prerequisites
This feature must be enabled on a study-by-study basis. See details below.
Users with the CDMS Lead Data Manager and CDMS User Administrator study roles can perform the tasks above in EDC Tools by default.
Users must have the Vault Owner security profile to enable this feature.
If your organization uses user-defined Study Roles, your role must grant you the following permissions:
| Type | Permission Label | Controls |
|---|---|---|
| Standard Tab | EDC Tools Tab | Ability to access the EDC Tools tab |
| Functional Permission | Manage Learning | Ability to assign learning system Curriculums to Study Roles from EDC Tools |
If your Study contains restricted data, you must have the Restricted Data Access permission to view it.
Connect the Clinical Data Vault to CDMS Training
Before you can add and assign training, a Vault Owner or Veeva Services must first create a Connection between your vault and the CDMS Training system. Work with your Veeva Services representative to create this connection.
Once your vault is connected to CDMS Training, Vault performs the following actions:
- Creates a Learning System object record for CDMS Training.
- Creates a Curriculum object record for each CDMS Training course.
Enable the Integration for your Study
To enable the CDMS Training Integration:
- Navigate to Tools > EDC Tools > Study Settings for your Study.
- Click Edit.
- For Enable Learning System, select Yes.
- Click Save.
Once you click Save, Vault performs the following actions:
- Adds the Learning Systems area to EDC Tools. This tab is visible by default to CDMS Lead Data Managers and CDMS User Administrators.
- Vault sets the LMS Study Access field on all existing Users to Enabled. This prevents users from being locked out of your study upon feature enablement. Any users that you add after enabling this feature will not have study access before completing their training.
The CDMS Training Learning Integration is now enabled for your Study. Lead data managers can now add Curriculums and assign them to Study Roles.
Add the Learning System to the Study
To add a Learning System to your Study:
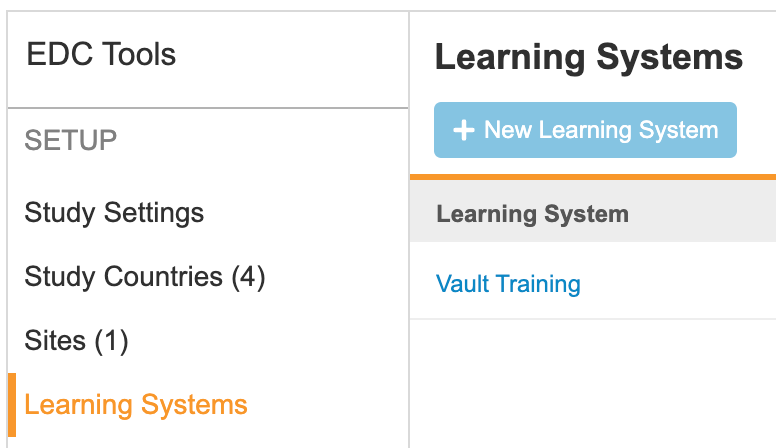
- Navigate to Tools > EDC Tools > Learning Systems for your Study.
- Click + New Learning System.
- Select your CDMS Training connection for Existing Connection.
- Click Save.
Delete a Learning System
If at any time you need to delete the Learning System, you can do so. To delete a Learning System:
- Navigate to Tools > EDC Tools > Learning Systems for your Study.
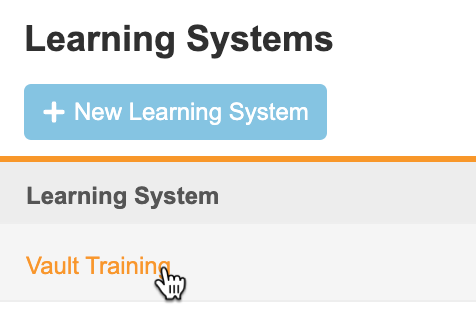
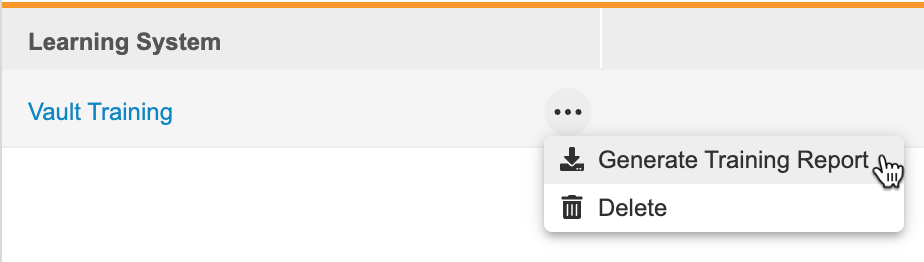
- Hover over the Learning System you want to delete to show the Actions menu.
-
From the Actions menu, select Delete.

- In the confirmation dialog, click Delete.
Deleting the Learning System removes all curriculum assignments for your Study.
Add Curriculums
Before you can assign curriculums to Study Roles, you must first add all available curriculums from CDMS Training.
To add curriculums:
- Navigate to Tools > EDC Tools > Learning Systems for your Study.
- Click CDMS Vault Training. Vault opens the CDMS Vault Training page.
- Click Add Curriculum.
Vault adds all available curriculums from CDMS Training to your vault as records in the Curriculum object. You can now assign these curriculums to Study Roles.
Assign Curriculums to Study Roles
You can assign curriculums (training courses) to Study Roles from EDC Tools > Learning Systems. You can download Veeva’s recommendations about curriculum assignments to standard Study Roles. Learn more about the courses offered in the course listing.
Mapping Before User Creation: Veeva recommends that you assign curriculums to Study Roles (training mapping) before creating Users in your vault. If you create users first, you will need to manually update their Training Status.
To assign curriculums:
- Navigate to Tools > EDC Tools > Learning Systems for your Study.
-
Click Vault Training. Vault opens the CDMS Vault Training page.
- From the Actions menu, select Edit.
- For each Curriculum, select one or more Study Roles to assign it to.
- When finished, click Save to Study.
- Optional: To copy the changes to the curriculum mapping to other Studies:
- From the Save menu, select Save to Multiple Studies.
- In the Select Studies dialog, use the shuttle menu to move Studies from Available Studies to Selected Studies.
- Click Save to Multiple Studies.
- In the confirmation dialog, click Save. Vault copies your changes to the selected Studies. Vault only applies the changes (the delta) you’ve just saved to the other Studies. Vault does not update the other Studies to become an exact replica of the current study’s curriculum mapping.
- Click Cancel to return to EDC Tools > Learning Systems.
The curriculums are now assigned to the chosen Study Roles. The assignment is recorded in the Application Role Curriculum object.
Copy Curriculum Assignments from Another Study
To assign curriculums by copying assignments from another Study:
- Navigate to Tools > EDC Tools > Learning Systems for your Study.
- Click Vault Training. Vault opens the CDMS Vault Training page.
- From the Actions menu, select Copy From Study.
- In the Copy From Study dialog, select a Study to copy from.
- Click Copy.
Export Curriculum Assignments
You can export your curriculum assignments to an Excel™ file. You can use this file for offline review or to import your mappings into another Study.
To export:
- Navigate to Tools > EDC tools > Learning Systems for your Study.
- Click Vault Training. Vault opens the CDMS Vault Training page.
- From the Actions menu, select Export to File.
- Vault generates an Excel™ file of your curriculum assignments as they exist at the time of export. Review this file in Microsoft Excel™.
You can edit the file and then import it into this or another Study to apply the assignments. Enter “Yes” in the cell for the appropriate curriculum and role.
Import Curriculum Assignments
After exporting, you can edit the file and then import it into a Study to apply the assignments. Enter “Yes” in the cell for the appropriate curriculum and role.
- Navigate to Tools > EDC tools > Learning Systems for your Study.
- Click Vault Training. Vault opens the CDMS Vault Training page.
- From the Actions menu, select Load from File.
- In the Load from File dialog, click in the File field.
- Browse for and select your file.
- If you have existing assignments, you can choose how to handle changes:
- Select Add supplemental selections from file to add additional curricula to the role’s assignments.
- Select Update strictly from file to overwrite any existing assignments and use only those in the file.
- Click Load.
- Vault shows your changes in the grid in edit mode. Review the changes.
- When finished, click Save to Study.
- Optional: To copy the changes to the curriculum mapping to other Studies:
- From the Save menu, select Save to Multiple Studies.
- In the Select Studies dialog, use the shuttle menu to move Studies from Available Studies to Selected Studies.
- Click Save to Multiple Studies.
- In the confirmation dialog, click Save. Vault copies your changes to the selected Studies. Vault only applies the changes (the delta) you’ve just saved to the other Studies. Vault does not update the other Studies to become an exact replica of the current study’s curriculum mapping.
- Click Cancel to return to EDC Tools > Learning Systems.
Training in CDMS Training
Once you assign curriculums to your Study Roles, CDMS Training automatically creates accounts for new users in your Study and assigns them the appropriate courses.
Email-Based Tracking: CDMS Training uses the user’s email address as the unique identifier for tracking training. Users with multiple EDC accounts linked to a single email address share one training profile and only need to complete an assigned curriculum once.
Reporting on Training
From time to time, you may want to report on your organization’s training progress. You can easily do that by exporting a training report. The training report is a set of CSV files that list a user’s training progress, including their assigned curriculums, the completion date of each curriculum, and whether their study access is disabled or enabled.
The training report includes the following information for each User:
- Last Name
- First Name
- User Type
- Company
- Learning System Username
- Vault Username
- User Status
- Study
- Study Role
- Study Access
- Site Access
- Country Access
- Training Required
- Training Status
- Date Assigned to Study
- Last Modified Date
- Curriculums Assigned
- Courses Assigned (If this feature is enabled, see details below)
- Training Completion Date
Training Completion Date: The Training Completion Date is recorded as midnight UTC on the date that training is completed.
Generating a Report
You can generate training reports through the user interface or API for either specific studies and sites or all studies and sites. Only one report job can be in progress or queued at a time for both methods.
To generate a training report for a specific Study from EDC Tools:
- Navigate to Tools > EDC Tools > Learning Systems for your Study.
-
From the Actions menu, select Generate Training Report.
- Vault begins a job to generate the training report. When finished, Vault sends you an email with a link to download the report (.zip).
To generate a training report for all or selected Studies in the current vault:
- Navigate to Tools > System Tools > Users.
-
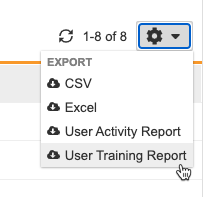
- From the Actions menu, select User Training Report.
-
-
In the User Training Report dialog, select the date range for the “Date Assigned to Study” values from the report.
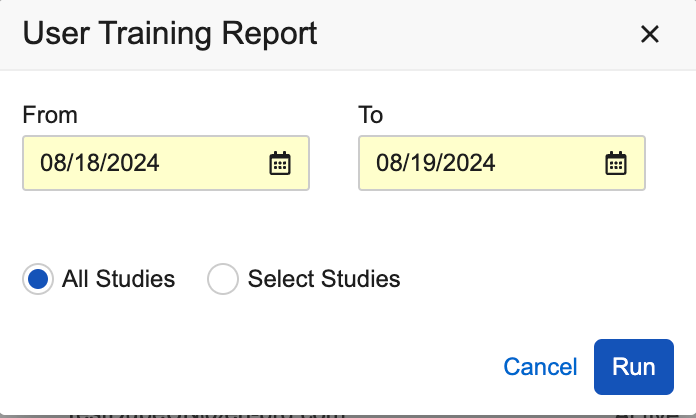
- To generate a training report for all studies: Select All Studies.
- To generate a training report for selected studies: Select Select Studies.
- Use the shuttle menu to move Studies from Available Studies to Selected Studies.
- Click Run.
- Vault begins a job to generate the training report. When finished, Vault sends you an email with a link to download the report (.zip).
To generate a training report for a specific Site from EDC Tools:
- Navigate to Tools > EDC Tools > Learning Systems for your Sites.
- From the Actions menu, select Generate Training Report.
- Vault begins a job to generate the training report. When finished, Vault sends you an email with a link to download the report (.zip).
To generate a training report for all or selected Sites in the current vault:
- Navigate to Tools > System Tools > Users.
- From the Actions menu, select User Training Report.
- In the User Training Report dialog, select the date range.
- To generate a training report for all sites: Select All Sites.
-
To generate a training report for selected sites: Select Select Sites.
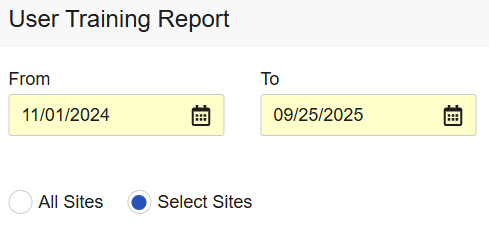
- Use the shuttle menu to move Sites from Available Sites to Selected Sites.
- Click Run.
- Vault begins a job to generate the training report. When finished, Vault sends you an email with a link to download the report (.zip).
User Training Report Date Selection: The date range you select in the User Training Report dialog applies to the “Date Assigned to Study” values from the report. Only users that were assigned study access between the dates you specify in the dialog will be included in the report, even if other users completed their training in that timeframe. The date is calculated based on the GMT time zone
Enable Course Completion Tracking 21R2 & Earlier
By default, Vault tracks training completion at the curriculum level. Each curriculum contains a number of individual courses. You can choose to have Vault track training completion at the course level and show those courses in the training report.
Enablement: This feature is enabled automatically in Studies created after the 21R3 release. Studies created prior to that release must enable this feature.
To enable this feature:
- Navigate to Tools > EDC Tools > Study Settings for your Study.
- Click Edit.
- For Include Course Details in the Training Report, select Yes.
- Click Save.
Recalculating User Training Status
You can use the Recalculate Training Status job to trigger a training status update for one or all vault users. With this feature, the system checks current enrollment completions against training mappings and updates a user’s LMS Training Status to Trained or Not Trained. This is useful in the following scenarios:
- After mapping curricula to roles for existing users
- When updating study configurations
- To reconcile users who previously bypassed requirements via an unmapped training warning
To recalculate user training status, your role must have the Edit Users permission and *All Sites (or higher) access for the applicable study or studies.
Recalculate the Training Status of a Single User
To recalculate a single user’s training status:
- Navigate to Tools > System Tools > Users.
- Locate the user you want to update.
-
Hover over their Name to display the Actions menu.
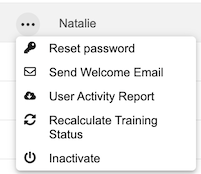
- Select Recalculate Training Status.
-
Select All Studies or Select Studies.
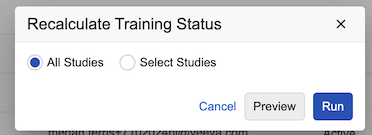
- If you chose Select Studies in the previous step, this opens the shuttle dialog. Use the shuttle buttons to move Studies from Available Studies into Selected Studies.
- Click Run to open the Recalculate Training Status confirmation dialog.
- If you chose All Studies in step five (5), you’ll go directly to the Recalculate Training Status confirmation dialog.
- Optional: Click Preview to run the job in Preview mode from any of the previous dialogs. This generates a CSV log file (for example, “Recalculate_Training_Status_Preview_2026_01_26_PST.csv”) that lists the actions the system would take without updating any records.
-
In the Recalculate Training Status confirmation dialog, type “CONFIRM” to proceed.
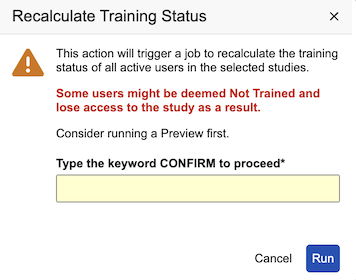
- Click Run. When the job completes, Vault sends an email with a link to download the results of the training status recalculation as a CSV file.
- Click Close in the Job Queued dialog.
Unmapped Training Warnings
Unmapped Training warnings only apply to studies where the Enable Learning System setting is set to Yes in EDC Tools.
You may encounter the Unmapped Training warning in System Tools during the following scenarios:
- When you attempt to manually create a new role assignment
- When you attempt to edit an existing role assignment
- When you attempt to import role assignments in bulk
The Unmapped Training warning indicates that no curriculum is mapped for the specific study and role combination you’re saving. Click Ignore Training Status and Grant Access to grant the user immediate access to the study and bypass the training check. Click Cancel to stop the role assignment. If you bypass the check and grant access, the user’s LMS Training Status remains set to Not Trained because no mapping exists to satisfy the requirement for this setting.