Managing Study User Accounts & Role Assignment
This article describes how to manage a Veeva Clinical Data user’s access to Studies and study-related data.
Prerequisites
Users with the CDMS Lead Data Manager and CDMS User Administrator study roles can perform the tasks above in System Tools by default.
If your organization uses user-defined Study Roles, your role must grant you the following permissions:
| Type | Permission Label | Controls |
|---|---|---|
| Standard Tab | System Tools Tab | Ability to access the Tools > System Tools tab |
| Functional Permission | View Users | Ability to view Users and their access |
| Functional Permission | Edit Users | Ability to create and edit Users and their access |
If your Study contains restricted data, you must have the Restricted Data Access permission to view it.
Cross-Vault & Cross-Domain Users
In Vault, user accounts exist within a single domain. One user may not have access to every vault on a domain. Cross-vault users have access to multiple vaults on a single domain. Cross-domain users have access to multiple vaults on different domains. You can add users from other vaults on your domain, or users from other domains, to your Study from Tools > System Tools > Users.
These users can use a single set of login credentials to log in to any vault they have access to, regardless of domain. Cross-domain users log into their home domain, but the session is vault specific. The My Vaults page, if enabled, is served from the cross-domain user’s vault on their home domain.
VeevaID for Site Users 25R1 & Later
CDMS utilizes a Just-in-Time (JIT) VeevaID registration model for site users. With this model, user administrators designate the User Type for new users as either site or sponsor. When an admin creates a site user, the system creates a corresponding Person (person__sys) record to store their details and study access. However, the actual User (user__sys) record is not created until the user successfully registers for VeevaID.
The site user receives an email inviting them to register for VeevaID after their initial Person record is created and the Activation Date has been met. If an admin sets an Activation Date in the future, the system queues the invitation until that date.
Single Sign-On
Site users can use SSO instead of VeevaID for eSignatures and to access their sponsor’s vault, provided they initially log in with SSO. This option is configured through the sponsor’s SSO settings and must be enabled by a Domain Administrator.
Access Activity
VeevaID and sponsor users can change their username (email address) within VeevaID. The User Activity Report tracks these changes, and when a VeevaID user updates their username, the User Access Report references all access activities for both the new and old usernames.
Sending Invites
When VeevaID for EDC is enabled, the system automatically queues registration invitations for new users with the Site user type. Under the JIT model, the system holds the invitation until the user’s Activation Date. Once that date arrives, the system sends the initial email and subsequent reminders every 72 hours until the user registers or the invitation expires after 14 days.
User administrators can manually resend registration invitation emails from System Tools > Users as needed, provided the user has not yet completed registration.
To send or resend a registration invitation email:
- Navigate to Tools > System Tools > Users.
-
Locate the user and check their status in the VeevaID Registration column (e.g., Invited, Expired, or Revoked). You cannot resend an invitation if the status is Registered.

- Hover over the Last Name of the user to display the Actions menu.
- Select Send VeevaID Invitation Email.
- Click Send Invitation Email in the confirmation dialog.
- Optional: Click Cancel to cancel sending the invitation and close the confirmation dialog.
Accessing Training
Users access training through CDMS Vault Training, Veeva’s learning management system. Site users use VeevaID to access CDMS Vault Training and use Sponsor ID to access Vault EDC studies. Sponsors use their Sponsor ID for both Vault Training and Vault EDC studies.
VeevaID Collision Resolution
The VeevaID collision resolution process manages situations where a user might have multiple accounts (for example, an original basic account and a new VeevaID account). When a user’s data “collides,” with existing records, it can lead to the creation of a new, separate VeevaID account. This can disable the user’s original basic account and replace it with the new VeevaID account.
In addition, the system clones all of the original user’s access and training completion data to the VeevaID user account, and hides the original user from all user lists, including those the CDMS API Retrieve Users endpoint returns.
How and When the Resolution Process Initiates
Veeva executes customer-by-customer conversions of EDC Vaults to support VeevaID access.
The system automatically initiates the VeevaID collision resolution process during these conversions.
Specifically, this occurs when:
- A Vault Administrator enables the Auto-Resolve Username Collision in VeevaID Conversion feature flag in a vault.
- A basic site user is eligible for VeevaID conversion and the system attempts to convert that user, using their email address as the target VeevaID username. If another user already has that same email address as their VeevaID username in the customer domain, the system detects a username collision.
If a Vault Administrator disables the feature flag, the system identifies the collision and marks the user as “ineligible” for conversion.
User Activity Report & User Access Report
When a collision occurs, the User Activity Report and User Access Report automatically include activity and access history from both the original and new accounts under the context of the active user. This eliminates the need for administrators to manually combine activity from multiple accounts, preventing misleading reports and saving time.
When generating a User Activity Report or User Access Report, the system automatically performs these steps:
- Identifies Historical User IDs: The system identifies all historical user IDs linked to the active user, including direct links created during collision resolution.
- Aggregates Activity Records: The system combines and displays all activity records linked to the active user’s ID and their associated historical IDs.
User ID Column
The User Activity Report includes a User ID column, which displays the unique user__sys.id value of the user associated with each action.
For users whose accounts underwent collision resolution, the report also indicates that a previous user account was disabled and a new one originated. This applies to reports for single users and all Vault users.
Total Access Time
When running the User Access Report for a specific date range, the system calculates total access time for studies and roles by combining access durations from all linked accounts (including active VeevaID and previous user IDs).
Automatic Updates After VeevaID Collision Resolution
When users undergo the collision resolution process, the system automatically updates the following user information and records to reflect their new VeevaID:
Email Group Membership: For users that hold membership in an email group, the system automatically updates the email group to use the new VeevaID. This ensures any subsequent email notifications go to the new user.
Audit Trail Export: When creating an Audit Trail Export job, the system only presents the new VeevaID user for selection in the User dropdown. However, if any collision resolution impacted users are included in an Audit Trail Export, the system automatically includes all audit events for both the original and VeevaID users, and presents them under the sole context of the new VeevaID user. This provides a complete, unbroken audit history and maintains the continuity of the Audit Trail Export.
Query Messages: For users that previously created a query message with the original user, the system automatically updates the User ID associated with that query message to the new VeevaID user’s ID. This ensures that these VeevaID users can continue to edit any query messages they created with their original account.
VeevaID Registration Report
User administrators can generate a VeevaID Registration Report to monitor and track VeevaID invitation activity.
To generate the report:
- Navigate to Tools > System Tools > Users.
- From the Actions menu, select VeevaID Registration Report.
- Click Close in the Job Queued dialog. Vault sends an email notification with a link to the .xlsx file when the job completes.
Training Integration
Veeva Clinical Data has an integration with Veeva’s Veeva Training learning management system, which your organization can use to prevent users from accessing study-related records before completing their assigned training curriculum. Learn more about how to use the integration.
If the integration is not enabled in your Study, you can simply enable and disable Study Access for your users.
If the integration is enabled for your Study, you have some additional options when creating and editing Users. The Study Access field is bundled with a new LMS Training Status field to roll up to Has Access. A user will have study access (Has Access set to Yes) if one of these two conditions is met:
- The User has completed all assigned training (their LMS Training Status is Trained).
- The User has Study Access set to Enabled and Ignore LMS Status, Assume Trained selected.
When a user has access to multiple studies, Vault automatically combines the training requirements across those studies. A user will only need to complete each curriculum once, not once per study.
Email-Based Tracking: CDMS Training uses the user’s email address as the unique identifier for tracking training. Users with multiple EDC accounts linked to a single email address have one training profile and only need to complete an assigned curriculum once.
Ignore LMS Status
The Ignore LMS Status, Assume Trained checkbox allows you to override the user’s training status, so that they may access the Study without completing their training. This is useful when your organization is first enabling the Veeva Training Integration and does not want to lock existing users out of a Study.
You can check the Ignore LMS Status of a particular user or users by performing one of the following actions:
- Export Study Users: Export a full list of users and their access, then check the Ignore LMS Status column for the user’s status.
- Retrieve Users: Use the Retrieve Users endpoint to retrieve all users and check if the
ignore_lms_training_statusparameter is set to “true”. - Create a User Defined Report : Create a user-defined report and check the
cdms_application_role_permission_vobject records for the LMS Ignore Training Status field. If the field has a value of “Yes” the checkbox was checked for the user.
To view the history of the Ignore LMS Status, Assume Trained setting, use the User Access Report. It includes the Ignore Training Status Changed event, showing LMS Respected and LMS Ignored as possible old and new values.
Permissions
To set or edit the Ignore LMS Status, Assume Trained setting, you must have all the permissions assigned to the user administrator role, including the Edit Users and Tab permissions. Any role with the View Users permission can view the setting. To access the Retrieve Users endpoint, the API Access permission is required.
Mapping Before User Creation: Veeva recommends that you assign curriculums to Study Roles (training mapping) before creating Users in your vault. If you create users first, you will need to manually update their Training Status.
Roles Limited by Environment Type
Because Studio is read-only in non-development environments (TST, training, and production), Vault includes a standard Study Role, CDMS Study Designer Read Only, that provides read only access to Studio. The CDMS Study Designer role provides complete access to Studio for users to design their study, typically in a development environment. In most cases, the following roles cannot be assigned to users in a production environment:
- CDMS Super User
- CDMS Study Designer
- CDMS Librarian
We recommend that these roles be assigned with study-specific access.
Roles Requiring All Sites Access
Certain roles require All Sites access. In the current release, the current standard Study Roles require All Sites access:
- CDMS API Read Write
- CDMS Clinical Coder
- CDMS Clinical Coder Administrator
- CDMS Clinical Coder Manager
- CDMS Super User
- CDMS User Administrator
- CDMS Study Designer
- CDMS Librarian
- CDMS Safety Administrator
Create the User’s Account
To create a new user:
- Navigate to Tools > System Tools > Users.
- Click + New User to create a new user.
- Enter a First Name and a Last Name.
- Enter a User Name. The user will use this value (with @domain.com appended) to log into Vault, for example, entering “cordelia.hunter” would have the user log in with the user name “cordelia.hunter@verteopharma.com”. User Names can’t include any of the following special characters: @ ( ) [ ] \ : ; < >, spaces, quotation marks, or non-ASCII characters. Periods ( . ) are permitted, but they can’t be used as the first or last character.
- Enter the user’s Email.
- Optional: Enter a Federated ID. If your organization is using Single Sign-On (SSO), Federated ID may be required for this user to be able to log in with SSO.
- Select a Security Policy.
- Optional: Select the User Type.
- Optional: Enter a Title and Company. These fields are only informational, there isn’t any functionality tied to these values.
- Select the user’s Language. This is the language that Vault displays UI text in.
- Select a Locale. This informs the number and date formats that Vault uses to display numbers and dates to this user.
- Select a Timezone.
- Select an Activation Date. The User won’t be able to access the vault until this date.
- By default, Vault sends the Welcome Email on the chosen Activation Date. If you want to send the Welcome Email upon save, select No for Send Welcome Email on Activation Date. Otherwise, leave this set to Yes.
- Click Save.
To add an existing domain user to the current vault:
- Navigate to Tools > System Tools > Users.
- From the + New User menu, select + Add Existing User.
- Enter the user’s User Name. This must be an exact match.
- Click Add User.
Set the User's Study Access 21R1 & Earlier
- If you aren’t already in Edit mode, click Edit.
- Scroll to the Study Access section.
- If your Study isn’t listed in the Accessible Studies list:
- Click + Add Studies.
- Use the shuttle menu to move your Study from Available Studies to Accessible Studies.
- Click Save.
- Select your Study in the Accessible Studies list.
- Optional: To provide this user access (via the same role) to all environments and sites, select Yes for Grant Access to All Environments and Sites. Leave this set to No to set access to specific environments and sites.
- For each Environment, complete the following steps:
- Select Grant Access to allow the user to access this environment.
- Select a Study Role to assign this user.
- To assign a user access to all study sites, select Access All Sites.
- If you didn’t give the user all site access: Allow access to all Sites in a Study Country by selecting a Country for Country Access, or allow access to one or more chosen Sites by selecting specific Sites in Site Access.
- Optional: Select Ignore LMS Status, Assume Trained if you’re using the Veeva Learning Integration but want this user to be able to access the Study without completing assigned training curriculums. For example, you may want to select this option for study designers in your development environment so that they can begin their design work without waiting for training.
- Click Save.
Set the User's Study Access 21R2 & Later
With the 21R2 release, we introduced a new security model, multi-role security. With multi-role security, a user can have multiple Study Roles in a study or in a vault with a single account and without a custom Security Profile. If your vault was created after the 21R2 release (August 2021), your vault is using this security model automatically. If your vault was created prior to the 21R2 release, you must upgrade to this model. If you haven’t upgraded, your vault is still using Role by Study. Contact your Veeva Services representative to discuss upgrading. See Set the User’s Study Access (21R1 & Earlier) for instructions to set a user’s study access in Role by Study.
With multi-role security, you can assign a User a Study Role across all Studies in the vault, across all Environments in a Study, or to one or more Environments in a Study. A user can have up to fifteen (15) Study Roles in a single vault. For example, a user may be a lead data manager, but that user can also be assigned a CRA role to preview the study as a CRA would view it in the Review tab.
Across All Studies
To assign a user a Study Role or multiple Study Roles across all Studies in the vault:
- Navigate to the User in Tools > System Tools > Users.
- If you aren’t already in Edit mode, click Edit.
- Scroll to the Study Access section.
-
Select Yes for Grant Access to All Studies.

- Click into the Grant Access table cell for the All Studies row to show the checkbox.
- Select the Grant Access checkbox to grant the user access to all studies with the Study Role you will choose in step 7.
-
Select the Study Role you want to grant this user from the Role drop-down.

- Optional: Select Ignore LMS Status, Assume Trained if you’re using the Veeva Learning Integration but want this user to be able to access the Study without completing assigned training curriculums. For example, you may want to select this option for study designers in your development environment so that they can begin their design work without waiting for training.
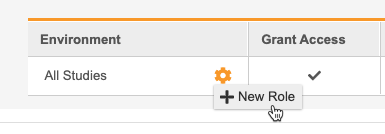
- Hover over the All Environments column to show the Actions menu.
-
From the** Actions** menu, select + New Role. This adds a row to the table.
- In the new row, select a Role.
- Repeat steps 5 through 11 until you’ve assigned this User all of their Study Roles.
- Click Save.
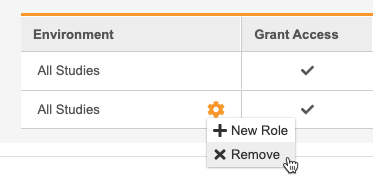
Unassign a Study Role from All Studies
To remove a row and unassign a Study Role from that User, select Remove from the Actions menu in that role’s row.
Across All Environments in a Study
You can also assign a user multiple roles across all Environments in a Study. To assign a user across all environments:
- If you aren’t already in Edit mode, click Edit.
- Scroll to the Study Access section.
- If your Study isn’t listed in the Accessible Studies list:
- Click + Add Studies.
- Use the shuttle buttons to move your Study from Available Studies to Accessible Studies.
- Click Save.
- Select your Study in the Accessible Studies list.
-
Select Yes for Grant Access to All Environments and Sites.

- Select a Study Role from the Roles drop-down.
- Optional: Select Ignore LMS Status, Assume Trained if you’re using the Veeva Learning Integration but want this user to be able to access the Study without completing assigned training curriculums. For example, you may want to select this option for study designers in your development environment so that they can begin their design work without waiting for training.
- Hover over the Environments column to show the Actions menu.
-
From the** Actions** menu, select + New Role. This adds a row to the table.

- In the new row, select a Study Role from the Roles drop-down.
- Click Save.
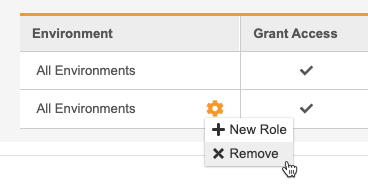
Unassign a Study Role from the Study
To remove a row and unassign a role, select Remove from the Actions menu.
Environment by Environment
- If you aren’t already in Edit mode, click Edit.
- Scroll to the Study Access section.
- If your Study isn’t listed in the Accessible Studies list:
- Click + Add Studies.
- Use the shuttle buttons to move your Study from Available Studies to Accessible Studies.
- Click Save.
- Select your Study in the Accessible Studies list.
- Select No for Grant Access to All Environments and Sites.
- Locate the row of the Environment that you want to grant access to.
- Select the Grant Access checkbox to allow the user to access this environment.
- Select a Study Role from the Roles drop-down to assign this user.
- To assign a user access to all Sites in the Environment, select Access All Sites.
- If you didn’t give the user all site access:
- Allow access to all Sites in a Study Country by selecting a Country for Country Access.
- Allow access to one or more chosen Sites by selecting specific Sites in Site Access.
- Optional: Select Ignore LMS Status, Assume Trained if you’re using the Veeva Learning Integration but want this user to be able to access the Study without completing assigned training curriculums. For example, you may want to select this option for study designers in your development environment so that they can begin their design work without waiting for training.
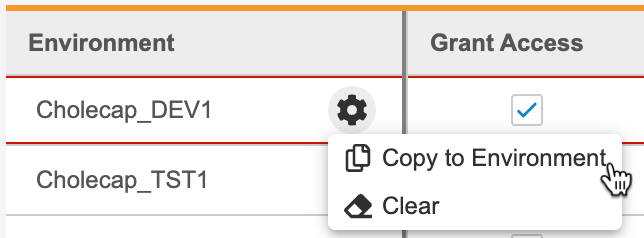
- To copy access and role assignment to another Environment:
- Hover over the Environment that you want to copy from to show the Actions menu.
-
From the Actions menu, select Copy to Environment.
-
In the Copy From Environment dialog, select the Environment checkboxes that you want have copy the access of the source Environment.
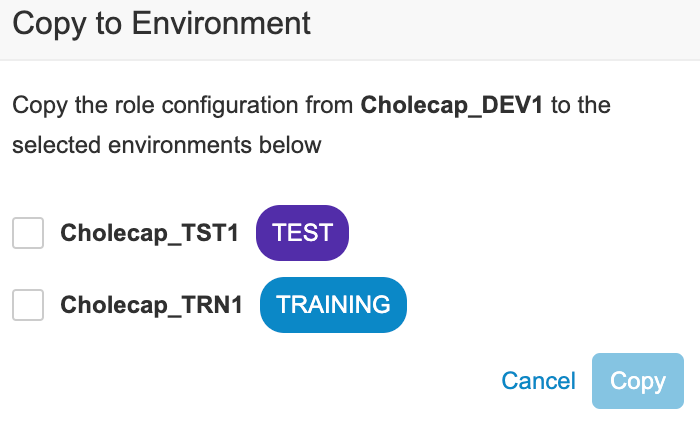
- Click Copy.
- Click Save.
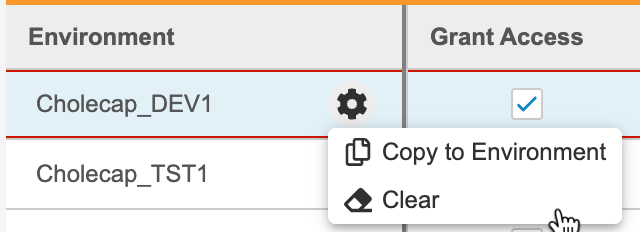
Unassign a Study Role from an Environment
To remove a row and unassign a role, select Clear from the Actions menu.
How to Remove Study Access
You can remove access on a study-by-study basis. This unassigns any Study Roles for that user across all Environments in that Study. To remove study access for an entire Study:
- If you aren’t already in Edit mode, click Edit.
- Scroll to the Study Access section.
- Select your Study in the Accessible Studies list.
-
Click Remove Study Access.

- Click Save.
Editing Existing Users
You can edit existing study users from EDC Tools > Users.
To edit a User:
- Navigate to Tools > System Tools > Users.
- Click the Last Name of the user you want to edit.
- Click Edit.
- Make any changes.
- Click Save.
Any changes to user access are effective immediately.
For cross-domain users, you can only edit their Security Profile and Application Role in your current vault. Any other changes must be made on that user’s home domain.
Editing Email Addresses
You’re unable to edit a user’s email address after it is created. To manage email changes, refer to the guidance below:
| Scenario | Guidance |
|---|---|
| The user was initially registered with an incorrect email address, including those with a VeevaID. | The user administrator or sponsor (for VeevaID users) should deactivate the account and create a new one. |
| The sponsor user needs to modify their email address due to a change. For example, a legal name change or a company name change. | The sponsor user should reach out to Veeva Support to update their email address. |
Importing Study Users
You can also create users in your Study in bulk by importing them as User records from a CSV (.csv) or Excel ™ (.xlxs) file.
Excel Localization for .CSV Files: Veeva Clinical Data uses commas as the default separator for .CSV files. If your system is configured in a non-English language, you may encounter errors when attempting to upload .CSV files created or modified in Excel. We recommend that you change the localization of your system to English while working on the .CSV to avoid this issue.
Creating the Import File
The 26R1 release introduces the Just-in-Time VeevaID registration model and the person__sys object for user management. Because of these changes, study user import templates differ depending on whether the Enable Person and Just in Time VeevaID User Creation setting is active. These updates are part of a phased release. All customers will have the new registration model and user management changes by the 26R2 general release.
If the Enable Person and Just in Time VeevaID User Creation setting is active in your vault, use the following template to create an import CSV file:
If you do not have the Enable Person and Just in Time VeevaID User Creation setting active in your vault, use the following template to create an import CSV file:
To create the import file:
- Download the template and open it in your preferred editor.
- Add a row for each User you want to add to your Study.
- Save your file.
File Restrictions
The following restrictions apply to the CSV file:
- CSV file must be smaller than 20mb.
- Use CSV UTF-8 encoding, or don’t use any special characters.
Required Columns
The following columns are required in your import file:
| Column | Description | Example Value | Required |
|---|---|---|---|
| User Name | Enter the user’s User Name. The User Name is used for login. |
user.name@domain.com, john.smith@verteopharma.com |
|
Enter the user’s email address. |
user.name@email.com |
||
| User Type | Enter the user’s type (Site or Sponsor). This is permanent. Once you save the user, you can no longer change the user type. |
Site |
|
| Title | Enter the user’s Title. This is informational and doesn’t affect the user’s ability to access the application. |
Principal Investigator |
|
| Last Name | Enter the user’s last name. |
Smith |
|
| First Name | Enter the user’s first name. |
John |
|
| Company | Enter the name of the user’s company or organization. This is informational and doesn’t affect the user’s ability to access the application. |
Verteo Pharma |
|
| Federated ID | If your organization is using Single Sign-on (SSO) for authentication, enter the user’s Federated ID. Vault uses Federated ID to map enterprise user names to Vault user names for SSO. Otherwise, leave this column blank. |
user.name@enterprise-domain.com |
|
| Language | Enter the user’s Language, using the language tag. See a list of languages and their appropriate entry formats here. |
en |
|
| Locale | Enter the user’s Locale, using the locale tag. |
en_US |
|
| Timezone | Enter the user’s Timezone. This column requires a special format. See a list of timezones and their appropriate entry format here. |
(GMT-08:00) Pacific Standard Time (America/Los_Angeles) |
|
| Security Policy | If your organization is using SSO, enter the Name of the Security Policy for your SSO solution. Otherwise, enter Basic to use Vault authentication. |
Basic |
|
| Cross Study Role | If this User is to have access to all Studies in the vault with the same Study Role, enter that Study Role here. Otherwise, leave this column blank to assign access to a specific Study. You can view a list of Study Roles from Tools > System Tools > Role Management. |
CDMS Principal Investigator |
|
| Activation Date | Enter the Activation Date for the user. This is the date the user will receive their welcome email (if selected) and access to the Study. If you’re updating an existing User, note that you can only change the Activation Date if the user has not yet been activated. You can’t change the Activation Date for an active user. |
2/26/21 |
|
| Send Welcome Email | Enter “Yes” to send the user a Welcome Email on the Activation Date or immediately if no Activation Date was provided. Otherwise, enter “No” to skip sending the Welcome Email. |
Yes |
|
| Study | Enter the Study that you want the user to access. This is the study’s name without any environment appended to it (for example, “Cholecap”, not “Cholecap_DEV1”). If you assigned the user a Cross Study Role, leave this column blank. |
Cholecap |
|
| Study Environment | Enter the Study Environments (comma-separated) that you want the user to access. If you assigned the user a Cross Study Role, or if you set Access to All Environments to Yes, leave this column blank. |
Cholecap_DEV1, Cholecap_UAT1, Cholecap |
|
| Access to All Environments | Enter “Yes” to allow the user to access all Study Environments for a Study with the same Study Role. Otherwise, enter “No”. If you assigned the user a Cross Study Role, leave this column blank. |
No |
|
| Study Role | Enter the Study Role that you want to assign the user in the selected environments. If you assigned the user a Cross Study Role, leave this column blank. |
CDMS Principal Investigator |
|
| Access to All Sites | Enter “Yes” to allow the user to access all Sites in the Study. Otherwise, enter “No” to assign access to specific sites (in the Site Access column). |
No |
|
| Study Access | Enter “Enabled” to allow the user to access the Study right away. Otherwise, enter “Disabled”. |
Enabled |
|
| Country Access | Enter Study Countries (comma-separated) that you want to allow the user to access. Granting access to a Study Country grants access to all Sites within that country. If you set Access to All Sites to Yes, leave this column blank. |
United States |
|
| Site Access | Enter Sites (comma-separated) that you want to allow the user to access. If you set Access to All Sites to Yes, leave this column blank. If you entered countries in the Country Access column, leave this column blank. |
01-101, 01-102 |
|
| Ignore LMS Status | Enter “Yes” to override the user’s training status, so that they may access the Study without completing their training. Otherwise, enter “No” to require the user to complete training before accessing the Study. |
No |
|
| Domain Administrator | Note that only domain administrators can manage other domain administrators. If you are not a domain administrator, leave this blank. Enter “Yes” to make the user a Domain Administrator. |
Yes |
|
| Service Availability Notifications | Enter “Yes” to set the user’s preference to receive Service Availability Notififcations. Set to “No” to have the user not receive these notifications. |
Yes |
|
| Product Announcement Emails | Enter “Yes” to set the user’s preference to receive Product Announcement Emails. Set to “No” to have the user not receive these announcements. |
Yes |
|
| Status | Enter “Inactive” to set an existing user’s Status to Inactive. This field can only be used to inactivate active users. Use the System Tools UI to activate inactive users. |
Active |
Vault automatically populates the License Type (Full User) and the Generate temporary password and notify user (selected) fields for each new User upon successful import.
Case Sensitivity: The matching of values in the import file to those values in Veeva Clinical Data is case-sensitive.
For cross-domain and cross-vault users, you only need to populate the following columns:
- User name
- Study Role
- Site Access
- Country Access
Vault ignores any other user details, because changes outside these columns must be made in the user’s home vault or domain.
VeevaID Guidance for Site Users
When importing site users, certain fields behave differently due to VeevaID authentication. The table below outlines requirements and limitations as it relates to this group of users.
| Field | Behavior for VeevaID Users |
|---|---|
| User Name | When User Type equals Site, the system locks the User Name field because the User Name for VeevaID users always matches their email address. When User Type equals Sponsor, the User Name field requires a value. |
| The system requires an Email for all users. | |
| User Type | Setting the User Type to Site creates a VeevaID user. With this User Type, the system ignores values for the following fields: User Name, Title, Company, Security Policy, Send Welcome Email, Service Availability Notifications, and Product Announcement Emails. |
| Title | You cannot configure the Title for VeevaID users. The system disregards any value in this field when the User Type equals Site. |
| Last Name | When User Type equals Site and the VeevaID already exists, the system ignores Last Name values since these values always reflect the existing VeevaID profile attributes. |
| First Name | When User Type equals Site and the VeevaID already exists, the system ignores First Name values since these values always reflect the existing VeevaID profile attributes. |
| Company | You cannot configure Company for VeevaID users. The system disregards any value in this field when the User Type equals Site. |
| Federated ID | If your vault domain uses SSO for VeevaID, the system saves any provided Federated ID values to the user. Otherwise, leave this column blank. |
| Language | When User Type equals Site and the VeevaID already exists, the system ignores Language values since these values always reflect the existing VeevaID profile attributes. |
| Locale | When User Type equals Site and the VeevaID already exists, the system ignores Locale values since these values always reflect the existing VeevaID profile attributes. |
| Timezone | When User Type equals Site and the VeevaID already exists, the system ignores Timezone values since these values always reflect the existing VeevaID profile attributes. |
| Security Policy | When User Type equals Site, the system sets the Security Policy to "VeevaID" and ignores any other provided values. |
| Cross Study Role | When User Type equals Site and a Cross Study Role exists, the Import Preview page displays a warning message requesting that administrators confirm the User Type and the user's All Studies access. Otherwise no differences for VeevaID users. |
| Send Welcome Email | The system disables the Send Welcome Email option for VeevaID users. VeevaID users automatically receive an invitation email. The system disregards any value in this field when the User Type equals Site. |
| Access to All Environments | When User Type equals Site and Access to All Environments contains a value, the Import Preview page displays a warning message requesting that administrators confirm the User Type and the user's access to All Study Environments. Otherwise no differences for VeevaID users. |
| Study Role | When User Type equals Site, but the Study Role value is not part of the site study team, the Import Preview page displays a warning message requesting that administrators confirm the User Type and the user's non-site role. Otherwise no differences for VeevaID users. |
| Access to All Sites | When User Type equals Site and Access to All Sites contains a value, a warning message displays in the Import Preview page requesting that administrators confirm the User Type and the user's access to All Sites. Otherwise no differences for VeevaID users. |
| Service Availability Notifications | You cannot configure Service Availability Notifications for VeevaID. The system disregards any value in this field when the User Type equals Site. |
| Product Announcement Emails | You cannot configure Product Announcement Emails for VeevaID. The system disregards any value in this field when User Type equals Site. |
Importing the File
To import the file:
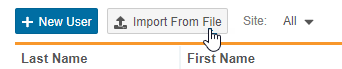
- Navigate to Tools > System Tools > Users.
-
Click Import From File.
- Click Select a file.
- Select your import file.
- Optional: Check the Append Site and Country Access checkbox in the right hand corner of the page next to the Import button. Leaving the checkbox unchecked will result in Vault replacing current site or country access with the updates from the file being imported. Checking the checkbox will allow Vault to add site or country access to the original accesses.
- Vault uploads the file and validates your new User records. Validation results display in the Preview area. (See possible validation errors below.)
- Optional: If your import file contains any validation errors, edit the file to resolve them. Then click Change File to re-upload your import file.
- Once all of your new User records are ready for import, click Import. Vault begins a job to import and create all of your new User records. Vault sends you an email notification when the job is complete.
- Click Job History or Back to Study.
Import Statuses
There are three possible statuses for a new User record as you prepare it for import:
| Status | Explanation |
|---|---|
| Error | There is at least one error on this row. Errors indicate missing or invalid values. |
| Warning | There is at least one warning on this row. Warnings indicate conflicts with existing User records. |
| Ready for Import | This User record is complete and can be successfully imported into the vault. |
Validation Errors
The table below lists possible validation errors and their resolutions:
| Error | Field | Explanation | Steps to Resolve |
|---|---|---|---|
| {Field} is required | All | This field is required. |
Provide a value for this field and re-upload your import file. |
| Inactive User | All | The cross-domain user is marked Inactive in their home domain. |
Remove the inactive cross-domain user’s row from your CSV and re-upload your import file. |
| Insufficient access to create Cross Domain User | All | You do not have the Admin: Security: Users: Add Cross-Domain Users permission, which is required to create cross-domain users. |
Remove the cross-domain user’s row from your CSV and re-upload your import file. |
| Evironment does not exist | Study Environment | The Study Environment provided doesn’t exist. |
Verify that you entered the Study Environment correctly, correct any errors, and re-upload your import file. |
| Invalid Study Environment | Study Environment | The Study Environment provided doesn’t exist, or, if Access to All Environments is set to No, no Study Environments were provided. |
Update the Study Environment and re-upload your import file. |
| Invalid Email Format | The email provided is in an invalid format. |
Verify that the email address is correct and that it is in the someone@example.com format. Remove any special characters and re-upload your import file. | |
| Invalid User Name | User Name | The user name provided is in an invalid format, or Vault couldn’t locate a cross-domain user with the user name included in the import file. |
Remove any special characters (@ ( ) [ ] . : ; < >), correct the cross-domain user’s user name, and re-upload your import file. |
| Invalid Timezone | Timezone | The Timezone provided is in an invalid format. |
Enter a supported Timezone in the appropriate format and re-upload your import file. See a list of appropriate entry formats here. |
| Invalid Locale | Locale | The Locale provided does not exist in this vault. |
Enter a supported Locale and re-upload your import file. See a list of appropriate entry formats here. |
| Invalid Language | Language | The Language provided is not supported. |
Enter a supported Language and re-upload your import file. See a list of appropriate entry formats here. |
| Invalid Status | Study Status | The Study Status provided is not an option for this field. |
Enter either “Enabled” or “Disabled” and re-upload your import file. |
| Invalid Security Policy | Security Policy | The Security Policy provided is not an option for this field. |
Enter “Basic” and re-upload your import file. |
| Invalid Application Role | Cross Study Role, Study Role | The Study Role provided doesn’t exist in this vault or is spelled incorrectly. |
Enter a valid Study Role (formerly known as Application Role) and re-upload your import file. You can view a list of Study Roles from the Add User dialog in System Tools > Users or from Admin > Users & Groups > Application Roles. |
| Invalid Site | Site Access | The Site provided does not exist in the Study or is spelled incorrectly. You also can’t list all Sites. Provide the user with All Site Access to give access to all Sites in the Study. |
Enter a valid Site or list of Sites for your Study and re-upload your import file. You can view a list of Sites from EDC Tools > Sites. |
| Invalid Country | Country Access | The Country provided does not exist in the Study or is spelled incorrectly. |
Enter a valid Study Country for your Study and re-upload your import file. You can view a list of Study Countries from EDC Tools > Study Countries. |
| Activation Date must be set to a future date | Activation Date | The Activation Date provided was not in the future (based on import datetime). |
Update the Activation Date and re-upload your import file. |
| Federated ID must be no greater than 100 characters | Federated ID | The character limit for Federated ID is 100. |
Enter a Federated ID within the character limit and re-upload your import file. |
| {Input} does not exist | Domain Administrator, Service Availability Notifications, Product Announcement Emails | This field only accepts “Yes” or “No”. |
Update the Domain Administrator field and re-upload your import file. |
| Only a Domain Administrator can manage other Domain Administrators | Domain Administrator | Only users who are domain administrators can make changes to other Users who are also domain administrators. |
Remove the rows modifying domain administrators and re-upload your import file. |
| Status must be Active or Inactive | Status | The Status field only accepts “Active” or “Inactive”. |
Update the Status field and re-upload your import file. |
| Can't modify own study access | Access related fields | Vault doesn’t allow you to modify your own study access. If you need changes to your access, contact your vault’s administrator. |
Remove your own user row and re-upload your import file. |
| User Type is required | User Type | The User Type field is a required value for each user/row. |
Provide a value of “Site” or “Sponsor” for this field and re-upload your import file. |
| Invalid User Type | User Type | The User Type provided is not a supported option. |
Enter either “Site” or “Sponsor” and re-upload your import file. |
| User Type cannot be changed once set for an existing user | User Type | The User Type has already been set for this user and cannot be changed. |
Either update the User Type value to align with the user’s existing type or leave the field blank. |
| Conflicting User Types entered for the same user. A user can only have one User Type value. | User Type | The same user is listed with different User Type values within the import file. |
Remove the conflicting rows and ensure each user has only one User Type value. |
Validation Warnings
The table below lists possible validation warnings and their resolutions:
| Warning | Explanation | Steps to Resolve |
|---|---|---|
| Duplicate user record | The import file contains two (or more) duplicate rows for a single User record. |
Remove the duplicate rows from your import file. For automated deployment Studies, the import file contains two (or more) duplicate rows for a single combination of User and Study Environment. |
| User exists. Applying study access. | This User already exists in the vault or Study Environment. Upon import, Vault does not create a new User record, and instead only adds this User to the Study. |
Remove this User row from your import file. You can add this User to your Study. |
| Activation date will be set to today as it is not specified | You didn’t specify a date for the Activation Date, so Vault automatically sets this field to the current date. |
Enter an Activation Date and re-upload your import file. |
| User exists. Activation date will be ignored. | The specified user already exists and is Activated. Vault will apply other changes, but it will ignore the change to the Activation Date. |
None |
| Site and Country access will be ignored for external studies. | External studies (OpenEDC) have their countries and sites managed in that system, instead of in Vault CDMS. |
None |
| User Name is matched with an existing user in a connected vault. Proceeding with this import will create a cross-vault user with the specified access to this vault. Please ensure that User Name values are unique before proceeding. | A user in a connected vault has the same User Name as this User. |
Unless you are intending to add an existing user from another vault, ensure that the user name value is unique for each user before proceeding. |
| User Type is Site, but access is not site-specific. Once set, User Type cannot be changed. | The imported user has a User Type of “Site” but also has broad access such as: Access to All Environments, Access to All Sites, or a Cross Study Role. This also applies if an existing user has another role that has broad access permissions. |
Ensure that the user is actually a Site user and should use VeevaID. |
| User Type is Site, but role is not in the Site Team. Once set, User Type cannot be changed. | The imported user has a User Type of “Site” but the assigned Study Role is not in the Site Query Team. This also applies if the user already has another role that is not in the Site Query Team. |
Ensure that the user is actually a Site user and should use VeevaID. |
| Site user email matches an active VeevaID user. Username, Security Policy and profile attributes will be ignored when the VeevaID user is linked. | A new “Site” user’s email matches an existing VeevaID user. The system will link the user to the VeevaID account and ignore some profile attributes in the CSV. |
None |
| User is designated as type "Site", but Bypass VeevaID Check is "Yes". No VeevaID user will be created or linked, and the user will have a separate Training account, if applicable. This is irreversible. | The “Bypass VeevaID Check” field is set to “Yes” for a new “Site” user. A separate training account will be created instead of linking to VeevaID, and the user will not be able to use VeevaID to access EDC. |
Check and ensure that the user should not be created as VeevaID. |
| Site user email does not match any active VeevaID user. An invitation to register for VeevaID will be sent to the provided email. The user will not be able to access this vault until they have registered and created their VeevaID account. | The email address for a new “Site” user does not match an existing VeevaID user, so an invitation will be sent to create a new VeevaID account. |
None |
Exporting Study Users
You can export user information in your Study into a CSV file. This can be useful for record keeping and user inventory. Note that any filters you apply to the listing of Users will also apply to your export. You can also export a list of study users to import into another study, copying all Study user access settings into that Study.
To export study users:
- Navigate to Tools > System Tools > Users.
-
From the Actions menu, select CSV.
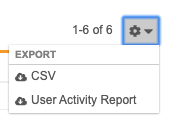
- Vault begins a job to create a CSV of your Users. When finished, Vault sends you an email notification with a link to download the output file.
The study user export includes all columns listed above. To import your users into another Study, update the Site Access and Country Access columns with values from the target Study and then follow these steps to import. Vault ignores the Last Login column during import.
Reset a User’s Password
When needed, you can reset an existing user’s password.
To reset a user’s password:
- Navigate to Tools > System Tools > Users.
- Locate the User whose password you want to reset in the list.
- Hover over the user’s Last Name to show the Actions menu.
- From the Actions menu, select Reset Password.
- In the confirmation dialog, click Reset Password.
Resend a User’s Welcome Email
To resend a user’s welcome email:
- Navigate to Tools > System Tools Users.
- Locate the User whose welcome email you want to resend in the list.
- Hover over the user’s Last Name to show the Actions menu.
- From the Actions menu, select Send Welcome Email.
- In the confirmation dialog, click Send Welcome Email.
Changing an Account’s Status
Vault doesn’t allow you to delete user accounts entirely. Instead, you can inactivate any user accounts that are no longer in use. This prevents that account from accessing Vault, but it doesn’t remove the account from the system. If needed, you can later activate that user account.
Inactivate a Single User
To inactivate a user:
- Navigate to Tools > System Tools > Users.
- Locate the User whose account you want to inactivate in the list.
- Hover over the user’s Last Name to show the Actions menu.
- From the Actions menu, select Inactivate.
- In the confirmation dialog, click Inactivate User.
Inactivate Multiple Users
To inactivate users in bulk:
- Navigate to Tools > System Tools > Users.
- Select the Users that you want to inactivate. Select the Select All Users checkbox to select all users in the vault.
- Click Inactivate.
- In the confirmation dialog, click Inactivate.
Activate a User
To activate a user:
- Navigate to Tools > System Tools > Users.
- Locate the User whose account you want to activate in the list.
- Hover over the user’s Last Name to show the Actions menu.
- From the Actions menu, select Activate.
- In the confirmation dialog, click Activate User.
Activate Multiple Users
To activate users in bulk:
- Navigate to Tools > System Tools > Users.
- Select the Users that you want to activate. Select the Select All Users checkbox to select all users in the vault.
- Click Activate.
- In the confirmation dialog, click Activate Users.
User Activity Report
You can use the User Activity Report to easily track a user’s activity in the vault. This report (CSV) is a chronological log of user activity, including login attempts, password resets, and more. Learn how to generate a User Activity Report.