Managing Study Settings
After creating your Study, you can update various study-level settings related to data collection in your study from Studio > Study Settings. Note that your selections within Studio > Study Settings, including the Signature Definition, are not versioned.
Accessing Studio
To access the Studio study design and configuration area, click the Studio tab in the primary navigation bar.
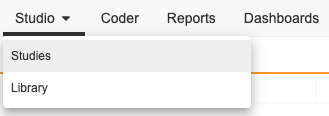
Once you click the Studio tab, you have the option to open either Studies, a listing of Studies in your vault, or Library.

From the My Studies page, you can click a Study Master to open the Study Instances page. Then, you can click a Study Instance to open Studio for that instance.
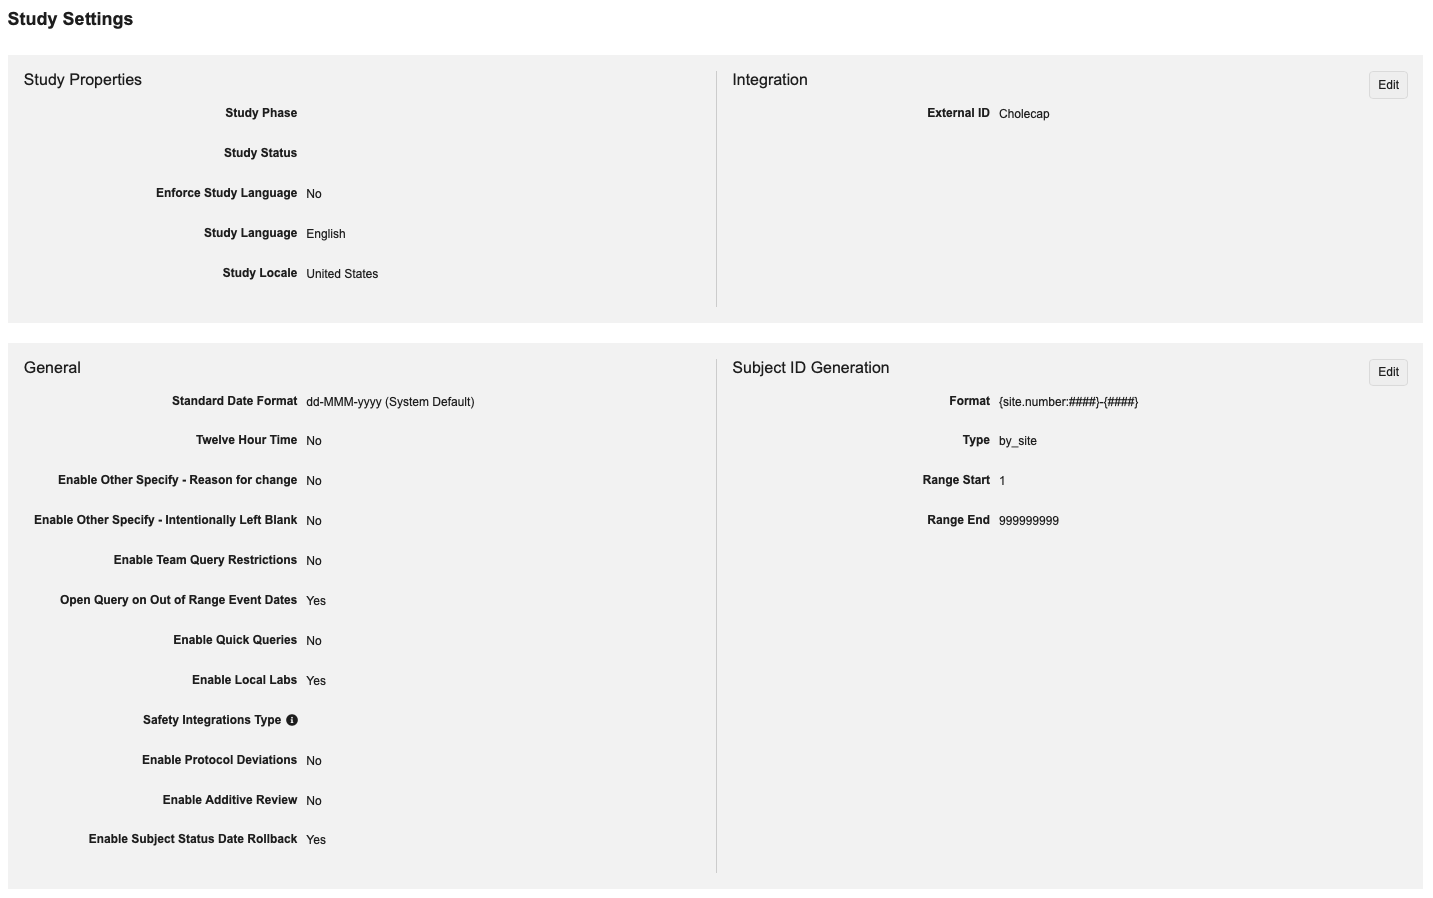
Study Settings includes five (5) configuration sections: Study Properties, Integrations, General, Subject ID Generation, and Signature Definitions.
How to Edit Settings
To edit your study’s general and subject ID generation settings:
- Navigate to your Study in Studio and open the Study Settings tab.
-
Click Edit.
- Make your changes.
- Click Save.
Study Language
Study Language allows users to designate a base language and locale for their study. When configured, all system labels, filters, buttons, and data will display in the chosen study language, instead of the vault or user language. Study Language selections will also be visible in the Study Design Specifications (SDS) as well as when running Casebook Comparisons (Diff Reports).
As of the 25R3 release, the Enforce Study Language setting will be automatically enabled for new studies.
The following will display in the chosen study language when the Enforce Study Language setting is set to Yes:
- Labels, buttons, and filters in the site list page, casebook list page, task bar, signature pages
- Study related labels for forms, events, codelists, etc.
- Date formats and date pickers
- Change reasons
- Audit display
- Review activities: system queries and query dialogues, protocol deviations, assessments, additive review
- Listings & exports
- Snapshots
- Job Schedule page
- Detailed and Closeout PDFs
You are responsible for uploading translations for dynamic messages in your selected study language. Vault will use the Vault language if translations are not available.
Note that Vault will use the selected study language value to display and save translations in Studio regardless of the Enforce Study Language setting.
The user’s language, which is specified as part of their user account, is still utilized for application settings, such as tab names, the search bar, etc.
How to enable Study Language:
- Navigate to Studio > Study Settings.
- Click Edit in the top right hand corner of the page.
- In the Study Properties section, set Enforce Study Language to Yes.
- Select your chosen study language from the Study Language dropdown menu.
- Select your chosen study locale from the Study Locale dropdown menu.
- Click Save in the upper right hand corner of the page.

Study Properties
You can define informational properties for your study from the Study Properties section of Studio > Study Settings. There is no functionality associated with these properties. Vault displays the values for these properties in study listings across Veeva CDMS.
| Setting | Description |
|---|---|
| Study Phase | Select your study’s Study Phase. |
| Study Status | Select your study’s current Study Status. |
| Enforce Study Language | Select “Yes” if you’d like to utilize the Study Language feature, which allows you to designate a base language and locale in which the study will operate. |
| Study Language | Designate a Study Language. This option is available for users utilizing the Study Language feature. |
| Study Locale | Designate a Study Locale. This option is available for users utilizing the Study Language feature. |
Integration
You can edit the External ID for your study from the Integrations section of Studio > Study Settings.
| Setting | Description |
|---|---|
| External ID | Enter the External ID for your Study. |
General
You can define general settings related to data collection in your study from the General section of Studio > Study Settings.
| Setting | Controls |
|---|---|
| Standard Date Format | Select a date format to use across the study. |
| Twelve Hour Time | Select Yes to use twelve hour time, and select No to use twenty-four hour time. |
| Enable Other Specify - Reason for Change | Select Yes to enable this feature. When enabled, users can enter a custom Reason for Change. |
| Enable Other Specify - Intentionally Left Blank | Select Yes to enable this feature. When enabled, users can enter a custom reason for Intentionally Left Blank. This feature is not supported for Lab forms. |
| Open Query on Out of Range Event Dates | This setting controls whether or not Vault creates out of window queries by default. When set to Yes, Vault creates queries when an Event Date is outside of the configured window or is in the future (based on event-level configuration) if the Open Query property is set to Inherit or Yes. When disabled (No selected), Vault does not create system-generated queries against Event Dates when set to Inherit or No. This setting only determines the default for out of window query creation (any Events with Inherit for Open Query). You can override this for individual events by choosing Yes or No for Open Query. Learn more. |
| Enable Team Query Restrictions | This setting controls whether or not Vault enforces query team restrictions. When enforced, Vault prevents users from closing any queries created by a user on a different Team. Teams are assigned by Study Role. When this feature is enabled, you can choose which Query Team to assign to System queries in Studio > Study Settings. When this feature isn’t enabled, users with permission to close queries may close any query they have permission to access. Enabling Team Query Restrictions and the Query Detail Listing: When the Team Query Restrictions study setting is not enabled, the Role column in the Query Detail Listing is populated with the user’s current role at the time of job generation. This information is not recorded in the query record. When the Team Query Restrictions setting is enabled in an ongoing study, the user’s role and team are stored on the query record at the time of the query action for queries moving forward and will populate in the Roles and Teams columns in the Query Detail Listing. Queries that were created prior to the Team Query Restrictions setting being enabled are not assigned a query team. If you want to keep the current roles for existing queries in the Query Detail Listing, we do not recommend that you enable Query Teams in an ongoing study. |
| Enable Veeva Randomization | Select Yes to enable the Veeva Randomziation module. Otherwise, leave this set to No. |
| Enable Local Labs | Select Yes to enable the Local Labs module. Otherwise, leave this set to No. |
| Enable Protocol Deviations | This setting controls the availability of the Protocol Deviations feature. Enabling this feature allows monitoring users to create and respond to Protocol Deviations. When enabled, Vault adds the Protocol Deviations configuration area to Studio and the Create Protocol Deviation rule action. Learn more. |
| Enable Additive Review | Select Yes to enable the Additive Review feature for your Study. When enabled, users can perform SDV and DMR on an ad hoc basis for Event Dates and Items with the requirement mode set to No Review. Additive Review only applies to the user who enables it. |
| Enable Data Loader | When the Data Loader feature is enabled at the Vault level by Veeva Support, use this field to enable the Data Loader feature in your Study. Select Yes to enable the feature. Otherwise, leave this field set to No. |
| Enable Subject Status Date Rollback | Select Yes to clear the status date when a subject’s status is rolled back after a data change causes a Set Subject Status rule to evaluate as false, that previously evaluated as true. Select No to keep the status date when a subject’s status is rolled back. |
Subject ID Generation
Vault automatically creates subject IDs for each new Subject. At Casebook creation, Vault adds the subject ID SCR-####, incrementing by one for each Subject at the Site. Once the subject is assigned the In Screening status, Vault updates the subject ID to a new auto-generated ID based on the Subject ID Generation configuration.
| Setting | Description |
|---|---|
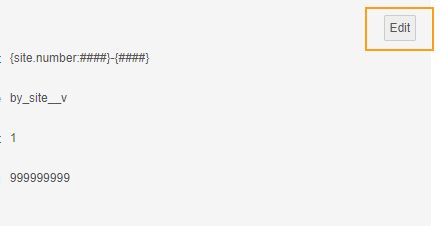
| Subject Id Gen Format | Enter the format for Subject IDs in the Study. In the current release, Vault supports including or excluding leading zeroes, padded spaces, and #### to show data type. See details below. This setting is only relevant for the by_site Subject ID Generation type. |
| Subject Id Gen Type | Select the type of auto-generated Subject ID to use. See details below. |
| Subject Id Range Start | Enter a number at which to start numbering Subject IDs. For example, if you enter “1” here, Vault numbers the first Subject ID in the Study with “1”. This setting is only relevant for the by_site Subject ID Generation type. Do not include leading zeros. |
| Subject Id Range End | Enter a number at which to end numbering Subject IDs. For example, if you enter “9999” here, Vault starts numbering over after subject -9999. This setting is only relevant for the by_site Subject ID Generation type. Do not include leading zeros. |
APIs & Subject ID Generation: When using an API connection to create Subjects with specific Subject ID numbers or identifiers, only select the external__v or manual__v generation setting. Any other selection for subject generation could result in conflicting subject numbers.
Subject ID Format Tokens
The following tokens are available for use in the Subject ID Gen Format setting:
study.name: Name field value for the Studystudy.oid: External ID (formerly known as “OID”) field value for the Studycountry.name: Name field value for the Study Country of the subject’s Sitesite.number: Site Number (name__v) field value for the subject’s Site
Use # for system-generated numbers. Surround each section of the subject ID format with curly braces {}.
In a Study with the Subject Id Gen Format set to {site.number-####}-{####}, where a Site Number is “101” and the Subject ID Range Start is “0001”, the system generates the Subject ID “101-0001”. The second number is incremented by 1 for each new Subject at the Site (101-0002, 101-0003, and so on.)
Subject ID Generation Types
Vault supports the following standard Subject ID generation methods. Contact Veeva Services to discuss other generation methods, such as setting the Subject ID based on your organization’s randomization system.
| Type | Description |
|---|---|
| by_site | Vault generates unique (at the Site level) Subject IDs based on the template in the Subject ID Gen Format field within the range of the Subject Id Range Start and Subject Id Range End. |
| manual | A data entry user enters the subject ID in a configured data collection Item (a Status-type Item within a Screening, Enrolled, or Randomized type Event). |
| external | Use this method if your organization plans to import Subjects from another system. Contact your Veeva Services representative for details about connecting external systems to Veeva CDMS for subject import. |
Testing Considerations
You can perform testing related to your subject ID generation settings in your development and test environments. You should approach the testing of subject ID generation as though it can’t be changed once the study is published.
When configuring and testing Subject ID generation, there are some important considerations:
- Is the formatting for “by_site” correct?
- If you plan to change the Subject ID generation method to manual or external, is the Event Type configured for the Event set to the status you would like it to apply to?
- If you plan to change the Subject ID generation method to manual or external, is the Item Type configured for the Item Status?
If you change the Subject ID Generation method in a post go-live change and some of the Subjects have already moved past the screening status, it may not be possible to update the Subject ID for those Subjects via the submission of that Form and Item. In this scenario, an update via the API would be required.
When testing, if you want to change your subject ID generation settings, you must first delete all of your testing data, including your testing sites. Learn more in Deleting Non-production Test Data. Note that once you deploy your Study to production, there are some restrictions on the changes you can make. Learn more about Post Go-Live Changes to Study Settings below.
Post Go-Live Changes to Study Settings
Certain settings may be restricted from changes after the initial deployment.
The following settings can’t be changed:
- Standard Date Format
- Twelve Hour Time
The following settings can be changed:
- Study Phase
- Study Status
- External ID
- Enable Other Specify - Reason for Change
- Enable Other Specify - Intentionally Left Blank
- Enable Query Team Restrictions
- Enable Veeva Randomization
- Enable Local Labs
- Safety Integrations Type
- Enable Protocol Deviations
- Enable Additive Review
- Enable Subject Status Date Rollback
- Enable Imaging (can be changed from Yes to No only if no Imaging study objects have been added to the study)
- Subject ID Generation method from by_site to manual or external
Post Go-Live Update of Subject ID Generation Type: If you change the subject ID generation type from by_site to manual or external, you cannot change it back to by_site.