Creating Custom Change Reasons
You can specify customized options for any dialog that uses a Reason for Change. Each Change Reason represents a value in the Reason for Change and Additive Review Reason drop-down menus and dialogs. Users select from the Reason for Change drop-down or radio buttons in the Intentionally Left Blank, Did Not Occur, Delete Subject, Change Reason, and Enable Additive Review dialogs.
This configuration is at the vault level. Any custom Reasons for Change you create will be available to all Studies within your vault.
Prerequisites
Users with the standard CDMS Deployment Administrator study role or the Vault Owner security profile can perform the actions described below by default. Note that only users with the Vault Owner security profile can create Labels for change reasons. If your vault uses custom Study Roles, you must have the following permissions:
| Type | Permission Label | Controls |
|---|---|---|
| Standard Tab | System Tools Tab | Ability to access the Tools > System Tools tab |
| Functional Permission |
If your Study contains restricted data, you must have the Restricted Data Access permission to view it.
Learn more about Study Roles.
Accessing System Tools
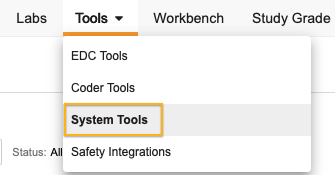
To access the System Tools area, click the Tools tab in the top navigation bar, and then click System Tools.
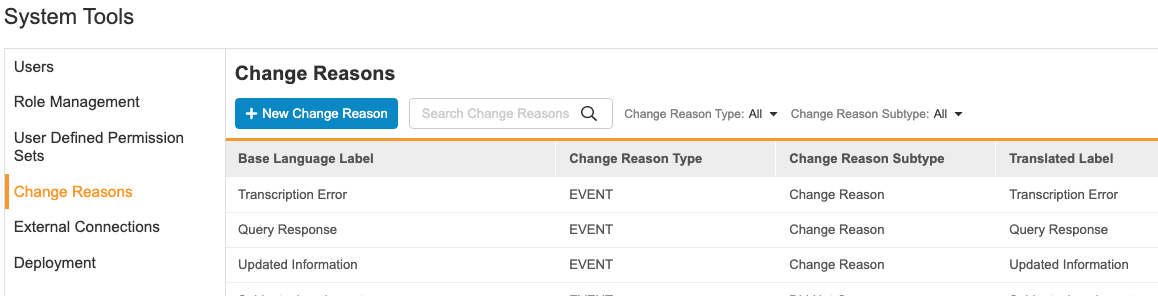
By default, System Tools opens to the Role Management area. You can select from the Navigation Panel to visit other System Tools areas. Learn more about each of these below.
Creating a New Reason
To add a new reason for change option:
-
Navigate to Tools > System Tools > Change Reasons.
-
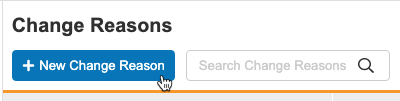
Click + New Change Reason. Vault opens the Change Reason dialog.
- Enter a Name for your change reason.
- Select a Change Reason Type. This value determines at which levels this reason applies to (Protocol Deviation, Subject, Event, Form, Item Group, or Item).
-
Select a Change Reason Subtype. This value determines which dialogs this reason displays in (Change Reason, Did Not Occur, Intentionally Left Blank, Deletion, or Review).
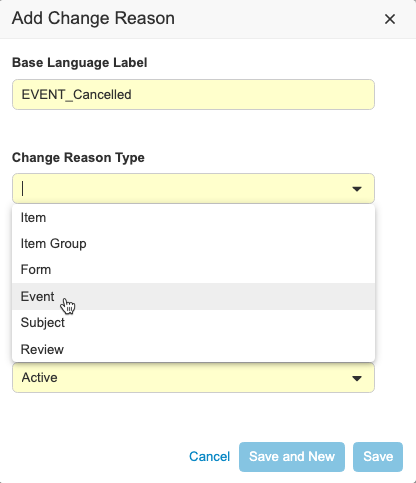
- Optional: Select Inactive for Status. This prevents this change reason from displaying to data entry users. Otherwise, leave this set to Active. If you set the status to Inactive, you will have to return to this Change Reason and activate it for data entry users to use it.
- Click Save.
- Optional: Click Save and New to save your Change Reason and immediately begin creating another without closing the dialog.
Now that you have created the Change Reason, you must assign it a label to display to the users selecting it.
How to Edit a Change Reason
You can edit a Change Reason to change its name or type, as well as to change its status.
To edit the Change Reason label that displays to end users, you must use Bulk Translation.
To edit a Change Reason:
- From System Tools > Change Reasons, locate the Change Reason you want to edit.
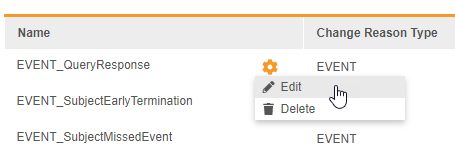
- Hover over the Change Reason to show the Actions menu.
-
From the Actions menu, choose Edit.
- In the Edit Change Reason dialog, make your changes.
- Click Save.
How to Delete a Change Reason
To edit a Change Reason:
- From System Tools > Change Reasons, locate the Change Reason you want to delete.
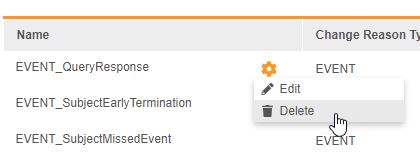
- Hover over the Change Reason to show the Actions menu.
-
From the Actions menu, choose Delete.
- In the Delete Change Reason confirmation dialog, click Continue.
Vault deletes your Change Reason. The change reason will no longer display in the drop-down menu.
Creating the Reason Label
You can apply investigator-friendly labels to your Change Reasons, as well as customize the existing labels for the default Change Reasons, using Vault’s Bulk Translation tool. This label is what displays to the user selecting the reason for change. You can also create localized labels for your change reason at this time.
By default, Veeva EDC displays the Name value you entered when creating your Change Reason Configuration record.
To update a label, you first export a translation file CSV:
- Navigate to Admin > Settings > Language & Region Settings.
- Scroll to the Bulk Translation section.
- Choose Field Labels for Select Items to Translate.
- Choose your vault’s language for Export Translation File.
- Click Export.
- Vault automatically begins a download of a translation file CSV.
Then, make your label changes in that CSV file:
- When the download is complete, open the CSV file in your editor of choice.
- Locate your new Change Reason Configuration. Scroll to (or search for) the
chng_reason_cfg__vsection of the CSV. You can identify your new record by its ID. - Edit the value in the Translated Label column. This value will display to your users.
- Save the CSV.
Lastly, import the updated CSV back into your vault to use the updated labels.
- Return to the Bulk Translation section of Admin > Settings > Language & Region Settings.
- Click Choose for your Import Translation File.
- Browse to and select your updated CSV.
- Click Import.
How to Enable “Other (please specify)”
You can also choose to allow your users to select Other (please specify) as a Reason for Change when marking a Form or Item as Intentionally Left Blank, or when changing any data from what it was originally saved as (for example, editing a Form or an Event Date). This reason adds a text field to the dialog, in which the user can enter their own reason.
Other (please specify) is a study-level configuration. This enablement applies to all Sites in a Study.
To enable the Other (please specify) option:
- Navigate to the Study Configuration object in Admin > Business Admin.
- Click into your Study.
- Click Edit.
- Select the Yes radio button for Enable Other Specify - Reason for Change and Enable Other Specify - Left Blank. You can enable one or both of these.
- Click Save.
The Other (please specify) change reason will now display whenever a user marks a Form or Item as Intentionally Left Blank or edits a Form or Item.
Activating & Inactivating a Reason
You may want to hide a change reason. You can accomplish this without deleting a Change Reason Configuration record by setting the Status of a Change Reason as Inactive.
To inactivate a Change Reason:
- Navigate to Tools > System Tools > Change Reasons.
- Locate the Change Reason you want to inactivate in the list.
- Hover over it to display the Actions menu.
- From the Actions menu, select Edit. Vault opens the Change Reason dialog.
- For Status, select Inactive.
- Click Save.
That Change Reason is now inactive, and it will not display to your data entry users.
You can later choose to activate that Change Reason to display it again. To activate the record, edit the Change Reason choose Active in the Status field.
To activate an inactive Change Reason:
- Navigate to Tools > System Tools > Change Reasons.
- Locate the Change Reason you want to activate in the list.
- Hover over it to display the Actions menu.
- From the Actions menu, select Edit. Vault opens the Change Reason dialog.
- For Status, select Active.
- Click Save.
Your Change Reason is now active. A data entry user can choose it the next time they select a reason.
Managing Change Reasons in Admin > Business Admin
Users with permission to access Admin > Business Admin can also create and edit Change Reasons from there. Veeva EDC stores these values in the Change Reason Configuration object (change_reason_config__v).
To create a custom Reason for Change in Admin > Business Admin:
- Navigate to the Change Reason Configuration object in Admin > Business Admin.
- Click Create.
- Enter a Name. The text you enter here displays in the drop-down when a user is selecting a change reason.
- Fill the required fields.
- Select a Change Reason Type. This value determines at which levels this reason applies to (Subject, Event, Form, Item Group, or Item).
- Select a Change Reason Subtype. This value determines which dialogs this reason displays in (Change Reason, Did Not Occur, Intentionally Left Blank, or Deletion).
- Click Save.
You may want to hide a change reason. You can accomplish this without deleting a Change Reason Configuration record by setting a Change Reason Configuration as Inactive. You can later choose to activate that Change Reason Configuration record to display it again.
To inactivate a Change Reason Configuration record:
- Navigate to the Change Reason Configuration object in Admin > Business Admin.
- Click into the Change Reason Configuration record.
- Click Edit.
- In the Change Reason Status field, select Inactive.
- Click Save.
That Change Reason Configuration is now inactive, and it will not display to your data entry users.
You can later choose to activate that Change Reason Configuration record to display it again. To activate the record, edit the Change Reason Configuration record and choose Active in the Status field.