Designing Forms
From Studio > Schedule, you can drag and drop design definitions from the Components panel onto the Design palette to design your Forms. You can also perform additional, display-related configuration on your Item Groups and Items in the Properties panel.
Accessing Studio
To access the Studio study design and configuration area, click the Studio tab in the primary navigation bar.
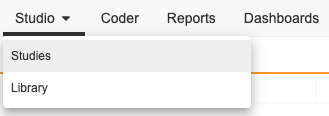
Once you click the Studio tab, you have the option to open either Studies, a listing of Studies in your vault, or Library.

From the My Studies page, you can click a Study Master to open the Study Instances page. Then, you can click a Study Instance to open Studio for that instance.
How to Add Items (Questions) to a Form
An “item” represents a question, or field, on your Form. Items are grouped into Item Groups. You can add Item Groups to your Form, and then add Items to those Item Groups.
- In Studio > Schedule, locate the Form you want to design.
- Open the form layout in Edit mode:
-
If you’re using the Drag & Drop Editor, click Edit Form () on the Form. Vault opens the Form in a new Form Tab.
-
If you’re using the Time & Events Schedule Editor, click the Form Name to open the Drag & Drop Editor for the Form.
-
- Click Item Group to view a list of available Item Groups from your Study.
- Click and drag your Item Groups onto the design palette.
- Remove the Item Groups filter and click Items.
- Click and drag your Items into an Item Group. Items must be within an Item Group. Studio displays a green line when you can drop the item, as shown in the first example below.
 You can also create a multi-column layout by dragging an Item to the left or right of another Item or a composite item by dragging an Item on top of another Item as shown in the following examples:
-
Multi-column layout:
-
Composite Items:
-
- You can click Schedule to return to your event schedule without closing a form. You can also click Close () to close your form’s tab.
When designing Forms later on, if you add an Item Group that you previously added Items to, Vault automatically adds those Items when you add the Item Group.
Removing Item Groups & Items from a Form
If you have already published a version of your Casebook Definition, you will be able to deploy removals of Item Groups or Items, but if there is data against any casebooks in Data Entry you will be unable to run a retrospective amendment to move Subjects to the new version. See Managing Casebooks & Versions for more information.
To remove an Item Group or Item:
- Navigate to the Form that you want to edit in Studio > Schedule.
- In the Item Group or Item, click Remove ().
- In the confirmation dialog, click Remove.
Progressive Display
You can use progressive display to conditionally show or enable Items based on the value entered for a codelist- or boolean-type Item on the same Form.
For example, on an Adverse Event form, you may have an Is the Adverse Event Ongoing item and an End Date item. If the event is ongoing, there is no end date to record for the adverse event. So, you can configure progressive display on the End Date item to only show it if the user selects No for Is the Adverse Event Ongoing item.
Queries on Items Hidden by Progressive Display: While Vault doesn’t create edit check queries on hidden or disabled Items, rule-based queries may still open on Items that have been hidden or disabled by Progressive Display depending on the controlling Item.
Progressive Display with Default Data: When progressive display is configured for Item Groups that have default data, the repeating item group still appears on the Form even when the controlling item for progressive display evaluates as false.
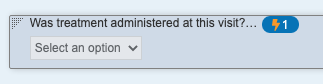
You can easily identify which Items are subject to progressive display using the Progressive Display Indicator ().
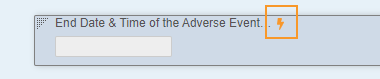
Vault displays the Progressive Display Indicator inside a blue pill with a count of dependent definitions on controlling Items.
How to Enable Progressive Display 19R3 & Earlier
If your Study was created after the 20R1 release (April 2020), the Progressive Display feature is already enabled. If your Study was created before the 20R1 release, you must enable this feature for your Study.
To use Progressive Display, your Study must be using the automated deployment model, and Role by Study must be enabled for your vault.
Note that you can’t enable Progressive Display if your Study contains any Disable rule definitions.
To enable Progressive Display:
- Navigate to Admin > Business Admin > Study Configurations.
- Locate your study’s Study Configuration record.
- Click to open the Study Configuration record.
- Click Edit.
- In the Rules Version field, enter “2”.
- Click Save.
Upon save, Vault does the following:
- Adds the Progressive Display section to the Properties panel for Items in Studio > Schedule
- Removes the Disable rule action from the Rule Editor
How to Configure Progressive Display
You can configure the display of Items from either the controlling Item or the dependent Item. To configure the progressive display of an Item Group, you configure progressive display by selecting the controlling Item from the Item Group.
Controlling Item Restrictions: Derived Values can’t be used as controlling items.
Controlling Items
To configure progressive display from the controlling Item:
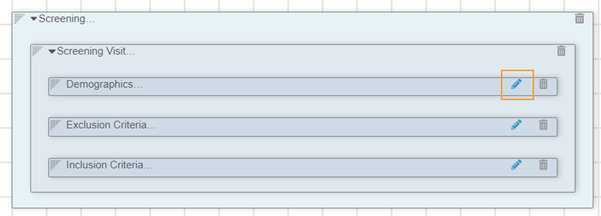
- Navigate to your Form in Studio > Schedule.
- Click to open the Properties panel for the Item that you want to use as the controller for the display of other Items or Item Groups.
-
- Click Edit.
-
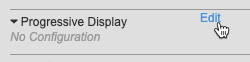
- In the Progressive Display section, click Edit. Vault opens the Progressive Display dialog.
-
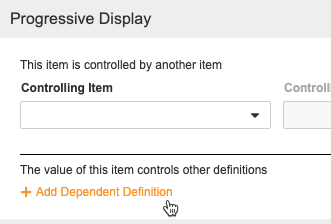
- Click + Add Dependent Definition.
-
-
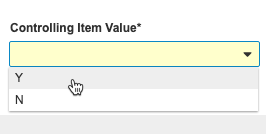
- Select a Controlling Item Value. When the controlling Item has this value, Vault displays the dependent, progressively displayed Item.
-
-
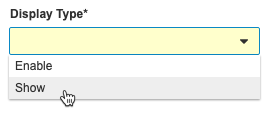
- Select a Display Type. See more details about these options below.
-
- Use the shuttle menu to move Items from Available Definitions to Selected Definitions. Items in the Selected Definitions column become dependent definitions.
- You can search for Items to add. Enter your search term and click Search () or press Enter. Click Clear () to clear your search and show all available items.
- Click the Double Arrow buttons to move all Items from one panel to another.
- Click Save.
- Optional: Click + Add Dependent Definition again to add another dependent definition.
- Click Save.
Once you click Save, Vault creates a new, system-managed rule with the Progressive Display action. Note that you can’t edit this rule from the Rule Editor. To make changes, you must edit the Item from Studio > Schedule.
Dependent Items & Item Groups
To configure progressive display from the dependent Item or Item Group:
- Navigate to your Form in Studio > Schedule.
- Click to open the Properties panel for the Item Group you want to progressively display.
-
- Click Edit.
-
- In the Progressive Display section, click Edit. Vault opens the Progressive Display dialog.
-
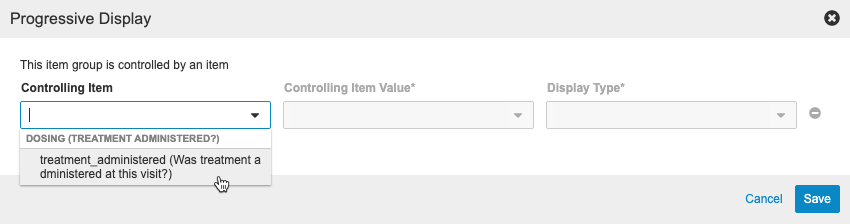
- Select a Controlling Item. Vault uses this Item value to determine whether or not to display the dependent, progressively displayed Item Group. Note that you can only select an Item that uses the boolean or codelist data type.
-
-
- Select a Controlling Item Value. When the controlling Item has this value, Vault displays the dependent, progressively displayed Item Group.
-
-
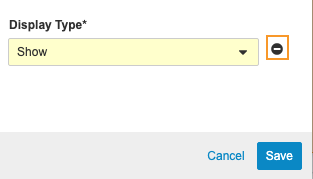
- Select a Display Type. See more details about these options below.
-
- Click Save and close the Properties panel.
Once you click Save, Vault creates a new, system-managed rule with the Progressive Display action. Note that you can’t edit this rule from the Rule Editor. To make changes, you must edit the Item from Studio > Schedule.
Progressive Display Types
There are two display types: Show and Enable.
| Show | When the controlling Item has the chosen value, Vault displays the Item on the form. Otherwise, the Item is completely hidden. Data entry users can’t see it. |
|---|---|
| Enable | When the controlling Item has the chosen value, Vault enables the Item. When the Item is not enabled, either before a value is entered for the controlling Item or if the entered value doesn’t match the chosen value, the Item still displays on the Form but it isn’t editable. |
How to Delete Progressive Display
To delete the progressive display configuration from a controlling Item:
- Navigate to the Item in Studio > Schedule.
- Click the Item or Item Group to open the Properties panel.
- In the Properties panel’s Progressive Display section, click Edit.
-
- Click Delete () for each dependent item that you want to remove.
-

- Click Save.
Vault deletes the progressive display configuration from this Item. Any previously dependent Items will now display and be enabled automatically.
To delete the progressive display configuration from a dependent Item or Item Group:
- Navigate to the Item or Item Group in Studio > Schedule.
- Click the Item or Item Group to open the Properties panel.
- In the Properties panel’s Progressive Display section, click Edit.
-
- In the Progressive Display dialog, click Delete ().
-
- In the Delete Configuration confirmation dialog, click Delete.
Vault deletes the progressive display configuration from this Item or Item Group. This Item or Item Group will now display and be enabled automatically.
Configure Automatic Queries for Items or Forms Marked as Intentionally Left Blank (ILB)
In the Properties panel, you can configure queries to fire on Items when required Items or Forms are marked as ILB by site users. This process can prevent required data points from being incorrectly marked by prompting site users to provide reasoning via query message as to why an Item or Form was marked as ILB.
ILB Best Practice: We recommend only configuring queries to fire on Items marked as ILB that are critical data points in your study.
To configure queries to fire on an Item when required Items or Forms are marked as ILB in Data Entry:
- Navigate to Studio > Items.
- Click on the Item that you would like to trigger a query for if left blank.
- Click Edit in the Properties panel.
-
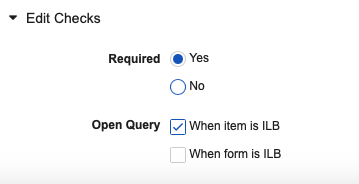
In the Edit Checks section, select Yes in the Required subsection and specify when Vault should open a query on the item: when an Item is marked as ILB, when a Form is marked as ILB, or both. Note that selecting the When form is ILB option will cause a query to fire on the item within the form and not the form itself.
- Click Save.
Sites will automatically receive a query when marking the configured Item as ILB.
Indent Items on a Form
You can indent Items on a Form to arrange those items as a nested list. Each Item can be indented up to three (3) levels. Indentation is available for both single- and double-column layouts. For composite rows, the row’s indentation level depends on the first (leftmost) item in the row.
Using item indentation moves the data entry control from the right of the item’s label to below it.
How to Indent Items
To indent an Item using the Indent Level property:
- Navigate to your Form in Studio > Schedule.
- Click to open the Properties panel for the Item you want to indent.
- Click Edit.
-
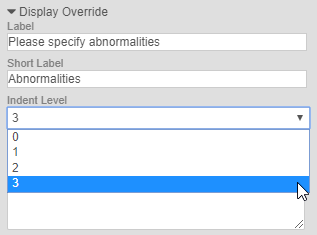
For Indent Level, select 1, 2, or 3 to set the indentation level. 1 is the least amount of indentation, while 3 is the greatest.
- Click Save and close the Properties panel.
Studio shows an item’s Indent Level with the Indent Level Indicator. These are stripes across the Item row, the number of which corresponds to the Indent Level. If the Indent Level Indicator is absent, this means that there is no indentation and the item’s Indent Level is 0.
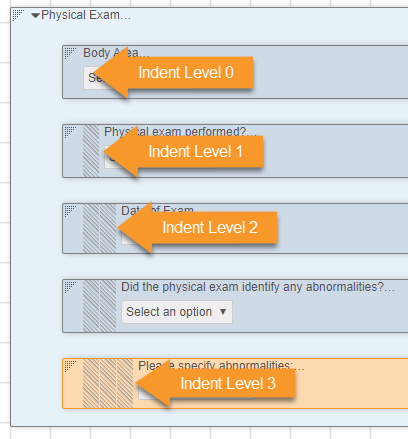
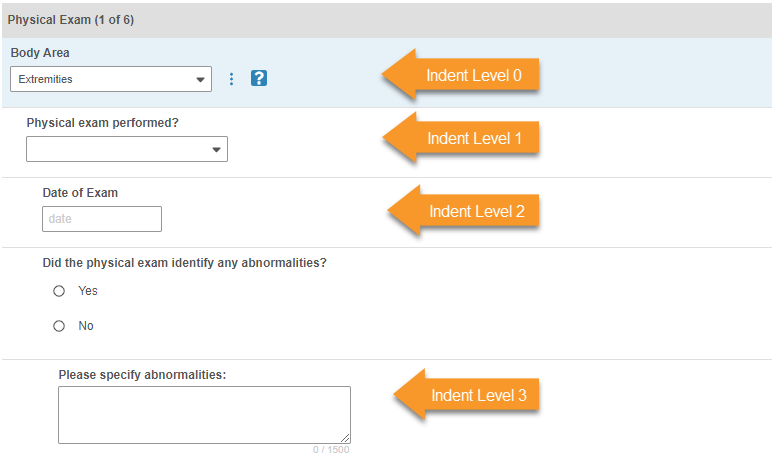
What Data Entry Users See
See the screenshot below to see what each indentation level looks like for data entry users (investigators and clinical research coordinators).
Conditionally Enable Item Groups & Items
If you don’t have Progressive Display enabled in your Study, you can use the Disable _rule action to conditionally enable _Item Groups and Items, based on user-entered data.
You can configure data validation rules to conditionally enable an Item or Item Group based on the entry for another Item. For example, you can configure a rule that conditionally enables the Pregnancy Test Result item based on the Gender item.
Dynamic fields only display when a user enters the correct data on a previous Item. If the user enters a different value, for example, Male for Gender, Vault disables the Pregnancy Test Result item. Vault then does not create queries or tasks related to the disabled Item.
For details about creating data validation rules to conditionally enable data entry Items, see Creating Rules in Studio.
Derived Items & Cross-form Derivations
Vault can derive values across forms in a casebook without manual action with Cross-form Derivations. To utilize Cross-form Derivations, you must add the Derived Items component to forms using the Schedule Drag & Drop Editor and create Set Derived Value rules to set values of derived items based on casebook criteria. See Cross-form Derivations for more information.
Note that you can’t use derived items as controlling items when using Progressive Display.
Studies created before the 22R3 release will use the Set Item Value rule instead of Cross-form Derivations. Contact Veeva Support to change a single-form study to cross-form.
Restricted (Blinded) Forms
You can restrict (blind) a Form to hide it from users who don’t have permission to access restricted data (via the Restricted Data Access permission on their Study Role). You may wish to restrict a form to hide data that might unblind subjects or compromise the integrity of a study.
The Restricted Data feature is only available in Studies created after the 20R2 release (August 2020).
To restrict a Form:
- Navigate to Studio > Forms for your Study.
- Locate the Form you want to restrict in the list.
- Click in the form’s row to open the Properties panel.
- In the Properties panel, click Edit.
- Select the Restricted checkbox.
- Click Save.
The following rules govern other study configurations on restricted forms:
- You can’t include a restricted form as visible (supplemental) data for an Assessment.
- You can’t configure a restricted form for use in Veeva Coder (via the Coding Configuration property), either as the source form or for copy Indication from link.
What Data Entry & Review Users See
Data entry users who don’t have the Restricted Data Access permission will not see any Form that is restricted. For example, if all Forms in an Event are restricted, those users can see the Event, but can’t see the restricted forms in the Event.
Users who do have the Restricted Data Access permission will be able to interact with both restricted forms and non-restricted forms normally, whether entering data or performing review tasks. These users can identify which forms are restricted by the Restricted icon.
Multi Role Users & Restricted Data Access: Multi-role users must have an assigned role that includes both the Restricted Data Access permission and the permissions associated with the user’s responsibilities to interact with a restricted form.
Study Update Restrictions
After you publish the initial version of your Casebook Definition, Vault prevents you from making certain changes in any later versions you may create. If you were to make these changes, it could cause errors during the casebook amendment process.
See Study Update Restrictions for a list of disallowed changes and available workarounds.
Edit Checks
Last Updated: 23R3
This video gives an overview of the Edit Checks feature in the Studio tab.