Form Linking & Item-to-Form Linking
In the Data Entry tab, you can link related forms through Form Linking. For example, one or more Concomitant Medication forms can be linked to an Adverse Event or Medical History form in order to group similar or related data or indicate cause and effect. Forms can be linked to other Forms through a jump link (Form Linking), or between an item on one form and another form (Item-to-Form Linking).
If your Study has Form Linking configured, the linked form displays in a visual group at the bottom of the form from which you can view, add, and edit linked forms. If your form doesn’t have any form links added and the Warn When Empty field in Studio is set to “Yes,” the form link tab will be highlighted in red and you’ll be prompted to link a form. Note that you can’t link forms that are marked as Intentionally Left Blank and marking a form as blank after linking will remove all form links.
Prerequisites
Users with the standard CDMS Principal Investigator, CDMS Sub Investigator, and CDMS Clinical Research Coordinator application roles can perform the actions described above by default. If your vault uses custom Application Roles, your role must have the following permissions:
| Type | Permission Label | Controls |
|---|---|---|
| Standard Tab | Data Entry Tab | Ability to access the Data Entry tab |
| Functional Permission | Data Entry | Ability to enter study execution data |
| Functional Permission | View Form Linking | Ability to view Form Links |
| Functional Permission | Edit Form Linking | Ability to edit Form Links |
If your Study contains restricted data, you must have the Restricted Data Access permission to view it.
Learn more about Study Roles.
Add Form Links
To add Form Links:
- Navigate to the Form Link object via the toggle menu.
- Click + Add Link.
- Select one or more forms to add and click Save.
Once you’ve created Form Links, you can edit the links via the Edit Links button. Editing links allows you to select or deselect forms to display in your Form Label tab. Forms can also be filtered by Event through the Edit Links button.
If an Item has been linked to a form in Studio, you can link that Item to another form. Learn more about Item to Form Linking here.
Remove Form Links
To remove all Form Links:
- Navigate to the Form Link for the form.
-
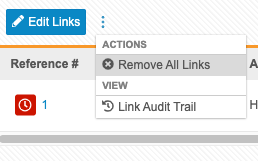
From the More Actions menu, select Remove All Links.
- In the Remove All Links confirmation dialog, click Remove.
To remove a single form link:
- Locate the Form Link you want to remove.
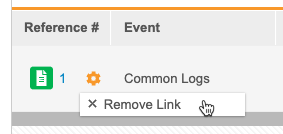
- Hover over the form’s Reference # to display the Actions menu.
-
From the Actions menu, select Remove Link.
- In the Remove Link confirmation dialog, click Remove.
Accessing the Form Link Audit Trail
To view a history of when links were created or removed, you can access the Form Link Audit Trail.
To access the audit trail for a Form Link:
- Navigate to the Form Link that you want to review.
- From the Actions menu, select Audit Trail. Vault opens the Audit Trail dialog.
- When finished, click Close.
Add Item-to-Form Links
To add Item-to-Form Links:
- In the linked item, click Select.
- Select the form to add and click Save.
- Remove Item-to-Form Links
To remove Item-to-Form links:
- In the linked item, click Clear.
Form Linking
Last Updated: 23R3
This video provides instructions on how to link common forms.