Test Data Management
To reduce the manual effort with creating test data, Study Designers and Data Managers can load test data directly into DEV and TEST environments.
Prerequisites
Your Study must be using Data Model V2 to use this feature.
Users with the CDMS Study Designer, CDMS Librarian, CDMS Lead Data Manager, and CDMS Data Manager standard study roles can perform the actions described below by default. If your organization uses user-defined study roles, your role must grant the following permissions:
| Type | Permission Label | Controls |
|---|---|---|
| Standard Tab | Study Testing Tab | Ability to access the Study Testing tab |
| Functional Permission | Import Test Data | Ability to import test data in the Study Testing tab |
Learn more about Study Roles.
Importing Test Data
Export the Template File
To simplify the creation of your test data, Vault provides a template file based on your Study. You can also include a sample subject when downloading this file, which prefills columns for the Event, Form, Item Group, and Items and Sequences for all Forms in the Casebook.
- Navigate to your Study in Study Testing.
-
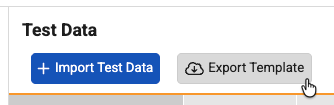
Click Export Template.
- Select a Source Environment to use as a template.
-
Optional: Select the Include Sample Subject checkbox to include an example row for a subject in the template file.
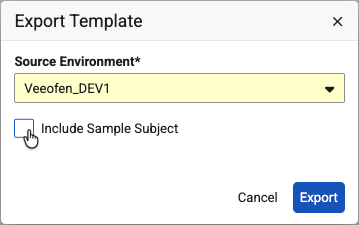
- Click Export.
- Vault begins a job to generate the template file. When finished, Vault sends you an email with a link to download the file. You can also click in the File column of the job log row to download it.
Create a Test Data File from the Template
Your CSV file has columns to uniquely identify the Subject and the data you’re entering with the row.
For each Subject, you will need a row to create the Subject, a row to create each Event, and a row for each Item that you want to enter data into. Then, you will need another row to submit the Form.
Test Data File Columns
The import file contains the following columns:
- Subject Unique ID
- Subject
- Site
- Event Group Name
- Event Group Seq
- Event Name
- Event Seq
- Form Name
- Form Seq
- Item Group Name
- Item Group Seq
- Item Name
- Value
- Form Link
- Change Reason
- ILB DNO Reason
- Action
Columns by Action
The following columns are required to perform different actions:
- Create Casebook
- Subject Unique ID
- Subject
- Site
- Action (Set to “Upsert”)
- Create Event
- Subject Unique ID
- Subject
- Site
- Event Group Name
- Event Group Seq
- Event Name
- Event Seq
-
Value (Set to “Event Date Visit Method”) - Action (Set to “Upsert”)
- Submit Form
- Subject Unique ID
- Subject
- Site
- Event Group Name
- Event Group Seq
- Event Name
- Event Seq
- Form Name
- Form Seq
- Value (Set to “Submit”)
- Action (Set to “Upsert”)
File Limits
The following limits apply to the import file:
- Must be a CSV file (“.csv”) or a ZIP file containing CSV files
- 500mb per CSV file
Imaging: In the current release, Vault doesn’t support EDC Imaging for Test Data Management.
Import a Test Data File
To import the test data file:
- Navigate to your Study in Study Testing.
-
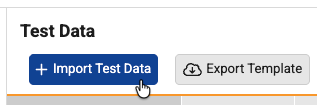
Click + Import Test Data.
-
To load your file, either drag and drop it into the Drag and drop file here area, or click Select File and browse for it.
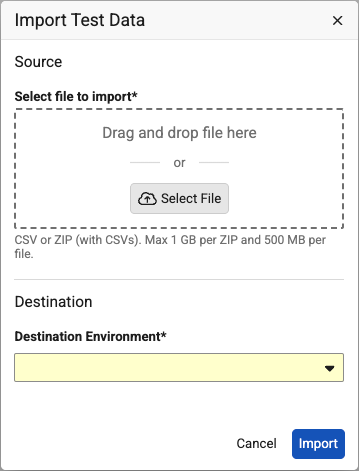
- Select a Destination Environment for your test data.
- Click Import.
- Vault begins a job to load your test data into the destination environment. When finished, Vault will send you an email notification.
File Processing
Vault processes each CSV row by row.
If you uploaded multiple CSV files via a ZIP file, Vault unzips the ZIP file, then processes the CSVs in alphabetical order by filename.
Viewing Test Data
Vault stores a log of all test data related jobs for a Study in Study Testing > Test Data. This is very similar to the Job History found in EDC Tools and the Review tab.
Refreshing the Job History
You can refresh the Job History, without refreshing the page, to see the most up-to-date job status and any available logs or output files.
Click Refresh () to refresh the Job History.
Job Statuses
Vault displays the status of your job in the job history, along with other details about the job. You can click the Information () icon for additional details about a job.
| Status | Meaning |
|---|---|
| Queued | Another job of the same type is currently waiting to run. Vault will run this job when the previous job is completed. |
| In Progress | Vault is currently performing the job. |
| Failed | The job instance encountered one or more errors. |
| Completed | The job instance completed without errors. |
| Canceled | The job instance was canceled. |
Download the Output File & Log
Vault provides a job log file and the output file for each entry in the job history. To access these files, click the icon () in either the Log or File column. Job logs are available for 60 days after the job has finished running.