Managing Change with an In Progress Study Design
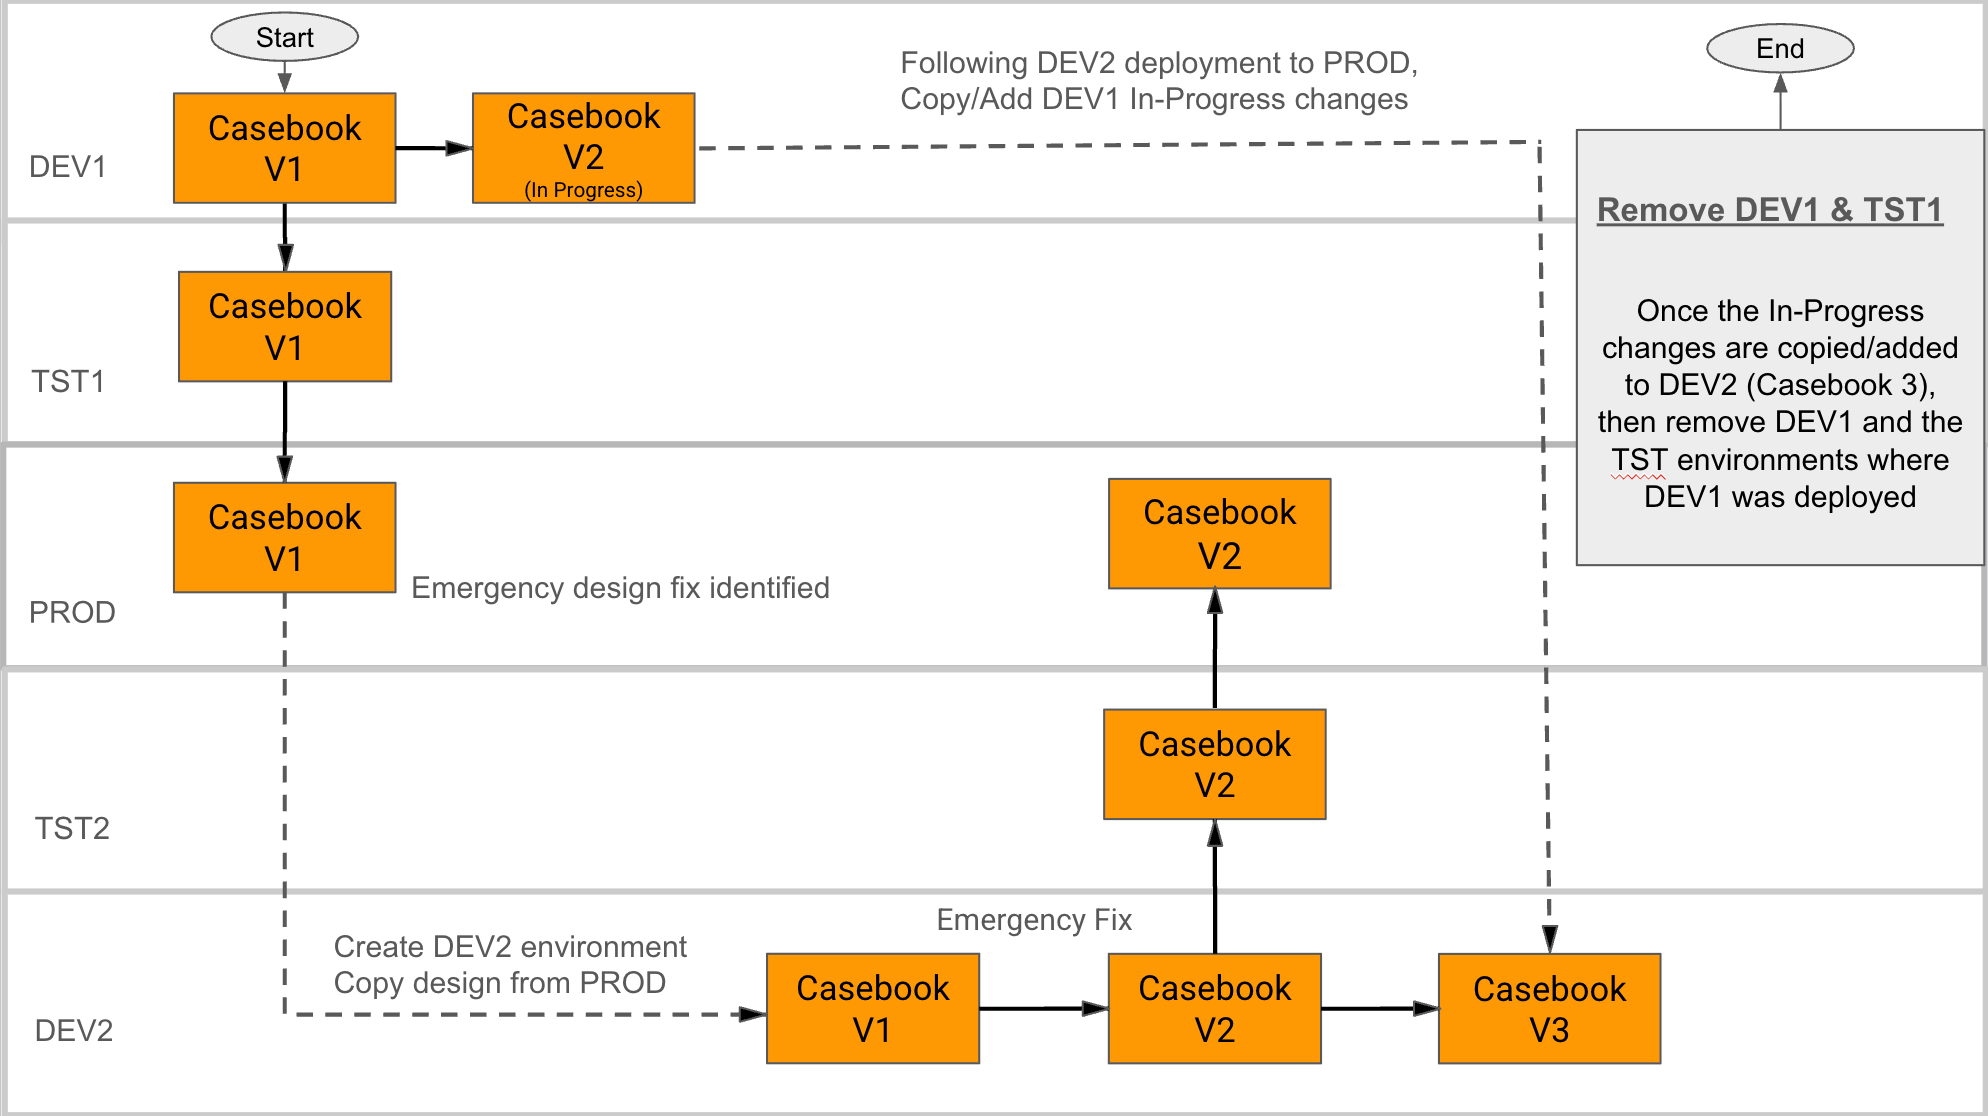
From time to time, you may need to make a change in the production (PROD) environment of your Study while you still have a larger change “in process” in your development (DEV) environment. To make this change without deploying your in-process changes, you can use a process called “study hotfix and merge”. The study hotfix and merge process involves creating a secondary DEV environment for the emergency design fix which will replace the primary (original) DEV environment. We recommend that at any given time only one DEV environment be used as the primary source for the study design deployed to test (TST) and PROD environments. Otherwise design conflicts and deployment errors may occur. Learn more about managing study environments.
Note that this process is still subject to the Study Update Restrictions listed here.
Hotfix and Merge Diagram
Prerequisites
Users with the standard CDMS Deployment Administrator can create and restore environments and deploy a study. Users with the CDMS Study Designer study role can make changes to study design.
| Type | Permission Label | Controls |
|---|---|---|
| Standard Tab | EDC Tools Tab | Ability to access the EDC Tools tab |
| Functional Permission | Manage Deployments | Ability to manage study deployments. |
If your Study contains restricted data, you must have the Restricted Data Access permission to view it.
Learn more about Study Roles.
Create a Secondary Development Environment
Emergency Fix DEV Environment Replaces Primary DEV Environment: After you deploy from the emergency design fix DEV environment it must become the primary DEV environment to prevent future deployment failures.
To create a new development environment::
- Navigate to Tools > EDC Tools.
- Click your Study Name in the Study Listing.
-
From the Actions menu, select + Development.
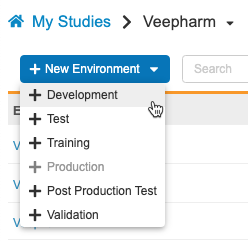
- In the Create Environment dialog, select a Vault to create your Study Environment in. This is typically the same vault that contains your primary development environment.
- Click Continue.
- In the Create Environment confirmation dialog, click Create.
Restore from Production
After creating the secondary (emergency design fix) DEV environment, you must restore your emergency design fix DEV environment from your production environment. This copies your Study as it exists in your production environment to your DEV environment, including everything except for those changes not included in the study package.
There are two methods to restore your environment: from another environment or from a file.
Restoring from Another Environment
To restore from production from another environment:
- Navigate to EDC Tools > Deployments for your study.
- Locate your secondary DEV environment in the list of Environments.
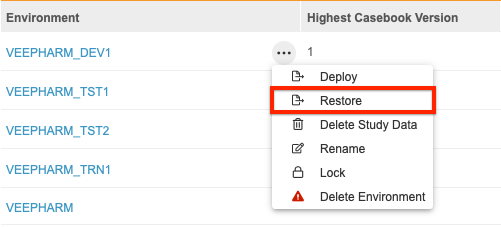
- Hover over the environment to display the Actions menu ().
-
From the Actions menu, select Restore. Vault opens the Restore Study Design dialog.
- Select Restore from Environment.
-
For Source Environment, select your production environment.
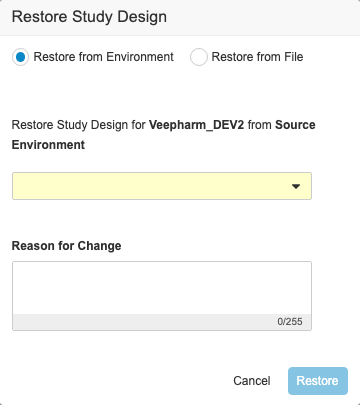
- Optional: Enter a Reason for Change.
- Click Restore. Vault begins a job to restore your environment from your production environment. When finished, Vault sends you an email notification.
Restoring from a File
To restore from production from a file, you must first obtain the study instance package file you want to use, and then you can use it to restore the environment from a file. Study packages are created for study deployment, or are created automatically when a study instance or environment is deleted.
To obtain the study package file:
- Navigate to your Study in EDC Tools.
-
Click the Deployment History button on the upper right of the page.
- In the File column, click the Download icon () to download the package you want to use. The .ZIP package file download will begin, with the name structure File_{StudyName}_{DateTime}.zip.
- Extract the contents of the file package. The Pkg_{Version.Build}_{Env}_{DateTime}.zip file will be used to restore the environment.
To restore the environment from a file:
- Navigate to EDC Tools > Deployments for your Study.
- Locate your secondary development environment in the list of Environments.
- Hover over the environment to display the Actions menu ().
-
From the Actions menu, select Restore. Vault opens the Restore Study Design dialog.
-
Select Restore from File.
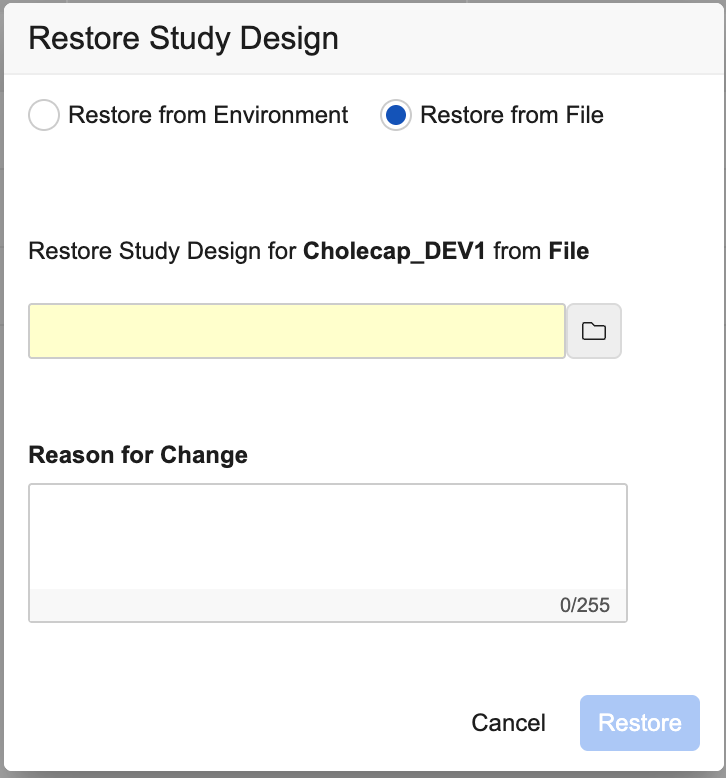
- Click the File icon () to browse to and select your file.
- Optional: Enter a Reason for Change.
- Click Restore. Vault begins a job to restore your environment from your production environment. When finished, Vault sends you an email notification.
Make & Deploy Changes
A study designer can now make the required changes in the secondary DEV environment. They can create a new casebook version in Studio and work through your organization’s change process.
When changes are finished, you can deploy your study from your secondary development environment into a new secondary TST environment, and then from the secondary TST environment into PROD, completing the hotfix process.
Make the Emergency Design Fix Development Environment the Primary Environment
After the emergency design fix process is complete, the emergency design fix DEV environment you created as part of that process must become the new primary DEV environment to prevent future deployment failures.
To make the emergency design fix DEV environment the primary DEV environment:
- Compare versions by running a diff report to compare the old primary DEV environment and the new emergency design fix DEV environment.
- Have a study designer copy over any diffs from the old primary DEV environment to the new emergency design fix environment. Copy operations must use the “Use Existing” and “With Update” options to prevent design conflicts.
- Run another diff report to identify any differences between the old primary DEV and new emergency design fix DEV environments.
- Have a study designer manually add any changes that could not be copied over.
- Delete the old primary DEV environment.
- Delete any TST environments that the original primary DEV environment was deployed to. TST environments should not be used until they have been deleted and re-deployed from the new primary DEV environment.
- The new emergency design fix DEV environment is now the primary DEV environment.