Deploying a Study
Once you’ve finished creating your study design, you can deploy it. You can deploy your design from a development environment to TST or training, or from TST to production.
Processing Time for Study Deployment: Study creation updates User Role Setup records and requires recalculation of group membership and sharing rules. The processing time when deploying a study to a production environment may take several hours, and user access is restricted until processing is complete.
Prerequisites
Users with the standard CDMS Deployment Administrator study role can initiate a deployment by default. Users with the CDMS Lead Data Manager or EDC Lead Data Manager study roles can run amendments by default.
| Type | Permission Label | Controls |
|---|---|---|
| Standard Tab | EDC Tools Tab | Ability to access the EDC Tools tab |
| Functional Permission | Manage Deployments | Ability to create and manage study Environments and deploy Studies from EDC Tools, manage and deploy vault-level configuration from Tools > System Tools, manage and deploy listings, checks, and views in CDB, and enter License Keys |
| Functional Permission | Manage Study Milestones | Ability to lock and unlock Studies and Sites, as well as set the Billing Status for study environments from EDC Tools |
If your Study contains restricted data, you must have the Restricted Data Access permission to view it.
Learn more about Study Roles.
Deployment Requirements
The following conditions must be met before you can deploy your study:
- The new casebook version does not contain any of these disallowed changes.
- The Casebook Definition has passed publishing validation with no errors.
- You have finished any testing of the design in your source environment.
- The target environment is not in the Under Deployment or Deleted statuses.
Clinical Data License Key
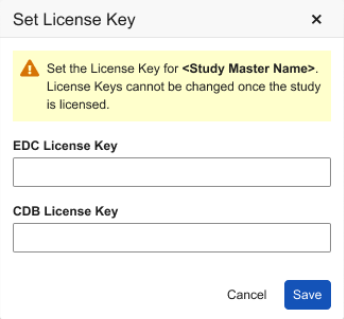
All non-ELA (Enterprise License Agreement) customers’ studies require a License Key before deploying to Production. You can find this key in the sales order form.
To enter your License Key:
- Navigate to EDC Tools.
- Hover over the relevant study name row and click on the Actions icon.
- Select Set License Key.
- Click Save.
For full ELA customers (EDC & CDB), all EDC and CDB studies are considered Licensed, which means you don’t require a License Key.
Components Included in the Deployment Package
The table below lists which components are included in the deployment package:
| Component | Included |
|---|---|
| Study Objects & Schedule | Yes |
| Signature Definitions | Yes |
| Study Configurations (Studio Study Settings) | Yes |
| Rules | Yes |
| Review Plans | Yes |
| Views & View Sets | Yes |
| Annotations | Yes |
| Coder Tools - Study Settings | No |
| Coder Tools - Synonym and Do Not Autocode List Names | No |
| Coding Configuration | Yes |
| Custom User Study Roles | Yes |
| Custom Objects | Yes |
| Integration Configurations (when managed in Studio) | Yes |
| Study Execution Data | No |
| Study Settings | No |
| Study Users | No |
| Study Countries | No |
| Study Sites | No |
What Isn’t Included in a Deployment
The following configuration components are not included in a deployment. You must reconfigure these in every environment:
- System Tools configurations, including the following:
- Custom Change Reason Configuration records
- Custom Reports and Dashboards
- Coder Tools configurations, including the following:
- Synonym Lists
- Do Not Autocode Lists
- EDC Tools configurations, including the following:
- Role assignments for Assessments
- Review Plan Assignment criteria
- FTP configuration
- Users within email notification groups
- Integration Configurations for Procedures
- Completion Guidelines
- Enable Study File Format API
- Custom Java SDK configurations (for example, custom triggers)
To deploy custom Vault object configuration, you must add those objects to the Deployment List. See details in Adding Custom Configuration Components to the Deployment List.
Warnings Regarding Deployment With Destructive Changes
Vault allows deployments that contain destructive changes but these versions could stop the amendment process. A destructive change refers to the removal of an Event Group, Event, Form, Item Group, or Item from the study schedule or moving one of those components from one location in the schedule to another (see Managing Casebook Versions & Amendments for additional information).
Handling Deployment Failure
Your deployment will fail if there are validation issues or destructive or structural changes against existing data. In rare cases, deployment may fail due to a transient system processing issue.
If your study deployment fails:
- Review the deployment logs to check if a failure reason is indicated.
- Review the Deployment Requirements and ensure they have been met.
- Once any issues have been addressed, attempt to deploy the study again.
- If the deployment fails again, contact Veeva Support.
Coding Configuration Changes with Existing Forms: A deployment will fail if it contains changes to a form’s Coding Configuration and there are existing Code Requests for that Form in the target environment.
Deploy the Study from the Source Environment
To deploy a study:
- Navigate to your Study Master in EDC Tools.
- Locate your source environment (the environment you want to deploy from) in the environment list.
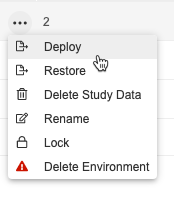
- Hover over that Environment to show the Actions menu.
-
From the Actions menu, select Deploy. Vault opens the Deploy Study Design dialog.
-
Select a Destination Environment. This is the environment that you are deploying your Study into.
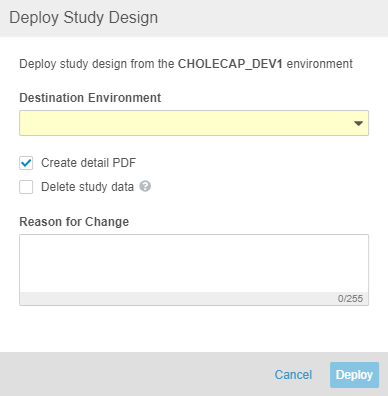
- Optional: Clear the Create detail PDF checkbox to not generate a Detail PDF for your study’s data in the source environment.
- Optional: Select the Delete study data checkbox to delete study execution data in the target environment after deployment is completed.
- Optional: Select the Include System Data checkbox to include choose which vault-level configurations to include in your deployment. Note that these options are only available when you’re deploying to an environment in another vault. Select a configuration’s checkbox to include it in your deployment. You can also deploy these separately from System Tools.
- Optional: Enter a Reason for Change.
- Click Deploy. For non-production deployments, this begins the deployment process. For production deployments, this opens the confirmation dialog.
- For production deployments: Type “PUBLISH” into the confirmation field. Then, click Deploy.
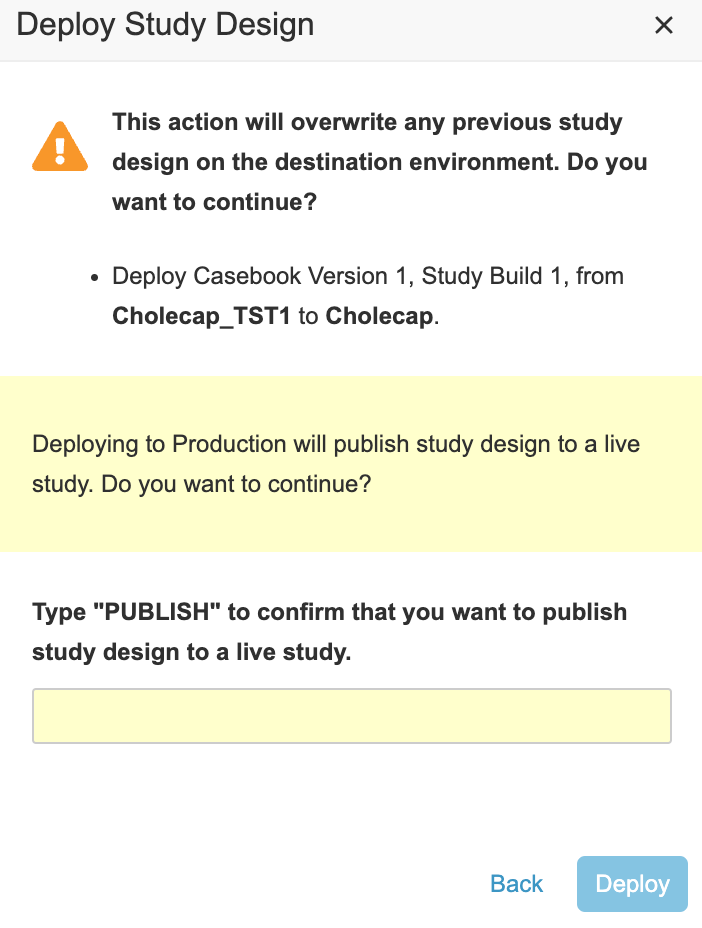
Vault begins a job to deploy your study. When finished, Vault sends you an email notification.
You can track the status of your deployment from the Deployment History. Learn more in Using Deployment History.
Deployment & Licensing: If your Study has a Billing Status of Locked, On Hold, or Archived, deployment to production is unavailable.
Run an Amendment in the Destination Environment
Once your deployment finishes, a lead data manager can run an amendment in your destination environment to upgrade Sites and Subjects to the newly deployed version.
See Managing Casebook Versions to learn how to run an amendment.
Adding Custom Objects to the Deployment List
You can include custom Vault object configuration in your study’s deployment. To do so, you must add each object that you want to include to the Deployment List in System Tools. Learn more in Adding Custom Objects to the Deployment List.
Vault only deploys custom object configuration, not records. Should you need to move object records in a whitelisted object from environment to environment, a Vault Owner can use Vault Loader to do so.
Deployment History
Vault records all deployment events related to a Study in the Deployment History page.
Accessing Deployment History
Once you’ve opened your Study Master, you can view the Deployment History for all of your environments from this listing.
To access Deployment History:
- Navigate to your Study Master in Tools > EDC Tools.
-
Select the Deployment History button on the right side of the screen.

- Vault opens the Deployment History. Click Back to Deployments to return to the Deployments page.

Searching & Filtering
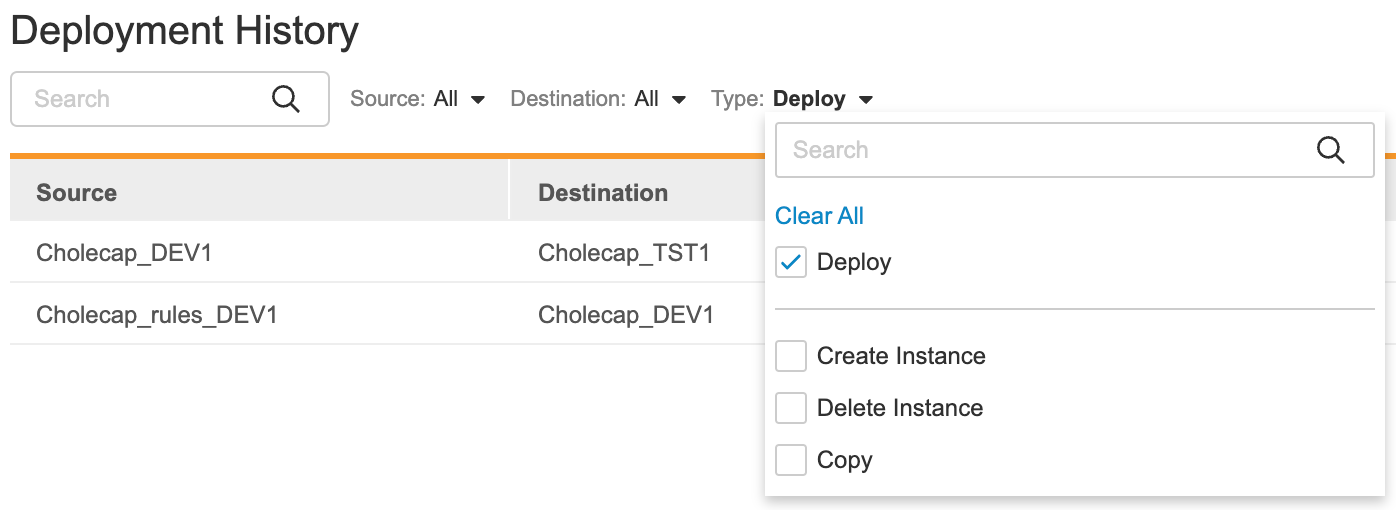
You can search for specific deployment events using the Search Bar. You can also filter the listing by Source, Destination, and Type using the drop-down filter menus.
Deployment Events
The following deployment events are tracked in the Deployment History:
- Create Instance: Vault is creating a new Study Instance (environment). This event starts once you create a new environment of any type.
- Delete Instance: Vault is deleting a new Study Instance (environment). This event starts once you delete an environment of any type.
- Deploy: Vault is deploying your Study from the source environment to the target environment.
Deployment Logs & Output Files
For Deploy events, Vault generates two files: the output file and a log file. You can download these files by clicking the Download icon () in the appropriate column of the Deployment History.
Deployment Statuses
The following statuses apply for Deploy events:
| Status | Description |
|---|---|
| Pending | A deployment administrator has initiated a deployment, but Vault has not yet begun the deployment job. |
| Exporting | Vault is exporting the Study Package from the source environment. |
| Importing | Vault is importing the Study Package into the destination environment. |
| Completed | The deployment completed successfully. Download and view the deployment’s output File and Log file for details. |
| Completed with Documentation Errors | The deployment completed successfully, but there was an error when Vault was generating the SDS and vault comparison report. |
| Failed | The deployment failed. Download and view the Log file for details. |
