Generating Study Closeout PDFs for Sites
Once your site finishes data collection, data review activities are complete, and you have locked the site, you can begin closing out the site. Vault generates closeout PDFs (a ZIP file containing a Detail PDF for each Subject at the Site) from within EDC Tools. After you generate the closeout PDFs, you can send them to the site for review. You can also choose to send sites periodic reminders until they finish their review.
CDMS to CTMS Site Closeout PDF Data Integration
If you have a Clinical Operations - EDC Connection , any closeout PDFs you generate are automatically sent to eTMF if the following conditions are met:
- The Clinical Operations - EDC connection is active.
- The study is connected to Clinical Operations.
- The CDMS to CTMS Site Closeout PDF Data integration is active (this integration is active by default).
- Your organization is using eTMF.
- The integration has been activated in the eTMF vault, and configuration has been completed. Learn more about configuring eTMF vaults for the CDMS to CTMS Site Closeout PDF Data integration.
If these conditions are met, every time you generate Closeout PDFs for a site, a new version of the PDFs is generated and sent to eTMF. This process is automatic, and there are no additional steps to be performed on your end.
Optimized for Fast Web View: Closeout PDFs are optimized for Fast Web View.
You can only begin closeout once a Site is locked. If you unlock a site and closeout is already complete, unlocking resets the closeout status. You will have to repeat the process.
At the end of your Study, if you want to create a lock entry in the audit trail for the objects in your Study (also known as “database lock”), you must first lock all the Casebooks in the study individually or lock Events and Forms in batches (with Snapshots). Then, after review is complete, you can lock the Sites and Study, and finally generate a Closeout PDF.
Prerequisites
Users with the standard CDMS Lead Data Manager study role can perform the actions described below by default. If your organization uses custom Study Roles, your role must grant the following permissions:
| Type | Permission Label | Controls |
|---|---|---|
| Standard Tab | EDC Tools Tab | Ability to access the EDC Tools tab |
| Functional Permission | Lock Data | Ability to lock and unlock data |
| Functional Permission | Generate Closeout PDF | Ability to generate the Closeout PDFs for a locked Site from EDC Tools > Sites |
| Functional Permission | Notify Sites of Closeout PDF | Ability to set reminders and send a notification to a Site that the Closeout PDFs are ready for review |
| Functional Permission | Edit Study Sites | Ability to create and edit Sites from EDC Tools |
If your Study contains restricted data, you must have the Restricted Data Access permission to view it.
Learn more about Study Roles.
Generate Closeout PDFs
To generate a closeout PDF:
- Navigate to EDC Tools > Sites.
- Locate the Site you want to close out in the list.
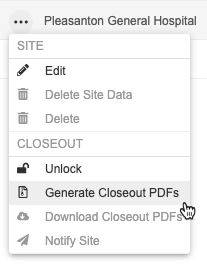
- Hover over the Site to show the Actions menu.
-
From the Actions menu, choose Generate Closeout PDFs.
- Click Generate. Vault begins a job to create the closeout PDFs for this site. You can monitor the progress of the job from EDC Tools > Job History.
You can download the closeout PDFs for a Site from EDC Tools > Sites. This is the same ZIP file that your site users will download. Note that if the user generating the PDF does not have Restricted Data Access permission and the casebook doesn’t contain any Restricted forms, only a non-restricted version of the closeout PDF will be generated. Closeout PDFs that contain restricted data will be marked as Restricted.
To download a site’s closeout PDFs:
- Navigate to EDC Tools > Sites.
- Locate the Site you want to download the closeout PDFs for in the list.
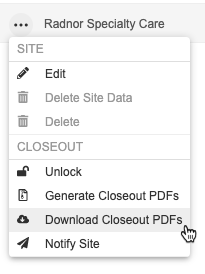
- Hover over the Site to show the Actions menu.
- From the Actions menu, choose Download Closeout PDFs. Vault downloads a ZIP file containing the closeout PDF for each Subject at the Site.
Site Closeout PDF Contents
When you close out a site, a Closeout PDF is generated that contains the closeout PDF for each Subject at the site. If the user generating the PDF does not have Restricted Data Access permission or if the casebook doesn’t contain any Restricted forms, only a non-restricted version of the closeout PDF will be generated. A Closeout PDF that contains restricted data will be marked as Restricted, in which case site users must have Restricted Data Access to download it. Closeout PDFs contains the following information:
- Event Schedule
- Data
- Casebook Audit Trail
- Form Audit Trail
- Item Audit Trail
- Event Audit Trail
Deleted Data in PDFs
If you select Include Audit Trail when generating your PDF, your PDF files include deleted data in the Deleted Data Audit Trail section of the file’s appendix. This includes any data that was deleted as part of the following processes:
- Retrospective amendment with destructive design changes
- Site reset an event or form which was marked for removal
- Site reset a repeating event
- Site removed row in a repeating item group
- Site removed the form linking by deleting a linked form
- Query deletions, undo action in Quick Queries*
- Unscheduled Event is deleted
* The Undo action in Quick Queries is captured as a delete action. It’s included in the audit trail for the queried Item or Event. It’s only included in the Deleted Data Audit Trail section if the queried Item or Event is also deleted.
Only users with access to restricted forms (users whose study role grants the Restricted Data Access permission) will see the Deleted Data Audit Trail. If the user who generated the file doesn’t have restricted data access, and there are deletions of restricted data, then Vault includes a note at the end of the PDF:
Note: The Deleted Data Audit Trail was not included in this file because the user who generated it did not have restricted data access. To include this data, please generate the file again as a user with restricted data access.
Replace Non-Permitted Characters from PDF File & Folder Names
Vault removes non-permitted characters from file and folder names in your PDF exports and replaces them with an underscore (_).
Your organization can choose to instead replace these characters with a hyphen (-).
Enablement: If your vault was created prior to the 25R2 release (August 2025), you must contact Veeva Support to use hyphens instead of underscores. If your vault was created after the 25R2 release, your vault will use hyphens to replace non-permitted characters by default.
When generating the PDFs, any of the following non-permitted characters will be replaced with a hyphen or underscore, depending on configuration:
- Periods (.)
- Whitespaces
- Exclamation points (!)
- At signs (@)
- Pound signs (#)
- Dollar signs ($)
- Carets (^)
- Percent signs (%)
- Asterisks (*)
- Commas (,)
-
Pipes ( ) - Plus signs (+)
- Quotation marks (“)
- Tildes (~)
- Less than or greater than, angle brackets (< or >)
- Curly brackets ({ or })
- Forward or back slashes (/ or )
- Equals sign (=)
- Brackets ([ or ])
- Underscores (_), if configured to replace with a hyphen
When deploying a study, if the user chooses to include Detail PDFs in the deployment file, the file names will not include the replacement hyphens. These files are for internal record keeping and not for regulatory review.
How to Notify Sites & Set Reminders
To allow your site users to access closeout PDFs, you must notify them. Notifying the site sends site users an email notification and makes the PDFs available for download in the Data Entry tab.
Note that to send site notifications, you must first generate the closeout PDFs.
To notify sites:
- Navigate to EDC Tools > Sites.
- Locate the Site you want to notify in the list.
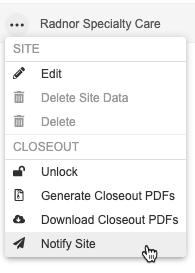
- Hover over the Site to show the Actions menu.
-
From the Actions menu, choose Notify Site.
-
Optional: By default, Vault will send an email reminder every 10 days. You can enter a new number to send an email every so many days, or you can clear this checkbox to not send reminder emails.
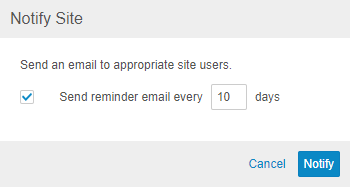
- Click Notify.
Stop Scheduled Reminders
To stop scheduled reminders:
- Locate the Site you want to remind in EDC Tools > Sites.
-
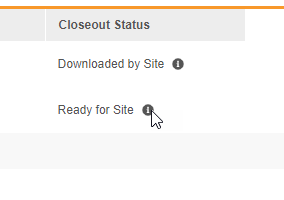
In the Closeout Status column for that Site, click Show closeout activity ().
- In the Closeout Activity dialog, click Stop Reminders.
- Click Stop Reminders.
Send Ad Hoc Reminders
You can send ad hoc reminders, in addition to scheduled ones, when the site’s closeout status is Awaiting Site Response.
To send an ad hoc reminder:
- Locate the Site you want to remind in EDC Tools > Sites.
- In the Closeout Status column for that Site, click Show closeout activity ().
-
In the Closeout Activity dialog, click Send Reminder Now.

-
Optional: In the Send Reminder dialog, update the selections to change who receives the notification. By default, Vault sends the reminder to both reviewers and approvers.
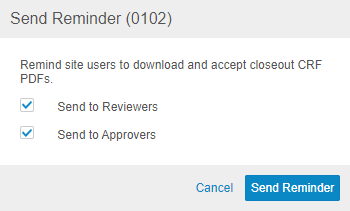
- Click Send Reminder.
Closeout & Custom Study Roles
By default, the CDMS Principal Investigator and CDMS Clinical Research Coordinator study roles have permissions to review and accept closeout PDFs. If your organization uses custom Study Roles, assign the appropriate roles the permissions below to allow them to review closeout PDFs:
| Permission | Description |
|---|---|
| Review Closeout PDF | Ability to download the Closeout PDF for a Site |
| Accept Closeout PDF | Ability to accept or reject Closeout PDFs |
Note that you can assign a role the Review Closeout PDFs without assigning Accept Closeout PDFs. This allows the user to download any closeout PDFs for their site but not accept or reject them.
Learn how to create custom Study Roles.