Scheduling Delivery of the Progress Report
You can schedule the recurring delivery of a progress report to a specified set of email addresses.
Prerequisites
Users with the standard CDMS Super User or CDMS User Administrator study roles can schedule the report delivery. IF your organization uses custom Study Roles, your role must grant the following permissions:
| Type | Permission Label | Controls |
|---|---|---|
| Standard Tab | Workbench Tab | Ability to access and use the Data Workbench application, via the Workbench tab |
| Functional Permission | View Admin | Ability to access the Admin page |
If your Study contains restricted data, you must have the Restricted Data Access permission to view it.
Learn more about Study Roles.
How to Schedule Delivery
To schedule delivery of a recurring progress report:
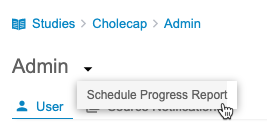
- Navigate to the Admin page.
-
- From the Admin menu (), select Schedule Progress Report. This opens the Schedule dialog.
-
- Click Edit.
-
- Select the Schedule checkbox.
-

- Select a Date and Time. This is the date of the first export, in UTC. Workbench will then generate future export packages after the chosen interval (step 6) has passed. For example, if you select “Weekly” and “7 December 2021, 12:00 AM”, Workbench will generate an export package at that time, and then the next export would occur on “14 December 2021, 12:00AM” .
- Select Daily, Weekly, or Monthly as an Interval.
-
- For Delivery, enter one or more emails (comma-separated) to receive the report.
-

- Click Save.
How to Edit a Scheduled Report
To edit a scheduled export:
- Navigate to the Admin page.
- From the Dashboard menu (), select Schedule Progress Report. This opens the Schedule dialog.
- Click Edit.
- Make changes as needed to the Schedule and Delivery.
- Click Save.
How to Stop a Scheduled Report
At any time, you can stop a scheduled report. Reports won’t be delivered until you restart the schedule.
To stop a scheduled export:
- Navigate to the Admin page.
- From the Dashboard menu (), select Schedule Progress Report. This opens the Schedule dialog.
- Click Edit.
- Clear the Schedule checkbox.
- Click Save.