Using Listings
Data listings show the data from Veeva EDC and Veeva Coder in tabular format. In addition to the source data of a listing, you can also view review statuses, queries, and context for each data point. Clinical Reporting automatically creates a Core Listing for each Form in your Study. You can create additional custom listings as needed.
Clinical Reporting only displays restricted (blinded) data to users with the Restricted Data Access permission (typically lead data managers). This permission is granted by default to the standard CDMS Lead Data Manager study role. If you are a blinded user (you don’t have the Restricted Data Access permission), Clinical Reporting doesn’t display data from restricted Forms in listings, Core Listings for restricted Forms, or any metadata for restricted Forms.
Types of Listings
There are two types of listings:
- Core listings: These are the listings that Clinical Reporting automatically creates when importing data. There is one core listing per Form.
- Custom listings: These are user-defined listings that display data in the way you want to view it. These can be either public or private.
Clinical Reporting divides your study listings into three groups. To view listings in a certain group, click to open the appropriate tab.
- Core: Workbench automatically creates a Core Listing for each Form in your study as they are available into the system.
- Public: These are all custom listings that you have permission to view. These include your own listings marked as public and any public listings from other users in your study.
- Private: These are all custom listings that you created and marked as private.
Click on a listing’s Title to open it.
Search for a Listing
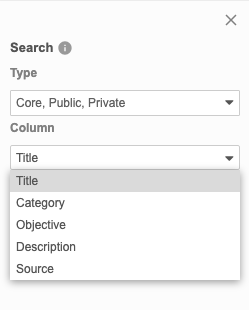
You can search for a specific listing, using the Title, Category, Objective, Description, and Source columns. This search uses “contains”.
To search:
- Navigate to your Study in Clinical Reporting.
-
In the top navigation bar, click Search ().

-
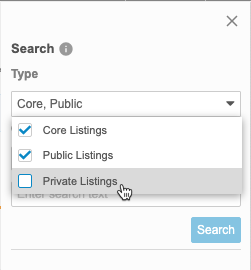
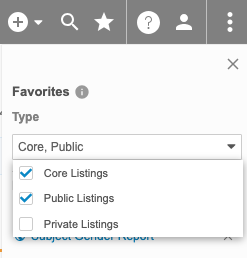
By default, Clinical Reporting searches across all listing types. You can select and clear checkboxes in the Type drop-down to change which objects Clinical Reporting is searching.
-
Select the Column to search. The default is Title.
- Enter your Search Text.
- Click Search or press
Enter</kbd> to search. - Click the listing Title in the Results section to open it.
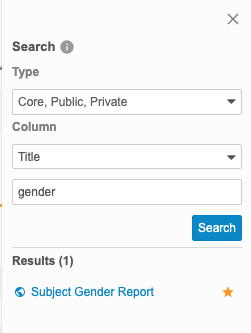
Clinical Reporting shows your search results in the Results section of the Search panel.
Workbench displays an icon with the listing that indicates the listing’s type:
- for Core Listings
- for Public Listings
- for Private Listings
Workbench also shows the Favorite () icon for favorited listings.
Click Close () to close the Search panel.
Last Listing Visited
For convenience, Clinical Reporting shows a link to the Last Listing Visited. You can click this link to easily navigate to the last Listing you visited.
Favorite Listings
You can mark listings as favorites to easily access them later from the Favorites menu.
To mark a listing as a favorite:
- Navigate to the listing that you want to favorite.
- Click Add to Favorites ().
- You can now access it from the Favorites menu () in the top navigation bar.
To remove it from your favorites, click Remove from Favorites (), or click Remove () for it in the Favorites menu.
To access your favorites, click to open the Favorites menu () in the top navigation bar after selecting a Study.

You can click the linked Object Name to open that listing.
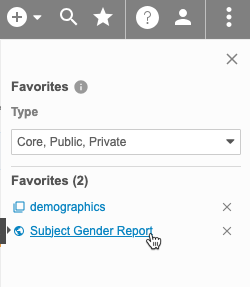
You can filter the list of listings by type:
Sort & Filter
You can sort and filter the Listings page by the following columns:
- Title
- Category
- Objective
- Created On
- Created By
- Modified On
- Modified By
- Last Uploaded
- Latest Download
- Forms
If a column already has a sort or filter applied, Clinical Reporting shows the Sort icon (icon for ascending or icon for descending) and the Filter icon filter_list. You can click these in the Column Header to edit the sort or filter. You can also sort and filter columns that don’t already have a sort and filter.
How to Sort
To sort the Listings page:
- Navigate to the Listings page for your Study.
- Locate the column you want to sort by.
- In that column, hover to show the Sort & Filter button.
- Click Sort & Filter filter_list.
- Click to expand Sort by.
- Select Ascending or Descending for the sort order.
How to Filter
To filter the Listings page:
- Navigate to the Listings page for your Study.
- Locate the column you want to sort by.
- In that column, hover to show the Sort & Filter button.
- Click Sort & Filter filter_list.
- Click to expand Condition.
- Select an Operator. Workbench uses the entered Value and chosen Operator to compare the values within the column.
- If required, enter a Value compare values against. Note that you can only use a static value and not a function. For dates, use the YYYY-MM-DD format or use the calendar picker.
- Click OK.
How to Reset a Filter
To reset (remove) a filter from a column, open the Sort & Filter menu and click Clear.
Viewing Listings
To view the clinical data returned in a listing, click on a listing’s Title to open it.
Listing Header
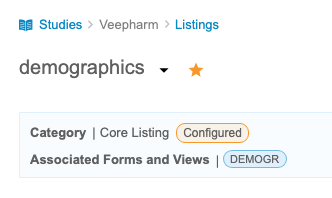
The Listing page’s header displays the Category, Objective, and Associated Forms for a listing. It also displays the date that the listing was last modified, and the date that the configuration was last applied. The Category and Objective are defined during listing creation, and Workbench generates the list of Associated Forms based on the Forms used when creating the listing in the Listing Builder. It also displays the date the listing was last modified, and for core listings that have been configured, the date configuration was last applied.
Configured core listings will display a Configured pill that indicates the core listing has a customized set of columns.
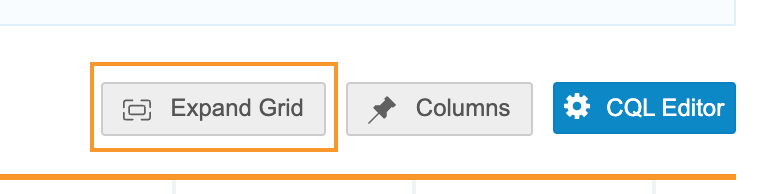
Expand & Collapse the Grid
You can hide the header to see more of the grid. To do so, click Expand Grid. To show the header again, click Collapse Grid.
Listing Results
Clinical Reporting displays a listing’s results in the Listing Results of the listing. Depending on the size of the data set, you may have to scroll horizontally to view all data for a Subject row. If your listing returns more than 100 result rows, you can page through the result set to view additional results.
Resizing Columns
To set column widths:
- Hover over the line between two columns.
- Click and drag the line to resize the columns.
Pagination
Clinical Reporting displays up to 100 rows per page in a listing. Use the left and right Arrow buttons to move between pages. To go directly to a page, enter the Page Number and press Enter.
A listing can show a maximum of 1000 rows in the UI. If the listing returns more than 1000 result rows, the pagination menu shows 1000+. You can apply filters to the listing to view additional rows.
If there are no filters applied to the listing, the CSV download will include all records.
Sorting Results
You can use the Sort & Filter menu to sort by a column.
Highlighting
When reviewing data in a listing, you can quickly scan the listing and get key insights about the data via cell highlighting.
Clinical Reporting highlights rows and cells in the following cases:
- The Event Date has an open or answered query:

- The Event was marked as Did Not Occur:
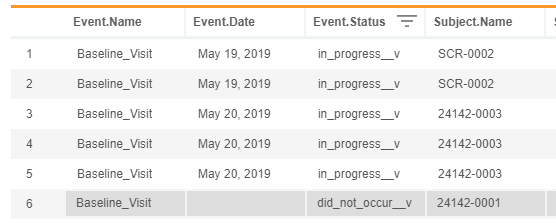
- The Form was marked as Intentionally Left Blank:

- The Item was marked as Intentionally Left Blank:

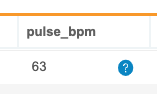
- The Item has an open or answered query
Cell Details Panel
You can view contextual information and review statuses about individual EDC Items (from forms) in the Cell Details panel.
To open the Cell Details panel, click the Cell you want to view in the listing results. To close the panel, click the Cell a second time, or click Close () in the Cell Details panel.
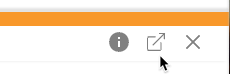
You can pop the Cell Details panel out into a separate window by clicking Pop Out.
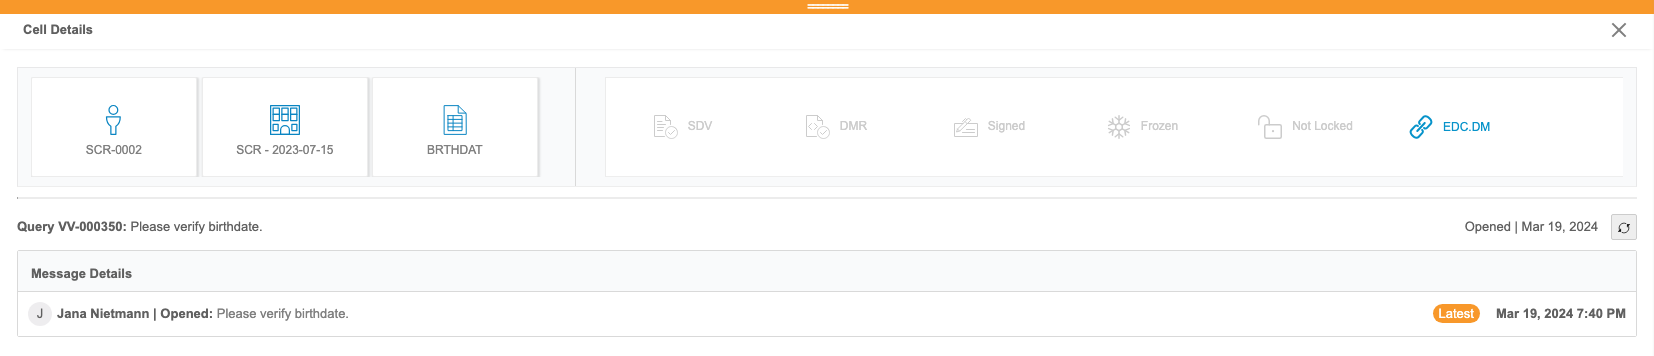
The cell details panel shows the following information:
- Subject ID (
@HDR.Subject.Name) - Event & Event Date (
@HDR.Event.Name,@HDR.Event.Date) - Item Name (
EDC.Item)
In the Cell Details panel, you can check the following statuses. Workbench highlights the review statuses that are complete or applied:
- SDV
- DMR
- Signed
- Frozen
- Locked
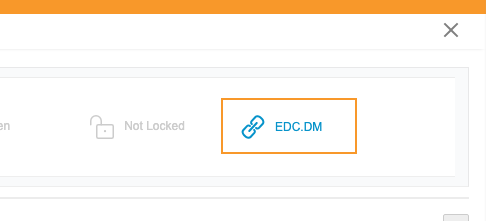
The Cell Details panel also contains a link to view the Form in Veeva EDC, in the Review tab.
Pin Columns
You can pin columns so that those columns remain visible even when you scroll to the right. By default, the Review column is always pinned.
To pin columns:
- Click push_pin Columns.
- Select a Number of columns to pin. This is a count of columns from the left, the leftmost column being 1.
- Click outside of the Pin Columns menu to close it.
Clinical Reporting pins the columns, showing a bolded border on the right side of the rightmost pinned column.
Clinical Reporting keeps your pins across sessions. Pinned columns don’t apply to other users.
If a listing is modified with changes to which columns are included in the listing, Clinical Reporting removes your pinned columns (resets the pin to “1”).
Hide Columns
You can hide and show columns as needed without removing them from your listing using the Hide Columns option.
This setting persists across the object and Study until you unhide the columns.
Clinical Reporting represents hidden columns with an orange, dotted line. CDB shows one dotted line for each set of hidden columns (columns next to each other that are all hidden).
To hide a column:
- Navigate to your listing.
- Hover over the Column Header to show the Sort & Filter menu filter_list.
-
Click Hide Column.
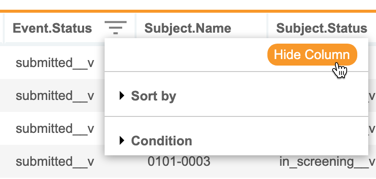
- Clinical Reporting hides the column. Hidden columns are indicated by a dotted orange line. Click Unhide Columns to show all hidden columns.
To hide or show multiple columns:
- Navigate to your listing.
-
From the Actions menu (), select Hide Columns.

-
In the Show/Hide Columns dialog, you can select columns to show. To hide a column, clear the column’s checkbox. You can click Select All and Clear to select or clear all column checkboxes at once.

- When finished, click OK.
Sort & Filter Listing Data
You can easily sort and filter listing data using the Sort & Filter menu. This allows you to quickly and easily create the view you need. You can then save your listing to return to it later.
To open the Sort & Filter menu, click the column header for the column you want to sort by or apply a filter to.
If a column already has a sort or filter applied, Clinical Reporting shows the Sort icon (icon for ascending or icon for descending) and the Filter icon filter_list. You can click these in the Column Header to edit the sort or filter. You can also sort and filter columns that don’t already have a sort and filter.
How to Sort a Listing
You can sort by a single column using the Sort & Filter menu.
To sort by a column:
- Locate the column you want to sort by in the listing results.
- If the column doesn’t already have a sort or filter applied, hover over the Column Header to show the Filter icon filter_list.
- Click the Filter icon filter_list. This opens the Sort & Filter menu.
- Under Sort by, select Ascending (A to Z) or Descending (Z-A) for a sort order.
- Click OK. Workbench sorts the listing results by the column values in the chosen sort order. Clinical Reporting shows a Sort icon (icon for ascending or icon for descending) in the column header.
- Optional: Save your listing to preserve your sort order.
How to Reset a Column’s Sort Order
To reset (remove) the sort and return the listing to the default order, open the Sort & Filter menu and click Reset.
How to Filter a Listing
You can also filter your listing using the Sort & Filter menu. You can select a comparison operator and, if required, a value to filter by, and use them as a filter.
To filter your listing with a conditional filter:
- Locate the column you want to filter by in the listing results.
- Hover over the Column Header to show the Filter icon filter_list.
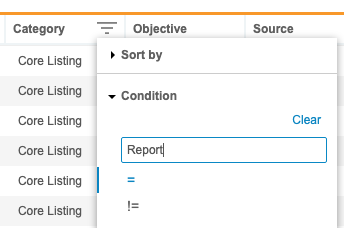
- Click the Filter icon filter_list. This opens the Sort & Filter menu.
- Under Condition, select an Operator. Clinical Reporting uses the entered Value and chosen Operator to compare the values within the column.
-
If required, enter a Value compare values against. Note that you can only use a static value and not a function. For dates, use YYYY-MM-DD or use the calendar picker.

- Click OK.

How to Reset a Filter
To reset (remove) a filter from a column, open the Sort & Filter menu and click Reset.
If you use only the Sort & Filter menu to filter your listing, resetting removes all filters from that column.
Reset All Sort & Filters for a Listing
You can reset the sort and filter across all of the listing columns. This resets the listing to its last saved state.
To reset all columns, click Reset.

Export Listing Data to CSV
You can export your listing’s data to a CSV file for offline review or use in an external system. When Workbench exports listing data, it includes all data shown in the listing, according to the currently applied listing definition.
To generate a CSV file of your listing:
- Open the listing.
-
From the Listing menu, select Generate CSV.
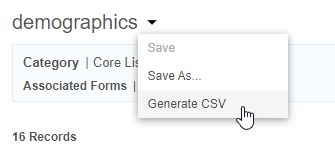
- Workbench begins a job to create the CSV file. When finished, Workbench shows a notification with a link to download the CSV in the bottom-left corner of the screen. You can click this link to download the CSV file.

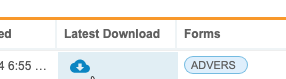
Once any user generates a CSV for a public listing, Workbench shows a download link for that CSV in the Latest Download column of the Listings page, in addition to the notification. Click the Download icon () to download the CSV file.