Unblinding Rules
You can define rules to conditionally unblind data from third party sources.
Prerequisites
To use this feature, you must first enable the Mask Blinded Data feature in your vault. See How to Enable Mask Blinded Data.
Users with the CDMS Lead Data Manager or CDMS Super User standard study roles can perform the actions described below by default. If your organization uses custom study roles, your role must grant the following permissions:
| Type | Permission Label | Controls |
|---|---|---|
| Standard Tab | Workbench Tab | Ability to access and use the Data Workbench application, via the Workbench tab |
| Functional Permission | Manage Sources | Ability to view and manage Sources from the import of third party data in CDB |
| Functional Permission | Manage Unblinding Rules | Ability to create and manage Unblinding Rules for the conditional unblinding of data in CDB |
If your Study contains restricted data, you must have the Restricted Data Access permission to view it.
Learn more about Study Roles.
Accessing Unblinding Rules
To access unblinding rules, you must navigate to the Imports page for your Study. You can navigate to Import from either the Study menu or the Navigation Drawer, after you open your Study.
In the Source card, click the Unblinding Rules link.

This opens the Unblinding Rules page. It lists all Forms in the Source. From here, you can open a Form and configure unblinding rules.
The Unblinding Rules page shows the following columns:
| Column | Description |
|---|---|
| Form | The Name of the Form. Clicking the linked form name opens the Unblinding Rule for the Form. |
| Configured Rules | CDB shows a green checkmark in this column if the Form has an unblinding rule configured. |
| Status | If the rule has errors, a warning icon displays in this column. |
| Rule Created Date | The date and time the Unblinding Rule was created. |
| Last Modified Date | The date and time the Unblinding Rule was last modified. |
| Last Modified By | The User Name of the user who last modified the Unblinding Rule. |
| Last Date Applied | The date and time the Unblinding Rule was last applied. |
Create an Unblinding Rule
You can create one unblinding rule per form. When the rule evaluates as true, CDB unblinds the selected Items. You can base the rule on multiple Item values.
You can create Groups within the rule. All conditions within a group use AND logic. Groups are evaluated with OR logic. A rule can have up to six (6) Groups.
Unblinding Rules & Existing Data: When you create or edit an unblinding rule, that rule doesn’t apply to data that has already been imported into CDB. To apply your new rule or rule changes, you must wait for a reprocess to run or import a new package.
- From Unblinding Rules, click the Form to open it.
- Select an Item.
- Select an Operator. Available operators depend on the data type.
- Enter a Value to compare the item’s value to.
- Repeat steps 2 through 4 for all conditions that you want to include in the Group.
- To remove a condition, click (Remove).
- To create a new Group, click Add Group. Then, repeat steps 2 through 4 for each item condition in that group.
- Drag Items from Items to Unblind to Select Items to Unblind. This marks those Items to be unblinded when the rule’s conditions are met.
- Optional: Click Select All to select all Items for unblinding.
- When finished, click Save.
Rule Evaluation: Rules evaluate during the import of data, not upon rule creation.
Available Operators by Data Type
The available operators for rules depend on the data type of the Item:
- Text
- Equals
- Is not equal to
- Contains
- In
- Not in
- Integer, Float
- Equals
- Is not equal to
- Less than
- Less than or equal to
- Greater than
- Greater than or equal to
- In
- Not in
- Date, Datetime
- Equals
- Is not equal to
- Less than
- Less than or equal to
- Greater than
- Greater than or equal to
- Boolean
- Equals
- Is not equal to
Edit an Unblinding Rule
To edit an unblinding rule:
- Navigate to Unblinding Rules.
- Click the Form to open it.
- Click Edit.
- Make your changes.
- Click Save.
Managing the Unblinding Rules Deployment Workflow
The deployment workflow for unblinding rules allows you to track rule readiness and ensure that only tested and authorized rules reach production. The workflow provides deployment statuses, an Unblinding Rule Approvals Log, and prohibits editing in production environments.
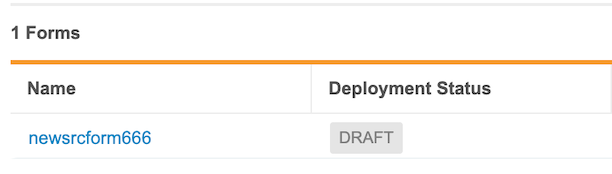
There are three deployment statuses:
- Draft: The initial state for new or modified rules.
- Ready For Approval: Indicates the rule is tested and awaiting review.
- Approved: Indicates the rule is authorized for deployment to production.
By default, all new rules are assigned the Draft status.
Changing the Deployment Status
Users with the Manage Unblinding Rules permission can change deployment statuses.
To change the deployment status:
-
From Unblinding Rules (in your test environment), click the Form to open it.
- From the Deployment Status dropdown, select a new status: Draft, Ready For Approval, or Approved.
-
Optional: Enter a Reason for the change in the Deployment Status dialog.
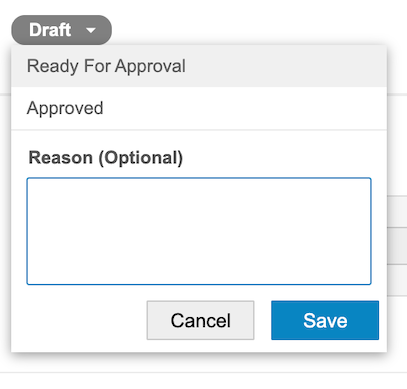
- Click Save. The Reason is saved to the Unblinding Rule Approvals Log.
If you edit and save a rule with a status of Ready For Approval or Approved, CDB automatically reverts the status to Draft. You must re-approve the rule before it can be redeployed. Deploying a rule to production triggers a refresh of the most recent data source.
Inactivate an Unblinding Rule
You cannot delete unblinding rules. To stop a rule from running, you must inactivate it in your test environment and then deploy the changes to production.
To inactivate a rule:
- From Unblinding Rules (in your test environment), click the Form to open it.
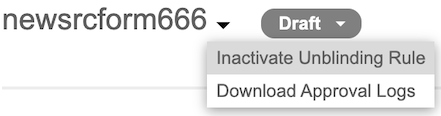
-
Click the down caret and select Inactivate Unblinding Rule.
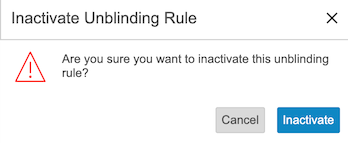
-
Click Inactivate.
- Optional: To reverse the previous step, select Activate Unblinding Rule from the down caret.
-
A red pill indicates that the unblinding rule is Inactive.

- Deploy the inactive rule to production.
Download the Unblinding Rule Approvals Log
CDB maintains an audit trail of all deployment status changes with the Unblinding Rule Approvals Log.
To download the approval log:
- From Unblinding Rules, click the Form to open it.
- Click the down caret and select Download Approvals Log.
- Save the CSV file.
- Review the CSV file in your preferred application.
Unblinding Rule Approvals Log Columns
The Unblinding Rule Approvals Log CSV file contains the following columns:
| Column | Description |
|---|---|
| Vault ID | The ID of the vault where the rule is created. |
| Study Name | The Study Name where the rule is created. |
| Source | The Source where the rule is created. |
| Form Name | The Form where the rule is created. |
| Group 1–6 | The conditions for each specific group. |
| Items to Unblind | The item(s) unblinded when the rule evaluates as true. |
| Created By / On | The user and timestamp of the original rule creation. |
| Last Modified By / On | The user and timestamp of the most recent modification. |
| Deployment Status | The current deployment status (Draft, Ready for Approval, Approved). |
| Transitioned By / On | The user and timestamp of the deployment status change. |
| Transition Comment | The reason provided during the status change (may be null). |